

April 28th, 2016
15
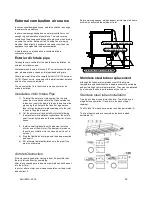
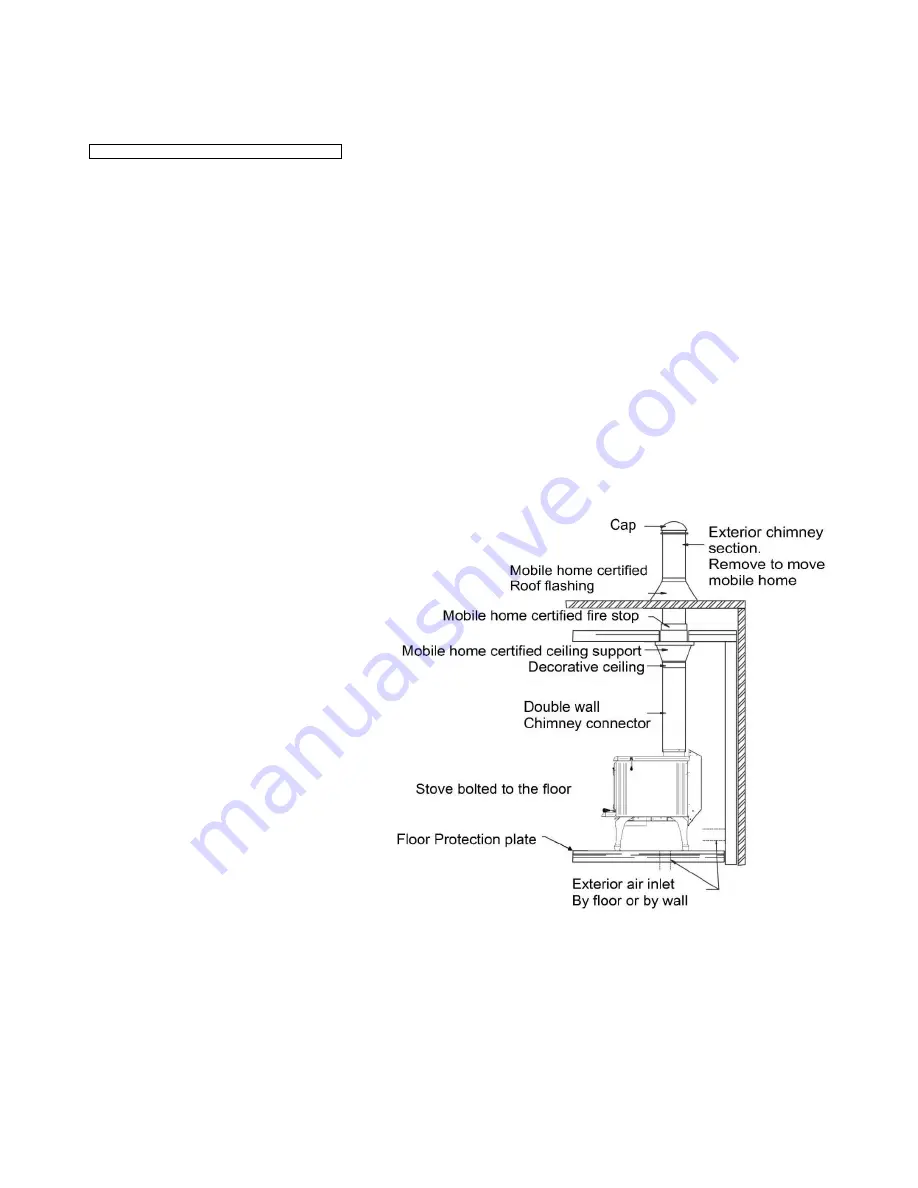
Mobile home installation
DANGER: DO NOT INSTALL IN BEDROOM.
WARNING: THE STRUCTURAL INTEGRITY OF THE MOBILE
HOME FLOOR, WALL, AND CEILING/ROOF MUST BE
MAINTAINED.
VAPOR BARRIER EFFICACITY MUST BE KEEPT IN GOOD
CONDITION
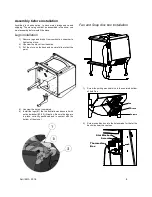
1) Do the General stove installation steps 1 to 11.
2) The following requirements are MANDATORY for
installation in a mobile home.
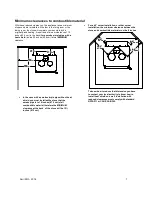
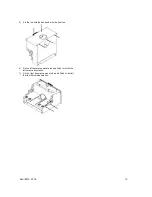
a. The stove must be fixed onto floor of mobile home
with bolt and nuts
b. The exterior air intake must be installed.
c. The stove must be electrically-grounded to
chassis of the mobile home. In USA, electrical
grounding to the certified terminals with 8 gauge
wire and using star washer are mandatory.
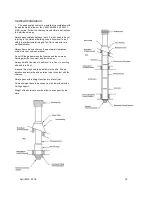
d. All of the following equipment must be certified
and approved for mobile home installation.
•
Double wall chimney connector
•
The chimney system
•
The roof flashing
•
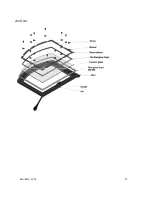
The Storm collar
•
Cap with spark arrester
•
Firewall
•
Chimney ceiling support
•
Decorative collar
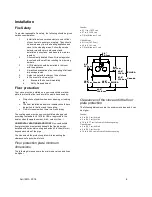
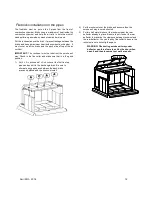
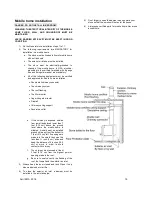
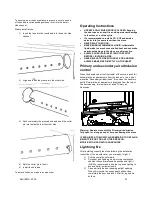
e. If the chimney is exposed outside
from a wall and placed lower than 7
feet (213 cm) above the ground
level where the mobile home is
situated. A shield must be installed
around chimney from the bottom to
7 feet (213 cm) tall. If openings are
made into the shield they must be
less than ¾ inch (2 cm) wide and
keep the distance of 4 inches (10,2
cm) or more in order to avoid
contact with chimney.
f.
The chimney must exceed at least
3 feet (91,4 cm) from the highest point of
opening made in the roof.
g. Be sure to seal correctly the flashing of the
roof, the firewall and the exterior air inlet.
3) Always keep the door closed and lock. Open it only
when add wood or start fire.
4) To close the exterior air inlet, a damper must be
installed in the air intake pipe.
5) Don’t forget to open the damper when operate your
stove so that the smoke will not enter the house.
6) Always use certified parts for mobile home. Never use
a substitute.
Summary of Contents for SIRIUS
Page 4: ...April 28th 2016 4 Nameplate...
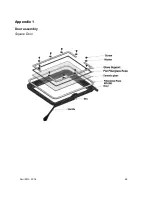
Page 26: ...April 28th 2016 26 Appendix 1 Door assembly Square Door...
Page 27: ...April 28th 2016 27 Arc Door...
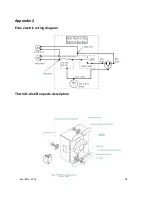
Page 28: ...April 28th 2016 28 Appendix 2 Fans electric wiring diagram Therm O disk Box parts description...
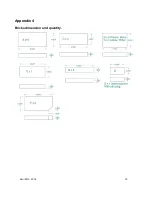
Page 30: ...April 28th 2016 30 Appendix 4 Bricks dimension and quantity...


