5
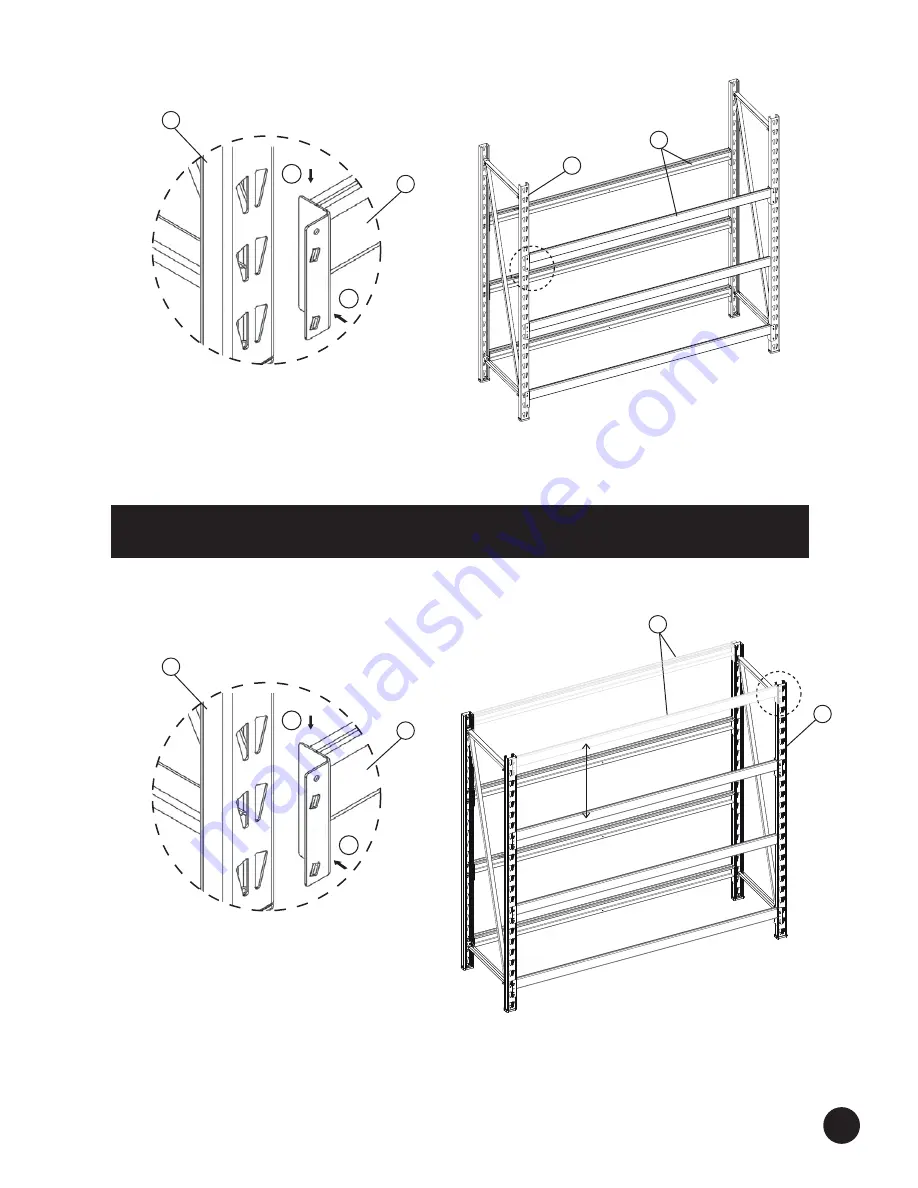
8. The assembly is completed by attaching the last set of cross beams (Part B, Fig. 5) to the top two
key holes on the upright frames (Part A, Fig. 5). This is done in the same manner as all of the other
cross beams.
NOTE -
The cross beams are adjustable and can be set at your desired height.
7. To continue assembly, repeat steps 2 through 6 on the second and third sets of cross beams (Part B,
Fig. 4). Make sure each set of cross beams is at the same level (as on the opposite side).
Fig. 5
Fig. 4
A
B
1
2
A
B
1
2
A
B
A
B


