Español
Paso 1. Colocar su JVCU100
Coloque su JVCU100 en una mesa plana o abra la base de clip de su JVCU100 y móntelo en
el monitor. Ajuste la base del clip para que quede estable en el monitor.
Ajuste su JVCU100 a su ángulo de visión óptimo.
Paso 2. Conectar su JVCU100
Conecte el cable USB™ de su JVCU100 a su PC, Mac
®
o Chromebook™.
Cuando la luz indicadora roja esté completamente iluminada, su JVCU100 estará listo para
usar para videollamadas.
Paso 3. Iniciar una videollamada con su JVCU100
Asegúrese de que su PC, Mac
®
o Chromebook ™ tengan servicio de Internet, y tanto usted
como la persona a la que llama deben usar una aplicación de videollamada.
Seleccione los dispositivos de vídeo y micrófono correctos en la configuración de la
aplicación de videollamadas.
* Su JVCU100 proporciona videollamadas Full HD 1080P, con un mínimo de al menos 2 megabits de velocidad
de carga.
* Las llamadas de 1080p pueden verse afectadas por el ancho de banda de red disponible, la velocidad de la
CPU, el tipo de aplicación de video llamada, etc.
* Amplia compatibilidad: Zoom™, Facebook™ Messenger, Skype™, Microsoft
®
Teams, etc.
* Para Windows
®
10:
* Configuración de privacidad para macOS
®
:
1. Vaya a inicio > Configuración > Privacidad > Cámara/Micrófono.
2. Elija su configuración preferida para permitir que las aplicaciones accedan a la cámara/micrófono.
3. Encienda su cámara/micrófono para aplicaciones.
1. En su Mac
®
, elija el menú de Apple
®
> Preferencias del Sistema, haga clic en seguridad y privacidad y, a
continuación, haga clic en privacidad.
2. Seleccione la cámara/micrófono.
3. Seleccione la casilla junto a una aplicación para permitirla acceder a la cámara/micrófono. Anule la
selección de la casilla para desactivar el acceso a esa aplicación. Si desactiva el acceso a una aplicación, se le
pedirá que lo vuelva a activar la próxima vez que la aplicación intente usar su cámara/micrófono.
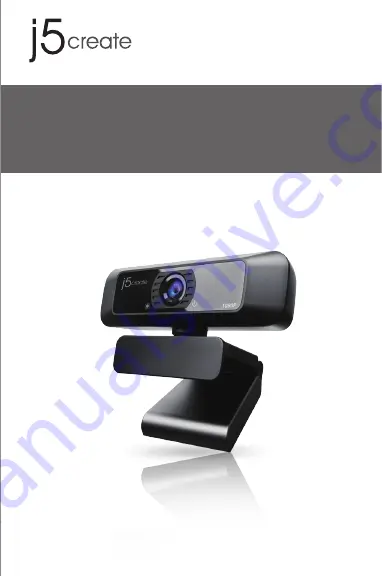
JVCU100
Step 1. Place your JVCU100
Set the JVCU100 on a flat table or open the JVCU100 clip base and mount it on
the monitor. Adjust the clip base so that it is stable on the monitor.
Adjust the JVCU100 to your optimal viewing angle.
Step 2. Connect your JVCU100
Connect the JVCU100 USB™ cable to your PC, Mac
®
or Chromebook™.
Once the red indicator light is illuminated, your JVCU100 is ready to use for video
calling.
Step 3. Start a video call with your JVCU100
Ensure your PC, Mac
®
or Chromebook™ has Internet service, and both you and
the person you call need to use a video calling application.
Select the correct video device and microphone in the settings menu in the
video calling application.
* The JVCU100 provides full HD 1080P video calling, with a minimum of at least 2 megabits upload speed.
* 1080p calling may be affected by available network bandwidth, CPU speed, type of video calling
application, etc.
* Wide Compatibility: Zoom™, Facebook™ Messenger, Skype™, Microsoft
®
Teams, etc.
* For Windows
®
10:
* Privacy settings for macOS
®
:
English
Quick Installation Guide
EN:
Guía de Instalación Rápida
ES:
Guide d'installation rapide
FR :
Snelle installatiegids
NL :
Guia de instalação rápida
PT:
Snabbinstallationsguide
SV:
Guida rapida all'installazione
I T:
Kurzinstallationsanleitung
DE:
クイックインストールガイド
日本語
:
快速安裝手冊
繁中文
:
快速安装手册
简中文
:
USB™ HD Webcam
with 360° rotation
1. Go to Start > Settings > Privacy > Camera/Microphone
2. Choose your preferred settings to allow apps to access your camera/microphone.
3. Turn on your camera/microphone for apps.
1. On your Mac
®
, choose the Apple
®
menu > System Preferences, click Security & Privacy, then click Privacy.
2. Select Camera/Microphone.
3. Select the checkbox next to an app to allow it to access the camera /microphone. Deselect the
checkbox to turn off access for that app. If you turn off access for an app, you'll be asked to turn it on
again the next time that app tries to use your camera/microphone.
Français
Étape 1. Placez le JVCU100
Placez le JVCU100 sur une table plate ou ouvrez la base du clip du JVCU100 et montez-le
sur le moniteur. Ajustez la base du clip de sorte qu'elle soit stable sur le moniteur.
Ajustez le JVCU100 à votre angle de vision optimal.
Étape 2. Connectez le JVCU100.
Connectez le câble USB™ du JVCU100 à votre PC, Mac
®
ou Chromebook™.
Une fois que le voyant indicateur rouge est entièrement allumé, le JVCU100 est prêt à être
utilisé pour les appels vidéo.
Étape 3. Faites un appel vidéo avec le JVCU100
Assurez-vous que votre PC, Mac
®
ou Chromebook™ est connecté à un service Internet, et
que vous et la personne que vous appelez utilisez tout les deux une application d’appel
vidéo. Sélectionnez le bon appareil vidéo et le bon microphone dans les paramètres de
l’application d’appel vidéo.
* Le JVCU100 permet de faire des appels vidéo en haute définition 1080p, avec une vitesse de téléchargement
d’au moins 2 mégabits.
* Les appels 1080p sont affectés par la bande passante disponible, la vitesse du processeur, le type
d’application d’appel vidéo, etc.
* Vaste Compatibilité : Zoom™, Facebook™ Messenger, Skype™, Microsoft
®
Teams, etc.
* Pour Windows
®
10 :
* Paramètres de confidentialité pour macOS
®
:
1. Allez dans Démarrer > Paramètres > Confidentialité > Appareil photo/Microphone
2. Choisissez le réglage préféré pour Autoriser les applications à accéder à votre appareil photo/microphone.
3. Allumez votre appareil photo/microphone pour les applications.
1. Sur votre Mac
®
, choisissez le menu Apple
®
> Préférences système, cliquez sur Sécurité & Confidentialité,
puis cliquez sur Confidentialité.
2. Sélectionnez Appareil photo/Microphone.
3. Cochez la case à côté d'une application pour lui permettre d'accéder à l'appareil photo/microphone. Décochez
la case pour désactiver l'accès de cette application. Si vous désactivez l'accès d’une application, vous serez
invité à le réactiver la prochaine fois que cette application tente d'utiliser votre caméra/microphone.
Nederlands
Stap 1. De JVCU100 plaatsen
Zet de JVCU100 op een tafelblad of open de klemvoet van de JVCU100 en bevestig
deze op de monitor. Pas de klemvoet aan zodat hij stabiel op de monitor zit.
Stel de JVCU100 op uw optimale kijkhoek in.
Stap 2. De JVCU100 aansluiten
Sluit de JVCU100 USB™-kabel aan op uw PC, Mac
®
of Chromebook™.
Zodra het rode indicatielampje geheel oplicht, is de JVCU100 klaar voor
videogesprekken.
Stap 3. Een videogesprek beginnen met de JVCU100
* De JVCU100 biedt Full HD 1080P videogesprekken met minimaal ten minste 2 megabits uploadsnelheden.
* 1080p-gesprekken kunnen worden beïnvloed door de beschikbare netwerkbandbreedte, CPU-snelheid,
type toepassing voor videogesprekken enzovoort.
* Grote compatibiliteit: Zoom™, Facebook™ Messenger, Skype™, Microsoft® Teams, enzovoorts
* Voor Windows
®
10:
* Privacy-instellingen voor macOS
®
:
1. Ga naar Start > Instellingen > Privacy > Camera/Microfoon
2. Kies uw voorkeursinstelling om Apps toestaan toegang te verlenen tot uw Camera/Microfoon.
3. Schakel de camera/microfoon in voor apps.
1. Kies op de Mac
®
het menu Apple
®
> Systeemvoorkeuren, klik op Beveiliging en Privacy, en
vervolgens op Privacy.
2. Selecteer Camera/Microfoon.
3. Plaats een vinkje naast een app zodat deze de Camera/Microfoon kan gebruiken. Verwijder het vinkje om
toegang voor die app te verwijderen. Als u toegang tot een app uitschakelt, wordt u gevraagd om dit weer in te
schakelen de volgende keer dat de app probeert om uw camera of microfoon te gebruiken.
Deutsch
Schritt 1. JVCU100 platzieren
Stellen Sie JVCU100 auf einen flachen Tisch oder öffnen Sie die Klemmbasis von JVCU100 und
montieren Sie es am Monitor. Passen Sie die Klemmbasis so an, dass sie stabil am Monitor ist.
Passen Sie JVCU100 auf Ihren optimalen Betrachtungswinkel an.
Schritt 2. JVCU100 verbinden
Verbinden Sie das USB™-Kabel von JVCU100 mit Ihrem PC, Mac
®
oder Chromebook™.
Sobald die rote Anzeige vollständig leuchtet, kann Ihr JVCU100 für Videoanrufe genutzt
werden.
Schritt 3. Einen Videoanruf mit Ihrem JVCU100 starten
Stellen Sie sicher, dass Ihr PC, Mac
®
oder Chromebook™ über einen Internetdienst verfügt.
Sie und die Person, die Sie anrufen, müssen eine Videotelefonie-App nutzen.
Wählen Sie das richtige Videogerät und Mikrofon in den Einstellungen der
Videotelefonie-App .
* JVCU100 bietet Full-HD-1080p-Videoanruf mit einer minimalen Upload-Geschwindigkeit von mindestens 2
Megabyte.
* 1080p-Anruf kann durch verfügbare Netzwerkbandbreite, CPU-Geschwindigkeit, Art der Videotelefonie-App
usw. beeinflusst werden.
* Breite Kompatibilität: Zoom™, Facebook™ Messenger, Skype™, Microsoft
®
Teams usw.
* Für Windows
®
10:
* Datenschutzeinstellungen für macOS
®
:
1. Wählen Sie Start > Einstellungen > Privatsphäre > Kamera/Mikrofon
2. Wählen Sie Ihre bevorzugte Einstellung um Apps den Zugriff zu Ihrer/m Kamera/Mikro zu erlauben.
3. Schalten Sie Ihr(e) Kamera/Mikrofon für Apps ein.
1. Wählen Sie an Ihrem Mac
®
das Apple
®
-Menü > Systemeinstellungen, klicken Sie auf Sicherheit &
Privatsphäre und dann auf Privatsphäre.
2. Wählen Sie Kamera/Mikrofon.
3. Wählen Sie das Kontrollkästchen neben einer App, damit sie auf Kamera/Mikrofon zugreifen kann. Wählen
Sie das Kontrollkästchen zum Abschalten des Zugriffs für diese App. Wenn Sie den Zugriff für eine App
abschalten, werden Sie gebeten, ihn wieder einzuschalten, wenn sie das nächste Mal versucht, Ihr(e)
Kamera/Mikrofon zu nutzen.
Italiano
Passo 1. Posizionamento di JVCU100
Collocare JVCU100 su un tavolo piano o aprire la base a clip di JVCU100 e montarlo sul
monitor. Regolare la base della clip in modo che sia stabile sul monitor.
Regolare JVCU100 sull'angolo di visione ottimale.
Passo 2. Collegamento di JVCU100
Collega il cavo USB™ di JVCU100 a PC, Mac
®
o Chromebook™.
Quando l'indicatore luminoso rosso è completamente illuminato, JVCU100 è pronto per
l'uso per le videochiamate.
Passo 3. Avvio di una videochiamata con JVCU100
Assicurarsi che PC, Mac
®
o Chromebook™ disponga di un servizio Internet e che l’utente e
la persona con cui si comunica utilizzino un'applicazione di videochiamata.
Selezionare il dispositivo video e il microfono corretti nelle impostazioni dell'applicazione di
videochiamata.
* JVCU100 fornisce videochiamate Full HD 1080P, con una velocità di upload di almeno 2 megabit.
* La chiamata a 1080p può essere influenzata dalla larghezza di banda di rete disponibile, dalla velocità
della CPU, dal tipo di applicazione di videochiamata, ecc.
* Compatibilità Wide: Zoom™, Facebook™ Messenger, Skype™, Microsoft
®
Teams, ecc.
* Per Windows
®
10:
* Impostazioni sulla privacy per macOS
®
:
1. Andare su Start > Impostazioni > Privacy > Videocamera/Microfono
2. Scegliere l’impostazione predefinita di Consenti app per accedere a videocamera/microfono.
3. Attivare videocamera/microfono per le app.
1. Su Mac
®
, selezionare il menu Apple
®
> Preferenze di Sistema, fare clic su Sicurezza e Privacy, quindi fare
clic su Privacy.
2. Selezionare Videocamera/Microfono.
3. Selezionare la casella di controllo accanto a un'app per consentirle di accedere a videocamera/microfono.
Deselezionare la casella di controllo per disattivare l'accesso per quell'app. Se si disattiva l'accesso per
un'app, verrà richiesto di riattivarlo la prossima volta che l'app tenta di utilizzare videocamera/microfono.
Zorg ervoor dat uw PC, Mac® of Chromebook™ verbonden is met internet, en
zowel u als de persoon die u belt moeten een toepassing voor videogesprekken
gebruiken. Selecteer het juiste videoapparaat en microfoon in het instellingenmenu
van de toepassing voor videogesprekken.


