background image


This furniture has been made from seasoned wood and has already been factory primed and finished 
with an oil-based paint.  With proper maintenance, it will give you years of enjoyable service.  Wood 
is a natural material and its appearance will change when exposed to the elements; surface splits and 
checking may appear, particularly on the end grain and to a lesser extent on the surface within a few 
weeks if left exposed to the elements.  The furniture is designed with this in mind to remain strong and 
durable. If left exposed to the weather, your furniture will fade in color. The exact color will depend on 
the environment; for example, less fading will occur if the furniture is placed in a shady location under 
a tree. To help preserve the color, cover the furniture with a garden furniture cover when not in use. 
Wood expands and contracts with changes in relative humidity. To prevent over drying and excessive 
cracking, do not store in a heated place.


REFINSHING


Based on exposure to the elements the finish may need to be restored.  Proceed as follows: 

OIL-BASED PAINTED WOOD CARE GUIDE

PLEASE READ THIS INFORMATION CAREFULLY -  IT WILL HELP YOU TO MAINTAIN YOUR FURNITURE

1.

Cover the floor area with a suitable liquid resistant ground sheet to contain dust, dirt or spills.

2.

Use suitable protective clothing, i.e., rubber gloves, apron, safety glasses, dust mask, etc.

3.

Check and retighten all furniture hardware

4.

Remove any finish that has become loose or cracked by using a scraper or wire brush.

DO NOT USE STEEL WOOL  as the fine particles may result in dark rusty blotching.

5.

In a well-ventilated area or outdoors, lightly sand using 100-200 grit sand paper.

6.

Remove any dust by wiping with a damp cloth.

7.

Allow item to dry completely.

8.

Use an oil-based primer on any bare wood spots.

9.

Brush or spray on new finish using the manufacturer’s instructions – using an oil-based paint

available at any paint retailer.

1.

We recommend cleaning the surface of dirt, bird droppings, tree sap, grease. etc. Scrub

with a cloth or soft brush using a mild household cleaner, dish or laundry detergent.

2.

Rinse 

thoroughly.

3.

Allow to dry completely and retighten all hardware.


CARE AND MAINTENANCE

CG-44

04

© 20

20


Jack-Post Corporation

10

/

20

THIS PRODUCT DESIGNED FOR A MAXIMUM CAPACITY OF 500 POUNDS.

NOTE: Save assembly instruction sheet for future reference. 

WARNINGS:

USE & CARE

Summary of Contents for CG-44

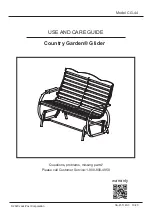
Page 1: ...Model CG 44 Questions problems missing parts Please call Customer Service 1 800 800 4950 USE AND CARE GUIDE 2020 Jack Post Corporation SA ZI 1140 3 10 20 warranty Country Garden Glider...

Page 2: ...CG 44 02 Contents Do Not Return 03 Use Care Wood Care Guide 04 Instructions 05 Customer Service Contact Info 13 2020 Jack Post Corporation 10 20...

Page 3: ...eturn this item to the store Retail stores are unable to properly assist you Contact our Customer Service Department directly for assistance Call toll free 1 800 800 4950 Monday Friday between the hou...

Page 4: ...CARE GUIDE PLEASE READ THIS INFORMATION CAREFULLY IT WILL HELP YOU TO MAINTAIN YOUR FURNITURE 1 Cover the floor area with a suitable liquid resistant ground sheet to contain dust dirt or spills 2 Use...

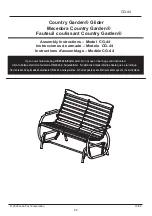
Page 5: ...Modelo CG 44 Instructions d assemblage Mod le CG 44 Open outer hardware bag HB 4444 Blister card Do not open inner bags until instructed Abra la bolsa exterior de ferreter a HB 4444 Tarjeta blister N...

Page 6: ...AT SUPPORT 1 APOYO CENTRAL DEL ASIENTO 1 SUPPORT DE SI GE CENTRAL 1 SHAPED TOP SLAT 1 LIST N SUPERIOR MODELADO 1 LATTE SUP RIEURE FORM E 1 SLAT 14 LIST N 14 LATTE 14 2020 Jack Post Corporation 10 20 R...

Page 7: ...tems may be replaced locally LISTA DE PIEZAS DE FERRETER A SE MUESTRAN A ESCALA 2020 Jack Post Corporation 10 20 ACORN NUT 27 TUERCA CIEGA 27 CROU BORGNE 27 LOCKNUT 8 CONTRATUERCA 8 CONTRE CROU 8 1 1...

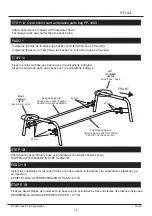
Page 8: ...iqu e REAR BASE BRACE TIRANTE DELA BASE TRASERO RENFORTDELA BASE ARRI RE BASE BASE BASE BASE BASE BASE 20 mm 20 mm 20 mm FRONT BASE BRACE TIRANTE DE LA BASE DELANTERO RENFORT DELA BASE AVANT FRONT LEF...

Page 9: ...rodamiento deben estar hacia afuera y el orificio debe estar en la parte inferior REMARQUE IMPORTANTE Des deux c t s du patin les deux 2 nervures sortantes sur l assemblage de roulement doivent faire...

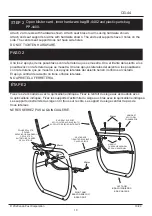
Page 10: ...del asiento tienen 3 orificios al costado El apoyo central del asiento no tiene orificios laterales NO APRIETE LA FERRETER A TAPE 2 Fixez les 2 accoudoirs avec la quincaillerie indiqu e Fixez le renfo...

Page 11: ...listones superiores en los 3 apoyos del asiento con tuercas ciegas y los 6 inferiores con tuercas hexagonales ASEG RESE DE QUE EL ENSAMBLE EST EN ESCUADRA APRIETE TODA LA FERRETER A TAPE 3 Fixez la l...

Page 12: ...G Assemble the seat to the base with the rear base brace behind the seat as shown If the rear base brace is under the front of the seat the product can tip over backwards and cause serious injury ADVE...

Page 13: ...107 1803 Customer Service 1 800 800 4950 Mon thru Fri 8 00am 8 00pm EST E mail cs jack post com English Espa ol Fran ois 13 For more information about warranty please visit WWW JACK POST COM Warranty...

Reviews: