CG-47
STEP 4
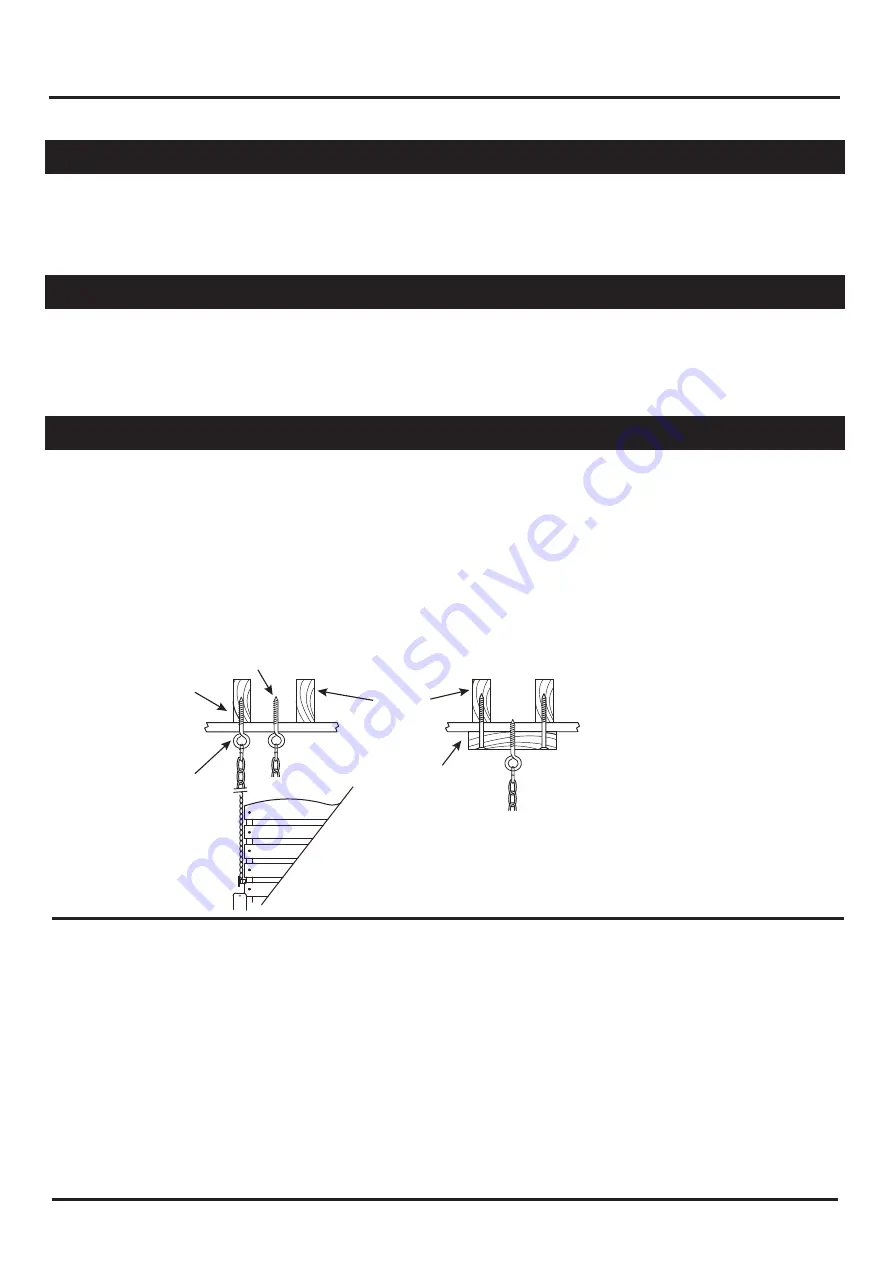
The Chain Bag contains two ceiling hooks. These hooks should be screwed into overhead joists as shown in Figure A with a
spacing of about 48". Note: If desired location of swing does not match overhead joist location, a suitable 2x4 header must first
be attached to the joists and the ceiling hooks screwed into the header as shown in Figure B. It will be easier if you first drill a
1/4" diameter starter hole before installing the ceiling hooks.Turn ceiling hooks to the position shown so the lower portion
moves freely with the motion of the swing seat.
PASO 4
La bolsa de la cadena tiene dos tornillos de ojo que deben atornillarse en la parte de arriba de la viga con espacio
aproximadamente de 48 pulgadas como se indica en la foto A. Nota: Si el querido lugar del balancín no coincide con la position
de los hoyos en la viga, primero agrega un barrote de madera de 2x4 y después atornilla los tornillos en el barrote como se
indica en la foto B. Sera más fácil de hacer otras agujeros de ¼ de diámetro antes de instalar los tornillos de ojo. Atornilla los
tornillos de ojo hasta que permiten el balancín de oscilar.
ÉTAPE 4
La chaine est accompagnée de deux écrous à oeil. Ces écrous doivent être vissés sur la poutre de soutien de plancher,
espacées approximativement de 48 pouces, comme indiqués sur le schéma A. Note : Si l’emplacement désiré de la balancelle
ne corresponds pas à la position des trous sur la poutre, vous pouvez ajouter une planche à bois de 2x4 et la visser sur le
plafond comme l’indique le schéma B. Il est plus facile de percer des trous de ¼ de diamètre avant de visser les écrous à oeil.
Visser les écrous jusqu’à ce que la balancelle puisse se balancer librement .
11
© 20
20
Jack-Post Corporation
10
/
20
FIGURE A / FIGURA A / FIGURE A
WRONG / INCORRECTO / INCORRECT
FIGURE B
FIGURA B
FIGURE B
RIGHT
CORRECTO
CORRECT
JOISTS
VIGAS
SOLIVES
HEADER
TRAVESAO
LINTEAU
NOTE POSITION
NOTA POSICIN
NOTEZ LA POSITION


