11
10
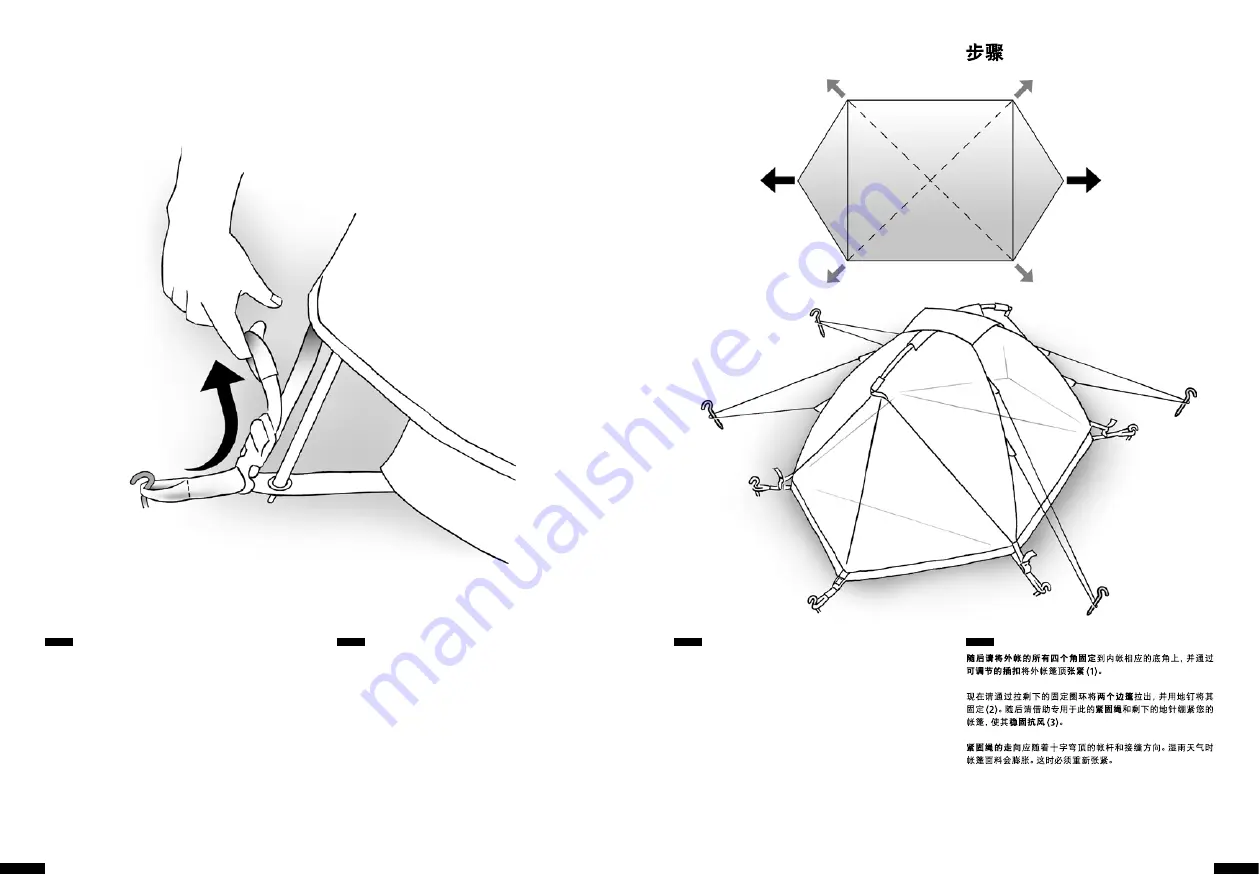
Fixieren Sie nachfolgend alle vier Ecken des Außen
zeltes an den jeweiligen Bodeneckpunkten des
Innenzeltes und bringen Sie das Überdach über die
verstellbaren Steckschnallen auf Spannung (1).
Ziehen Sie nun an den übrigen Befestigungsschlaufen
die beiden Apsiden aus und befestigen diese mit wei-
teren Heringen (2). Spannen Sie Ihr Zelt anschließend
mit Hilfe der dafür vorgesehenen Abspannleinen und
der restlichen Heringe sturmstabil aus (3).
Die Ausrichtung der Abspannleinen sollte dem
Stangen- und Nahtverlauf der Kreuzkuppel folgen.
Bei Nässe kann sich das Zeltmaterial dehnen. Es muss
dann etwas nachgespannt werden.
Attachez les quatre coins du double toit à leurs points
d’attaches appropriés de la tente intérieure et placez
la section du toit sous tension en utilisant les boucles
clipantes ajustables (1).
Puis prenez les sangles d’attaches restantes, tirez
les deux vestibules vers l’extérieur et fixez-les avec
les piquets (2). Pour finir, utilisez les haubans et les
piquets restants pour tendre la tente et la rendre
stable au vent
(3).
Les haubans doivent être fixés dans l’alignement des
arceaux et des coutures, de la construction du dôme.
La toile de tente se détend quand elle est humide.
Fixer les haubans de nouveau si nécessaire.
Attach all four corners of the flysheet to the appro-
priate corner points of the inner tent and place the
roof section under tension using the snap buckle
adjusters (1).
Next, take hold of the remaining anchor loops, pull
the two vestibules out and peg them out (2). Finally,
use the guy lines and the remaining pegs to tension
the tent and render it wind stable (3).
The guy lines should be pegged out in line with the
poles and seams of the dome construction. When wet
the tent material may stretch. Re-guy if necessary.
1)
2)
3)
45°
SCHRiTT 4
STEP 4
ÉTAPE 4
4
DE
EN
FR
ZH


