background image

1. 

Introduction 

     4

1.1 

Purpose of this document 


4

1.2 

Scope 

      4

1.3 


Warranty      5

2. 

Describing 

the 

System 

   6

2.1 

Key 

Features 

     6

2.2 

Enviroment 

     7

2.3 


Installation 

     7

3. 

Starting and Stopping the System 


7

3.1 

First-time 

Users 

     7

3.2 

Controller / Push button ON and OFF indication   

8

3.3 

LCD Touch Screen Interface operation   


9

3.4 

Starting 

the 

system 

    10

3.5 

Stopping and Suspending the system 


10

3.6 

Fault 

Detection 

     10

4. 

Step by Step Instructions   


13

4.1 

Turning on the Controller and  


13


Entering the Home Page

4.2. 

HOME 

page 

functionality 

   13

4.3. 

Fault and Error Detection 


15

5. 

Using the JackaJay Jumper Lead 


16

6. 

Appendix A: Acronyms,   


18


Abbreviations & Definitions

7. 

Appendix B: Related Documentation   

19

8. 

Troubleshooting 

    20

Table of

Contents

Summary of Contents for JackaJay

Page 1: ...User Guide Version 2 0 2018 Jacka Industries Pty Ltd All rights reserved...

Page 2: ...er to www jackaindustries com or make contact via email at enquires jackaindustries com for the most current information From the Web site you may also download and refresh this document if it has bee...

Page 3: ...tion 8 3 3 LCD Touch Screen Interface operation 9 3 4 Starting the system 10 3 5 Stopping and Suspending the system 10 3 6 Fault Detection 10 4 Step by Step Instructions 13 4 1 Turning on the Controll...

Page 4: ...es It summarizes the history of its development operation and maintenance through the following The scope of this guide revolves around providing users with information as regards purchase requirement...

Page 5: ...ystem other than as directed will void all warranty claims Any unintended use regarding extreme conditions including but not limited to the submerging of any components of the camper trailer not inclu...

Page 6: ...occurrence as outlined that requires the removal of JackaJay system and serviced will void all warranty Adverse weather and situational conditions include severe water leaks that cause pooling on the...

Page 7: ...OG function that can be operated from the HOME page This is done by touching either the Lift or Lower Buttons for less then 2 seconds You can operate in a JOG function as many times as you want Additi...

Page 8: ...e front of the control box and the Blue backlit LED will be ON Take note that the LCD touchscreen has a time out function and will go blank after 5 minutes This IS NOT an indication that the controlle...

Page 9: ...E Page 2 large BLUE buttons at the top for Lift and Lower operations Live supply battery voltage indication Controller status feedback text box Automatic Operations Page Displays all 4 corners of the...

Page 10: ...er is programmed with 2 smart detection systems to prevent damage to the camper These are set to detect abnormalities during operation and ultimately to STOP any function that can damage the lift syst...

Page 11: ...to connect an external power supply car battery to your controller See section 4 4 for details The battery supply voltage drops below 10V However it stays above 9V You will be notified on the HOME pag...

Page 12: ...s exhausted the battery voltage will drop when placed under a load JACKAJAY operation You may get an Undervoltage Trip and return to the HOME page to discover that the Battery Voltage is above 10V Thi...

Page 13: ...CCEPT button Afterwards you will proceed to the HOME page From the HOME page you can operate the controller in a JOG function then proceed to the Automatic function if required You will also be able t...

Page 14: ...ose and not caught on any obstructions and the middle telescopic mast section is loose and centred Damage may occur if monitoring precautions are not undertaken Please be aware that each corner may ex...

Page 15: ...o conduct an investigation to find out the cause If the cause can be removed The user can press the CLEAR button on the screen and then the BACK button to return to the HOME page The next operation ca...

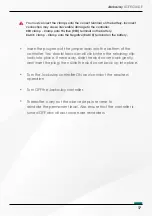
Page 16: ...e JackaJay controller OFF using the push button on the front of the controller Refer to section 3 2 for details Unplug the POWER lead the smaller left plug under the ON OFF button from the bottom of t...

Page 17: ...end of the jumper lead into the bottom of the controller You should hear a small click when the retaining clip locks into place If necessary slide the dust cover back gently and insert the plug then...

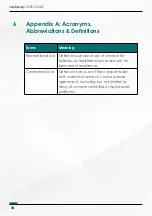
Page 18: ...onal Use Defined as personal use of camper for holidays by registered owner and not for permanent residences Commercial Use Defined as any use of the camper trailer that warrants payment s under a lea...

Page 19: ...re reading Jacka Industries product documentation and have any queries or questions you can submit your comments through email to enqiries jackaindustries com We appreciate your comments and feedback...

Page 20: ...your local provider or Jack Industries for additional direction Issue Experience Cause Remedy Controller will not turn ON Extremely exhausted battery under 5 Volts Replace the battery Use the emergenc...

Page 21: ...Jay controller to an external 12V power source car battery or jumper pack Controller keeps on Tripping out on a Fault Obstruction during Automatic Lift sequence Controller is sensing additional strain...

Page 22: ...t not lifting I can hear or see it spinning Loose connection on the drive coupler Ensure the drive coupler between the motor and drive tube actuator is sufficiently tight Uneven roof heights when lift...

Page 23: ...ift sequence one corner indicates Lift Complete when it is not at the top Loose electrical connection at the associated corners limit switch Check connection and ensure that it is tight and secure Fau...

Page 24: ...Jacka Industries Pty Ltd 468 Hawkesbury Rd Winmalee NSW 2777 1300 052 252 www jackaindustries com 468 Hawkesbury Road Winmalee 2777 NSW Australia 1300 052 252 www jackaindustries com...

Reviews: