JackaJay
INSTALLATION GUIDE
20
4.4 Fixing Down of all components
Once all the Corner elbows, flexible pushrods and motor / tube assemblies have
been placed into the camper you need to secure them all into position.
4.4.2 FIXING SQUARE DRIVE TUBE & MOTOR ASSEMBLIES
4.4.1 FIXING CORNER ELBOW
Do one corner at a time.
Manoeuvre the corner elbow such that it is centred in the base of the
telescoping leg.
Check the alignment of all components. i.e, the motor assembly,
corner elbow and telescopic leg.
Use a small drill bit and select ONLY 4 of the mounting holes of the
corner elbow that are best accessible with a drill. Then Drill a small
pilot hole for each hole. We have provided extra holes for alignment
purposes. This corner is not weight bearing, only experiences guide
pressure.
If the pilot drill, drills into metal – use the 14G – 10 x 42mm metal screws.
If the pilot drill passes through timber – use M6 bolts, washers and nuts.
Or use the 14G-10 x 25mm Timber screws.
Use Hex Nut driver to firmly drive in appropriate screws to attach corner
Elbow permanently to floor.
Do one corner at a time.
Ensure that there is no less then 5mm clearance between
the Motor Assembly and the opposing-coloured drive tube
assembly. This allows space for slight adjustments and cabling.
STOP POINT 13
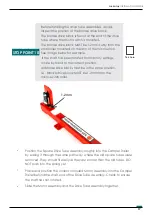
All 4 x corner elbows MUST be securely fixed to the
floor and the vertical tube MUST be accurately
aligned up with the centre of the base tube for the
telescopic mast.
Tick here
It is imperative that securing down of all components during Section 4.4 is
adequate. So as, to ensure that NO components may come away from the
floor, causing catastrophic dropping of a roof corner or structure during setup
or camping. If there is any indication of Rot in the floor or inadequate material
to secure to, conduct repairs or upgrades. This is the responsibility of the installer.
Multiple means of fixings are supplied with the JackaJay kit.


