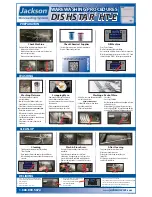
• Unscrew the wash and rinse arms from their
manifolds.
• Verify the nozzles and arms are free from
obstruction. If clogged, remove end-caps, clean
nozzles with a brush, and flush with fresh water.
• Replace end-caps and use a screwdriver to ensure
they are tight.
PREPARATION
WASHING
CLEAN-UP
DELIMING
Fill Machine
Washing a Rack of Ware
• All dishes, cups, and flatware should be
placed in proper racks.
DO NOT OVERLOAD RACKS
• Follow Fill Machine section above.
• Open door completely.
• Slide rack into machine.
Scrapping Ware
• Dump and hand-scrape dishware to
remove foodsoil and other debris.
• Soak in warm water if necessary to loosen
food particles.
• Place scrapped ware into dishrack.
• Rinse dishware with pre-rinse hose.
Cleaning
• Close door and turn machine off by pushing
“Power” button.
• Drain pump activates and empties the unit of water.
• When draining stops, remove and clean strainers and
set aside.
Check Machine
Verify the following before operating machine:
• Strainers are in place and clean.
• Wash and rinse arms are screwed securely into place
and end-caps are tight.
• Wash and rinse arms rotate freely.
Wash & Rinse Arms
After Cleaning
• Spray or wipe out interior of machine.
• Replace wash and rinse arms.
• Replace the strainers and ensure they are
laying flat.
• Use stainless steel polish to clean and protect
outside of dishmachine.
• Press
“Power”
button.
• Machine automatically begins filling.
• Once wash tub is filled, machine is ready for operation.
• Wait for wash temperature to reach at least 155 °F and
status to display “READY” before operating machine.
Washing Flatware
• Fill sink with hot water and add
presoak solution.
• Immediately place flatware in the sink.
• Soak flatware 15-30 minutes (no longer).
• Place flatware in proper rack and rinse .
DO NOT ALLOW PRESOAK SOLUTION IN DISHMACHINE
• Wash flatware in machine.
• When wash is complete, remove and shake
rack to remove excess water.
• Sort flatware into cylinders, handle down,
and wash a second time.
• Place flatware in clean cylinders with
handle up.
Check Chemical Supplies
• Check detergent and rinse-aid levels in containers.
• Replace if empty and prime lines.
07610-004-43-83
WAREWASHING PROCEDURES
DISHSTAR
®
HT-E
Strainers
Pre-Rinse Hose
Clean Strainers
“Power Button”
End-Caps
Wash and Rinse Arms
www.
jacksonwws
.com
1.888.800.5672
Wash and Rinse Arms
1 5 5
F
C Y C L E 1
R E A D Y
“Power Button”
Strainers
1. Remove rinse arms and place in sink with deliming
solution (leave for amount of time recommended by
chemical supplier).
2. Replace rinse arms.
3. Follow Filling Machine section above.
4. Open door and add amount of deliming solution
recommended by chemical supplier.
5. Close door and push “Delime” button.
Status will display “DELIME.”
6. Press
“Start”
button.
7. Machine will delime, drain, and refill.
8. Wait five minutes and inspect machine. If machine is not delimed, run again.
9. When clean, push “Delime” button. Status will display “READY”.
10. Run two regular cycles to remove residual deliming solution.
11. Machine is now ready for normal operation.
• Close door.
• Press “Start” button.
• Machine automatically goes through wash, rinse,
and sanitize cycles.
• After sanitize cycle is complete, machine goes
back to being “READY” for operation and simply
pressing “Start” button will begin another cycle.
Rack of Ware
“Start” Button
For the full DishStar
®
HT-E Manual, scan the
QR Code below or go to our website.
MANU
AL
1 5 5
F
D E L I M E
O N


