JP-24 Technical Manual 7610-002-49-79 Rev. D
Issued: 03-06-2006 Revised: N/A
SECTION 5: SERVICE PROCEDURES
RINSE REGULATING THERMOSTAT REPLACEMENT
27
6. Slide the new imperial brass fitting from your kit onto the
new thermostat.
7. Insert the new thermostat/brass fitting combination into the
well and tighten down the brass fitting by hand.
8. Use the 7/16” combination wrench to tighten down the
brass fitting, while also positioning the new thermostat so that
it does not hang over the heater.
9. Note: regardless of the unit this is being done to, the con-
cept is to ensure that the thermostat cannot come into contact
with the heater leads or interfere with the placement of any
covers.
10. Use the phillipshead screwdriver to remove the attach-
ment screws on the thermostat for the NORMALLY CLOSED
and COMMON points.
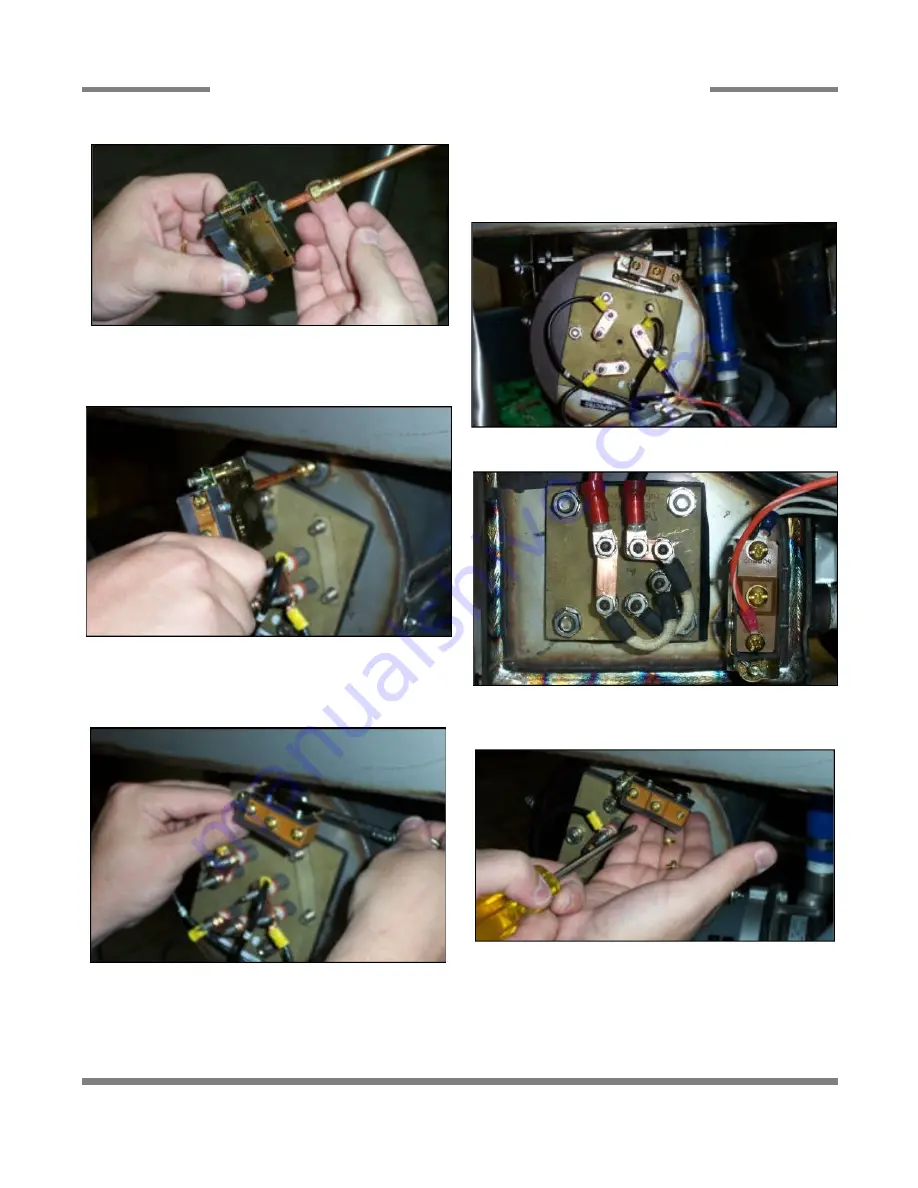
Tightening the brass fitting (Tempstar).
What the installed thermostat should look like (Tempstar).
What the installed thermostat should look like (JP-24B).
Removing the thermostat screws.
Putting the new thermostat in the well (Tempstar).
Sliding imperial fitting onto new thermostat.
Summary of Contents for Hot Water Sanitizing Undercounter Dishmachines JP-24
Page 2: ......
Page 6: ...1 SECTION 1 SPECIFICATION INFORMATION ...
Page 10: ...SECTION 2 INSTALLATION OPERATION INSTRUCTIONS 5 ...
Page 16: ...SECTION 3 PREVENTATIVE MAINTENANCE 11 ...
Page 18: ...SECTION 4 TROUBLESHOOTING 13 ...
Page 21: ...16 SECTION 5 SERVICE PROCEDURES ...
Page 34: ...SECTION 6 PARTS SECTION 29 ...


