MAINTENANCE 8
48
8.20 EFI DIAGNOSTIC CHECK ___________________________________________________
The electrical system is equipped with an OBD-II and
Diagmaster diagnostic connectors located near the
engine controller.
Plug an OBD-II reader into the matching connector, turn
ignition switch to the ON position (do not start engine),
and refer to the instructions included with the reader to
retrieve diagnostic codes.
Refer to the HR-9016 Technical Repair Manual for code
descriptions.
8.21 WHEEL MOUNTING PROCEDURE ____________________________________________
Mower Wheels
1.
Remove dirt, grease, and oil from stud thread. Do not
lubricate threads.
2.
Position wheel on hub and inspect to insure full
contact between mounting surface of wheel and hub
or brake drum.
3.
Finger tighten all hardware, then torque hardware in
crisis-cross order. Always tighten nuts in the top
position.
4.
After recieving new unit, or if tires were removed,
check and torque lug bolts daily until torque is
maintained.
Front Wheels............. 95-105 ft. lb. (128-142 N.m).
Rear Wheels ............. 65-75 ft. lb. (88-102 N.m).
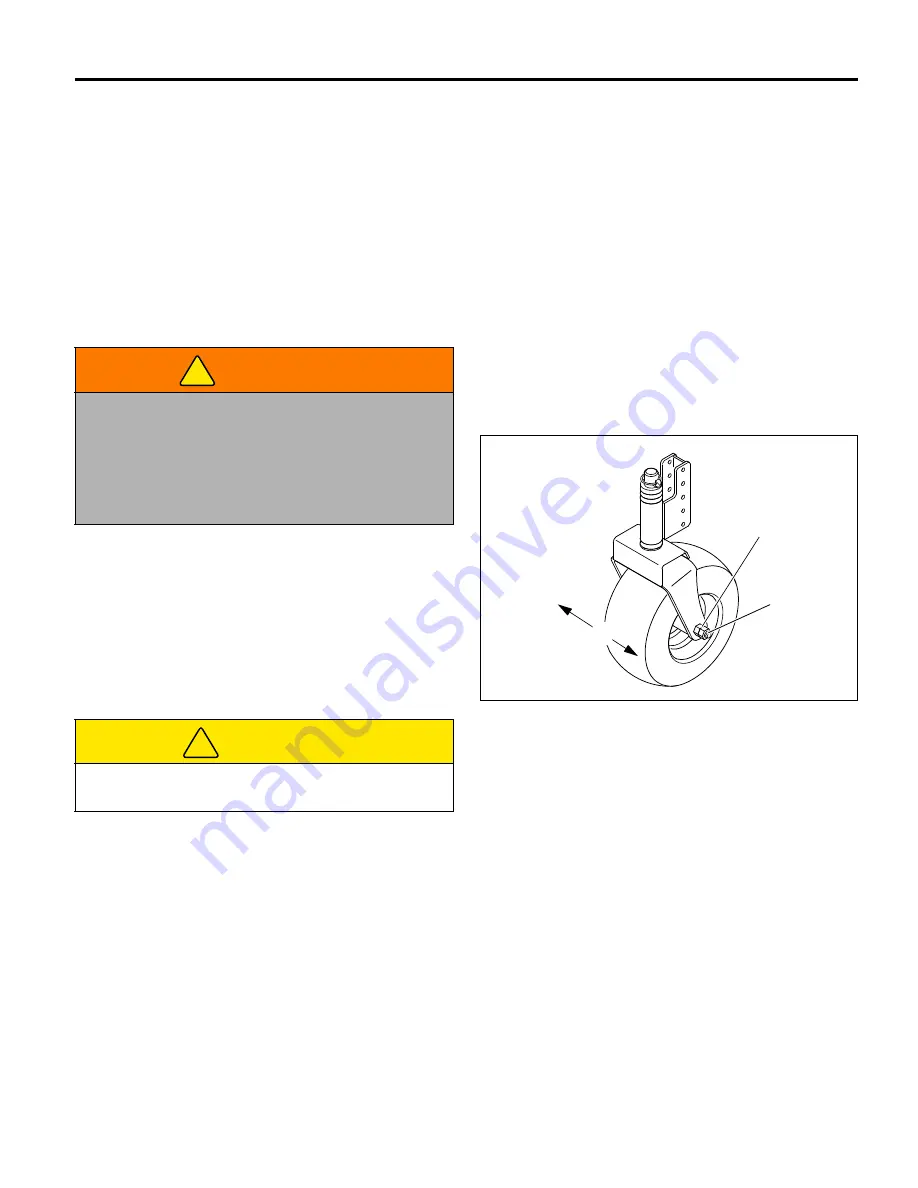
Caster Wheels
To extend bearing life check and adjust caster and gauge
wheels every year. Lubricate bearings every 100 hours
using NLGI Grade 2 grease.
1.
Raise deck so wheels are off ground and can be
rotated freely by hand.
2.
Check wheels for end play (I). Wheels should rotate
freely with zero end play.
3.
To eliminate end play, tighten inner nut (G) until
wheel just begins to bind then loosen it 1/4 turn.
Lock inner nut in position using outer nut (H). Do not
allow inner nut to rotate while tightening outer nut.
4.
Repeat step 2 and check for end play.
Figure 8H
WARNING
Make sure the mower is parked on a solid and level
surface. Never work on a mower that is supported
only by the jack. Always use jack stands.
If only the front or rear of the mower is raised, place
chocks in front of and behind the wheels that are not
raised.
CAUTION
Check and torque lug bolts daily for the first 100 hours
of operation.
!
!
G
H
I
HR021
Summary of Contents for HR 9016 Turbo
Page 18: ...3 DECALS 17...
Page 53: ...ADJUSTMENTS 9 52 Figure 9D K J H G G...
Page 69: ...NOTES 12 68 12 NOTES...


