ADJUSTMENTS 9
50
9
ADJUSTMENTS
9.1 GENERAL ________________________________________________________________
1.
Adjustments and maintenance should always be
performed by a qualified technician. If proper
adjustment cannot be made, contact an authorized
Jacobsen Dealer.
2.
Replace, do not adjust, worn or damaged
components.
3.
Do not wear jewelry or loose fitting clothing when
making adjustments or repairs.
4.
Do not change governor settings or overspeed the
engine.
9.2
LEVELING DECKS _________________________________________________________
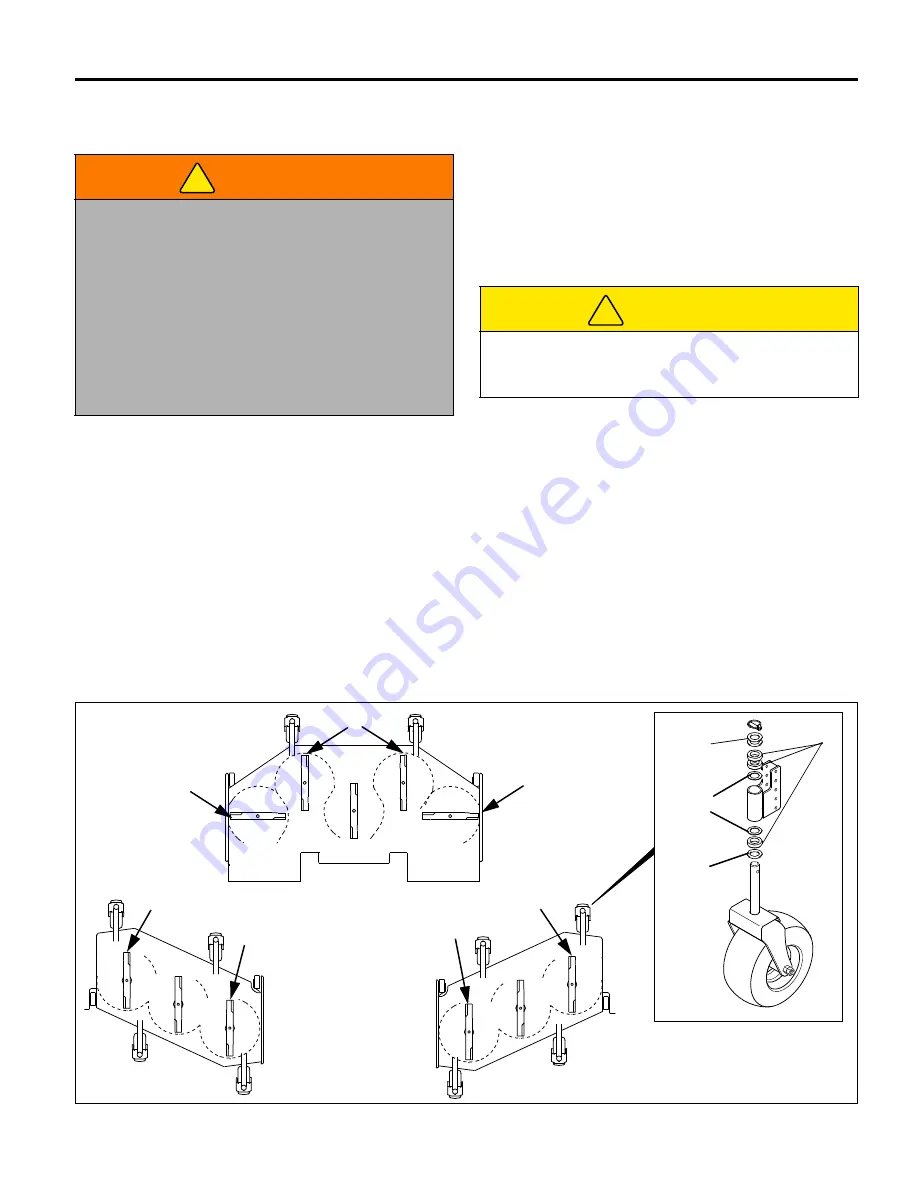
If the decks or casters have been removed for service or
cutting height appears uneven, it may be necessary to
level decks. Adjust casters so cutting heights of outer
blades are within 1/8 in. (0.3 cm) of each other.
1.
Position mower and decks on a hard, flat, level
surface. Position blades parallel to mower as shown.
2.
Check that air pressure in all caster tires is adjusted
equally.
3.
Set desired cutting height of deck using the 1/2 in.
(1.3cm) spacers (E) provided. See Section 9.5.
4.
Measure the height from the ground surface to the
front edge (B) of the two outer blades for the wing
decks and the center section of the front deck.
Position the 1/8 in. (0.3 cm) leveling washers (C)
above or below caster pivot as needed to obtain an
even cutting height across decks. Keep the 1/16 in.
(0.15 cm) thrust washers (D) positioned as shown,
one above and one below caster pivot.
WARNING
To prevent injury, lower implements to the ground,
disengage all drives, engage parking brake, stop
engine, and remove key from ignition switch before
making any adjustments or performing maintenance.
Make sure the mower is parked on a solid and level
surface. Never work on a mower that is supported
only by the jack. Always use jack stands.
If only the front or rear of the mower is raised, place
chocks in front of and behind the wheels that are not
raised.
!
CAUTION
Be careful to prevent entrapment of the hands and
fingers between moving and fixed components of the
machine.
!
B
B
B
B
B
C
C
E
D
L
L
Summary of Contents for HR 9016 Turbo
Page 18: ...3 DECALS 17...
Page 53: ...ADJUSTMENTS 9 52 Figure 9D K J H G G...
Page 69: ...NOTES 12 68 12 NOTES...


