background image

ESP

AÑOL

5

Jacuzzi Whirlpool Bath

©

   BR28000B     4/05

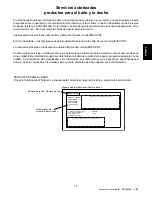
CONEXION ELECTRICA - FUELLE

120V 

PROTEGIO 

CIRCUITO GFCI

3 TAPON de 
PUNTA

PISO

4" MÍNIMO
O DE ACUERDO
CON EL EDIFICIO
LOCAL O
CÓDIGOS
ELÉCTRIOS

CONTACTO
DÚPLEX*

*(NO SE INCLUYE)

Dos (2) interruptores GFCI diferentes son requeridos para

las unidades Combinadas. Las conexiones eléctricas deben
ser hechas por un electricista licenciado.

Un circuito separado de 240 VAC, 20 AMP GFCI se

requiere para el Calentador y el motor/bomba.

Un circuito separado 120 VAC, 20 AMP GFCI se requiere

para el Soplador.  Vea página 6 para instrucciones opciona-
les de INSTALACION REMOTAS.

PELIGRO: RIESGO DE DESCARGA ELÉCTRICA. Conec-
te la unidad solamente a un circuito protegido con un
GFCI.

PELIGRO: RIESGO DE COMPONENTE RECALIENTA.  NO
utilice cuerda eléctrica de extensión para proporcionar
el poder a la unidad.

PRECAUCIÓN: El motor o la bomba pueden sufrir fugas
y daños permanentes si se operan sin agua suficiente
en la tina.  Antes de aplicar la energía eléctrica a la insta-
lación, asegúrese de que el interruptor esté en la posi-
ción “OFF” para evitar que se dañe la bomba.

CONEXION ELECTRICA - CALENTADORA Y BOMBA/MOTOR

TM

GFCI 240V 
PROTEGIO 
CIRCUITO*

CALENTADORA

CUERDA SUMINISTRADA del 
PODER DE la CAJA DE 
EMPALME A GFCI
PROTEGIO CIRCUITO

4" MÍNIMO
O DE ACUERDO
CON EL EDIFICIO
LOCAL O
CÓDIGOS
ELÉCTRIOS

*(NO SE INCLUYE)

Conexiones Eléctricas

SOPLADOR

Instale un tomacorriente doble en la pared debajo de la

bañera, por lo menos 4 pulgadas encima del piso.  El
tomacorriente doble no esta incluido.

Vea la página 6 para instrucción opcionales de INSTA-

LACION REMOTA.

BOMBA/MOTOR Y CALENTADORA

Instale un tomacorriente de 240 VAC, 20 AMP GFCI en

la pared debajo de la bañera, por lo menos 4 pulgadas
encima del piso.  Este tomacorriente no esta incluido.

Los cables eléctricos del calentador y del motor/bomba

se conectan a una caja de fusibles (en la fabrica).  Se incluye
un cable que nace en la caja de fusibles y tiene un enchufe
de 240 VAC que se conecta al circuito GFCI (del usuario).

Con un alambre de cobre #8, unir el calentador al panel

eléctrico de la casa o unión local aprobada.  El calentador
incluye una oreja de unión.

Durante el arranque inicial y antes de cada siguiente uso

(posición ON) presione el boton GFCI de prueba.  El boton
"reset" debe salir.  Empuje este botón para "resetear". Si el
interruptor no operar en esta manera, hay una corriente de
tierra presente o mal-funcionamiento de alguna parte, indi-
cando la posibilidad del shock eléctrico. 

 Apague el siste-

ma y no utilice la bañera hasta que el problema se haya
identificado y corregido.

CONEXIONES DE CAJA DE CONTROL DE FUELLE

 A LA VALVULA DEL SOLENOIDE

PARA DESAGUAR INTERRUPTOR

PELIGRO: RIESGO DE ELECTROCUCIÓN. Antes de ha-
cer servicio en estas conexiones desconectar toda alimen-
tación a ambos servicios de 120 VAC y 240 VAC

 WHIRLPOOL CONTROLE LAS CONEXIONES DE CAJA

PARA CONTROLAR ENTREPAÑO

A LUZ (LUCES) 
DIRIGIDA

A 8.0 AMP MOTOR
(CONECTOR FEMENINO)

A CAJA DE EMPALME
(CONECTOR MASCULINO)

AL SENSOR DEL NIVEL DEL 
AGUA DEL TEMPORERO

PARA VENTILAR 
INTERRUPTOR

CAJA DE 
EMPALME

TAPE EN EL RECEPTACULO 
DE GFCI 240V

TAPON 12A FEMENINO
(PARA CAJA de CONTROL 20V)

TAPON 15A FEMENINO
(PARA CALENTADORA)

FUSIBLE
(NO QUITE)

FUSIBLE
(NO QUITE)

CONEXIONES DE CAJA DE EMPALME

PELIGRO: EL RIESGO DE CALAMBRE. Antes servir es-
tas conexiones desconectar toda alimentación a ambos
servicios de 120 VAC y de 240 VAC

Summary of Contents for Allusion 7236

Page 1: ...ION AIR BATH AND WHIRLPOOL INSTALLATION AND OPERATING INSTRUCTIONS 2005 Jacuzzi Whirlpool Bath BR28000B 4 05 Installer Leave this manual for homeowner Homeowner Read this manual and keep for future re...

Page 2: ...SSIBLE DROWNING DO NOT USE A HYDROMASSAGE BATHTUB EQUIPPED WITH A HEATER IMMEDIATELY FOLLOWING STRENUOUS EXERCISE WARNING RISK OF HYPERTHERMIA AND POSSIBLE DROWNING WATER TEMPERATURE IN EXCESS OF 104...

Page 3: ...140 F 60 C The whirlpool system should be purged at least twice a month For your convenience we have developed a plumbing system cleaner Systems Clean specifically for whirlpool baths For availability...

Page 4: ...al Connections __________________________________________________________________ 5 6 Plumbing and Water Supply ______________________________________________________________ 7 Operating Instructions...

Page 5: ...ct that could have been discovered repaired or avoided by following this inspection and testing procedure Blower Motor END VIEW H W SIDE VIEW L 4 2 ALLUSION SIDE END Heater DRAIN OVERFLOW A B SPECIFIC...

Page 6: ...ALLUSION 7242 COMBINATION INSTALLATION CLEARANCE RECOMMENDATIONS The Installation Clearance Recommendations below are to ensure that installers have enough space to maneuver and insert tub The Combi...

Page 7: ...he bath is not designed to support weight If finish material is to overlap or contact the bath the added weight must be fully self supporting Install optional trim parts when all installation has been...

Page 8: ...ponents before installing To install unit insert the motor pump end first when lowering the tub into the cutout opening as shown in the bottom illustra tion Do not use plumbing fixtures or plumbing li...

Page 9: ...all a 240 VAC 20 AMP RATED GFCI outlet to the studwall underneath the bathtub at least 4 inches above the floor The outlet is not provided Power cords from the heater and the pump motor are routed to...

Page 10: ...cooling the motor and to supply sufficient air for the blower The intake of the blower must not be blocked restricted or have any debris around it that can potentially be sucked into blower Insulation...

Page 11: ...l clean soiled surfaces Remove spilled plaster with a wood or plastic edge Metal tools will scratch the surface Spots left by plaster or grout can be removed if lightly rubbed with detergent on a damp...

Page 12: ...chemi cals only on SURFACE stains Other dirt can be cleaned off with a mild liquid detergent on a damp cloth Scrape off plaster with a wooden or plastic edge do not use metal scrapers wire brushes or...

Page 13: ...lower intensity will vary from a minimum to the user defined maximum and back to the minimum in about 6 seconds producing a wave effect The indicator light s intensity changes smoothly showing this Wa...

Page 14: ...n indicates more air flow 1 Air Flow Decrease Pressing this button will decrease air flow from the one set of jets The air flow can be adjusted from maximum air to no air The display will show fewer b...

Page 15: ...te the handles to the right clockwise Never run the whirlpool system with all the jets closed Force of Air Buttons located on the bath control panel serve as controls for the air induction system The...

Page 16: ...e and desire an alternative cleaning mechanism we recommend SUPERSYSTEMSCLEAN PLUSmanufacturedbyStearns Packaging to rectify this condition This may be obtained by contacting us at 1 800 288 4002 It i...

Page 17: ...he small notch at the bottom The gasket must be inserted into the groove of the cover strainer before reinstalling onto the suction fitting CAUTION Keep hair a minimum of 6 inches away from the suctio...

Page 18: ...into outlet Reconnect tube to Magic Touch switch or to air switch pump motor Replace pump motor assembly Open jets by rotate counterclockwise With motor turned OFF remove safety cover and remove any...

Page 19: ...number of your unit This information can be obtained from the product registration card provided with your unit If the card has been misplaced this information can be obtained from the specification...

Page 20: ...lpool Bath has obtained applicable code standards listings generally available on a national basis for products of this type It is the responsibility of the installer owner to determine specific local...

Page 21: ...such as lightning floods earthquakes etc In addition THE COMPANY WILL NOT BE RESPONSIBLE FOR INCIDENTAL OR CONSEQUENTIAL DAMAGES or losses arising from any cause e g water damage to carpet ceiling los...

Page 22: ...rite Jacuzzi Whirlpool Bath Warranty Service Department P O Box 702168 Dallas TX 75370 2168 Call 800 288 4002 To obtain warranty replacement for factory installed components for Company supplied optio...

Page 23: ...COMBINACI N BA O Y REMOLINO A REOS MANUAL DE INSTALACI N Y OPERACI N Instalador Deje este manual para el propietario Propietario Lea este manual y gu rdelo para referencia en el futuro...

Page 24: ...RIESGO DE HIPERTERMIA Y AHOGAR POSIBLE NO UTILICE UNA BA ERA DE HYDROMASSAGE EQUIPADA CON UNA CALENTADORA EL EJERCICIO ARDUO INMEDIATAMENTE SIGUIENTE ADVERTENCIA EL RIESGO DE HIPERTERMIA Y AHOGAR POS...

Page 25: ...re su disponibilidad llame al tel fono 1 800 288 4002 D a la unidad el uso previsto y siga las instrucciones descritas en este manual S lo utilice los accesorios recomendados por el fabricante Esta un...

Page 26: ...to ___________________________________________________________ 12 13 Gu a General de Reparaci n de Ba os de Remolino ___________________________________________ 14 Servicios Autorizados ______________...

Page 27: ...este procedimiento de inspecci n y verificaci n ESPECIFICACIONES ESPECIFICACIONES Rectangulares TINAS RECTANGULARES DESAG E REBOSADERO A B MODELO PESO CAPACIDAD CARGA TOTAL SOBRE EL PISO MEDIDAS MEDI...

Page 28: ...DACIONES DE ESPACIO LIBRE DE INSTALACION Las tinas de la Combinaci n tienen el ctrico sistemas de instalaci n de ca er as e iluminaci n instalaron No levante el ba o por la instalaci n de ca er as ni...

Page 29: ...al de recubrimiento va a estar en contacto con la tina o sobrepuesto el peso adicional no debe recaer sobre ella Instale los accesorios opcionales cuando toda la instalaci n se ha completado El pl sti...

Page 30: ...Para instalar la unidad mete el fin de motriz bomba al bajar primero la tina en el recorte que abre como mostrado en la ilustraci n inferiora No utilice instalaciones fijas de instala ci n de ca er as...

Page 31: ...OMBA MOTOR Y CALENTADORA Instale un tomacorriente de 240 VAC 20 AMP GFCI en la pared debajo de la ba era por lo menos 4 pulgadas encima del piso Este tomacorriente no esta incluido Los cables el ctric...
Page 32: ...motor y para suministrar aire suficien te para el soplador La toma del soplador no se debe blo quear ser restringida ni tener ning n escombros alrededor que se puede introducir potencialmente en el s...

Page 33: ...isitos locales de c digo de instalaci n de ca er as para la altura m nima encima del borde de tina Limpieza General Despu s de la Instalaci n Para evitar descolorimiento o rasgu os en la superficie de...

Page 34: ...rlpool Bath para la l nea completa de unidades de remolino disponibles Una vez instalada la tina retire cualquier residuo o material extra o que haya quedado de la construcci n Use trementina o diluye...

Page 35: ...defini do por el usuario y de vuelta al m nimo en unos 6 segundos produciendo un efecto de onda La intensidad de la luz del indicador cambia suave mente mostrando este modo de Onda Apriete este bot n...

Page 36: ...aire del un conjunto de chorros El flujo de aire se puede ajustar desde aire m ximo hasta nada de aire La pantalla mostrar menos iconos de burbuja que oscilan ON y OFF indicando menos flujo de aire Si...

Page 37: ...orros est n cerrados Fuerza del aire Botones en el panel de control de la tina se usan para controlar el sistema de inducci n de aire La intensidad del hidromasaje depende de la cantidad de aire que s...

Page 38: ...mecanismo alternativo de limpieza recomendamos SUPER SYSTEMS CLEAN PLUS manufacturado por Stearns Packaging para rectificar esta situaci n Este producto se puede obtener contact ndonos al 1 800 288 40...

Page 39: ...scarga de agua Cuando la reinstale oriente la placa y el filtro con la peque a muesca en la parte inferior El empaque debe insertarse en el surco de la tapa filtro antes de reinstalar el accesorio de...

Page 40: ...de aire Bomba Motor no se apaga Reconectar el tubo al interruptor Magic Touch Switch o al interruptor de aire de la bomba motor Reemplace el cron metro Interruptor Magic Touch Switch tubo de aire no e...

Page 41: ...r tenga a la mano tanto el modelo como el n mero de serie de la unidad Esta informaci n puede ser obtenida en la tarjeta de registro del producto proporcionada junto con su unidad Si la tarjeta ha sid...

Page 42: ...cuzzi Whirlpool Bath ha obtenido las listas de c digos correspondientes standards para productos de este tipo que generalmente est n a disposici n por todo el pa s Antes de instalar el producto el ins...

Page 43: ...do operaci n de la unidad sin la cantidad m nima de agua especificada o a una temperatura del agua inapropiada uso de limpiadores abrasivos o inadecuados o por casos fortuitos tales como rayos inundac...

Page 44: ...peccionar que la unidad no est da ada en el momento de la entrega Si se detectan da os de inmediato debe informarse por escrito al vendedor y al transportista y solicitar una inspecci n La falta de re...

Reviews: