background image

J-200 Series

GRN

WHT

WHT

BLK

BLK

BLK

RED

1

2

3

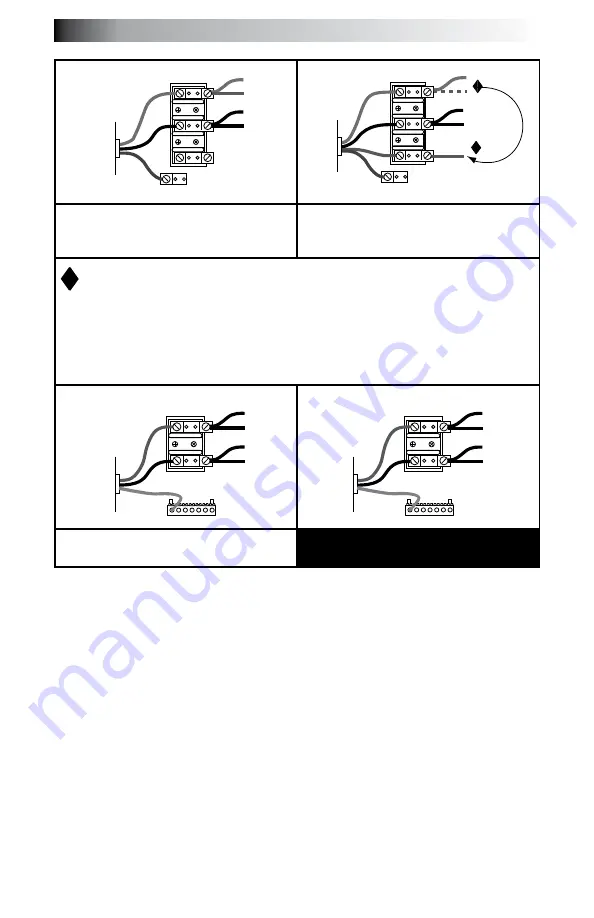
Figure-C

TB1

to Circuit 
Board

Power In

GRN

WHT

WHT

BLK

BLK

BLK

RED

RED

RED

1

2

3

Figure-D

TB1

to Circuit 
Board

Power In

Move Red 
Wire Here

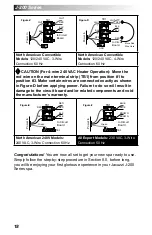
north american Convertible 

models:

 120/240 VAC, 3-Wire 

Connection 60 Hz

north american Convertible 

models:

 120/240 VAC, 4-Wire 

Connection 60 Hz

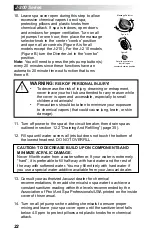
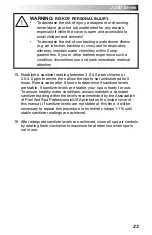
 CauTIon (For 4-wire 240 vaC Heater operation): move the 

red wire on the main terminal strip (TB1) from position #1 to 
position #3. make certain wires are connected exactly as shown 

in Figure-D before applying power. Failure to do so will result in 
damage to the circuit board and/or related components and void 

the manufacturer’s warranty.

BLK

RED

RED

RED

BLK
BLK

1

2

Figure-E

TB1

to Circuit 
Board

Power In

Green

TB3

1

2

BLUE

BLUE

BROWN
BROWN

Figure-F

TB1

to Circuit 
Board

Power In

Green

TB3

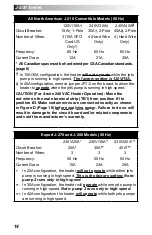
north american 240v models:


240 VAC, 3-Wire Connection 60 Hz

all export models:

 230 VAC, 3-Wire 

Connection 50 Hz

Congratulations!

 You are now all set to get your new spa ready to use. 

Simply follow the step-by-step procedure in Section 8.0, before long, 
you will be enjoying your first glorious experience in your Jacuzzi J-200 
Series spa.

18

Summary of Contents for J - 2

Page 1: ...owner s manual J 2 0 0 S e r i e s J 280 J 270 J 230 J 210 2530 277U Rev C...

Page 2: ...ciation of Pool And Spa Professionals USA pH 7 4 7 6 Free Chlorine 3 0 4 0 ppm Free Bromine 2 0 4 0 ppm Total Alkalinity 100 120 ppm Calcium Hardness 150 250 ppm TO DECREASE RISK OF INFECTION OR DISEA...

Page 3: ...perature 26 10 2 Activate Jet Pumps 26 10 3 Standard Light Operation 26 10 4 Optional Multi Colored LED Light System Operation 27 10 5 Adjusting Individual Jet Flow 27 10 6 Selecting Desired Massage A...

Page 4: ...3 Panel Displays ICE 40 14 4 Panel Displays SN1 40 14 5 Panel Displays SN2 40 14 6 Panel Flashes FL1 or FL2 Spas Without Circulation Pump Option 40 14 7 Panel Flashes FL1 or FL2 Spas With Circulation...

Page 5: ...2 0 FCC Notice This equipment has been tested and found to comply with the limits for a Class B Digital Device pursuant to Part 15 of the FCC Rules These limits are designed to provide reasonable prot...

Page 6: ...to drowning or severe injury Never use the spa unless all suction guards filter filter lid or skimmer assembly are installed to prevent body and or hair entrapment Never operate or use the spa if the...

Page 7: ...CI as required by NEC Article 680 42 4 WARNING Risk of Severe Injury or Death Extreme caution must be exercised to prevent diving or jumping into the spa or slipping and falling which could result in...

Page 8: ...pa use may lead to unconsciousness with the possibility of drowning 7 WARNING Risk of Severe Injury or Death Prolonged immersion in a spa may be injurious to your health Observe a reasonable time limi...

Page 9: ...cality to another Hot Tub Safety Literature To ensure you have a safe and enjoyable hot tub experience learn all you can about hot tub safety and emergency procedures Especially useful are the brochur...

Page 10: ...been reported in persons who when submerge themselves underwater allowing hair to come close and or within the reach of the suction fittings suction covers or skimmer assembly Keep hair away from suc...

Page 11: ...n covers or skimmer assembly Never allow children to play or get near the suction fittings suction covers filter filter lid or skimmer assembly 3 2 Hyperthermia Prolonged immersion in hot water may in...

Page 12: ...re within 10 feet 3m of the spa shall be bonded to the equipment grounding buss with copper conductors not smaller than No 6 AWG 10 mm 5 SAVE THESE INSTRUCTIONS 3 4 General Electrical Safety Instructi...

Page 13: ...Structural Engineer with experience in this type of application The spa must be installed in such a manner as to provide drainage away from it Placing the spa in a depression without provisions for pr...

Page 14: ...n considering a foundation that will adequately support the spa the entire time it is in place Proper support is critical especially if the spa is to rest on a second story or higher For spas that are...

Page 15: ...n not in accordance to local codes or authorities is not covered under the spas warranty Please consult your local state or city building ordinances WARNING In addition to maintenance of filters and w...

Page 16: ...point and any ground metal equipment metal water pipe or conduit within 5 feet 1 5m of the spa or copper clad grounding rod buried within 5 feet 1 5m of the spa Bonding wire must be at least No 8 AWG...

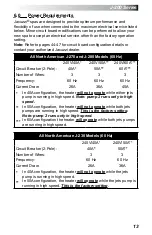
Page 17: ...z 60 Hz Current Draw 26A 36A 45A In 40A configuration the heater will not operate while either jets pump is running in high speed Note pump 2 runs only in high speed In 50A configuration the heater wi...

Page 18: ...ove the red wire on the main terminal strip TB1 from position 1 to position 3 Make certain wires are connected exactly as shown in Figure D Page 18 before applying power Failure to do so will result i...

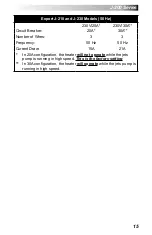
Page 19: ...0A 30A Number of Wires 3 3 Frequency 50 Hz 50 Hz Current Draw 15A 21A In 20A configuration the heater will not operate while the jets pump is running in high speed This is the factory setting In 30A c...

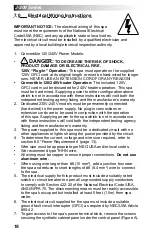
Page 20: ...Supplying power to the spa which is not in accordance with these instructions will void both the independent testing agency listing and the manufacturer s warranty 3 The power supplied to this spa mus...

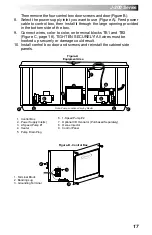
Page 21: ...re C page 18 TIGHTEN SECURELY All wires must be hooked up securely or damage could result 10 Install control box door and screws and reinstall the cabinet side panels Figure B Control Box 1 Terminal B...

Page 22: ...connected exactly as shown in Figure D before applying power Failure to do so will result in damage to the circuit board and or related components and void the manufacturer s warranty BLK RED RED RED...

Page 23: ...ely with hard water if you use a special water additive available from your Jacuzzi dealer WARNING to decrease RISK OF infection or disease Fill hot tub with clean tap water from garden hose to reduce...

Page 24: ...ol panel displays the actual temperature of the spa water Press either the COOLER or WARMER button once to display the set temperature for 5 seconds If you want the water to heat to a different temper...

Page 25: ...s 1 6 above Disregard steps 9 16 below if sanitizer levels remain stable at 3 0 4 0 ppm chlorine or 2 0 4 0 ppm bromine after performing steps 1 6 9 Add 2 5 ounces of sodium dichlor for every 100 gall...

Page 26: ...n off power to the spa at the circuit breaker then drain spa as outlined in section 12 2 Draining And Refilling page 35 12 Fill spa until water covers all jets but does not touch the bottom of the low...

Page 27: ...3 0 4 0 ppm chlorine or 2 0 4 0 ppm bromine then allow the spa to set undisturbed for 8 hours Retest water after 8 hours to determine if sanitizer levels are stable If sanitizer levels are stable your...

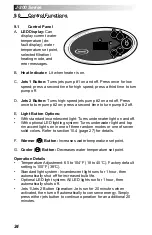
Page 28: ...tional LED lighting system Turns underwater light and top rim accent lights on in one of three random modes or one of seven solid colors Refer to section 10 4 page 27 for details F Warmer Button Incre...

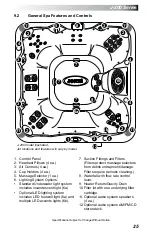
Page 29: ...er light system includes incandescent light 6a Optional LED lighting system includes LED footwell light 6a and multiple LED accents lights 6b Suction Fittings and Filters 7 Filters protect massage sel...

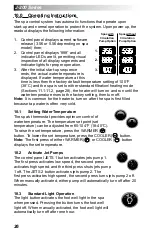
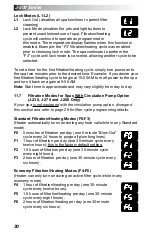
Page 30: ...because tap water is often very cold 10 1 Setting Water Temperature The spa s thermostat provides optimum control of water temperature The temperature set point set temperature can be adjusted from 65...

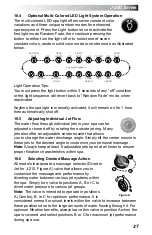
Page 31: ...pa can be adjusted or turned off by rotating the outside jet ring Many jets also offer an adjustable center nozzle that allows you to change the water discharge angle Simply tilt the center nozzle in...

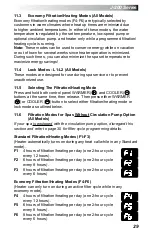
Page 32: ...ils 11 1 Standard Filtration Heating Modes For Models Without Circulation Pump Option All Models Standard filtration heating modes F1 F3 are typically selected by customers in cold climates where heat...

Page 33: ...nd COOLER buttons at the same time then release Then press either WARMER or COOLER button to select either filtration heating mode or lock mode as outlined below 11 6 Filtration Modes for Spas Without...

Page 34: ...ation Modes for Spas With Circulation Pump Option J 230 J 270 and J 280 Only If your spa is not equipped with the circulation pump option disregard this section and refer to page 29 for filter cycle p...

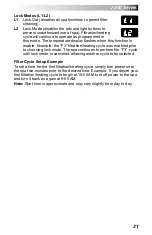
Page 35: ...ltration heating cycle was enabled prior to choosing lock mode The spa continues to perform the F3 cycle until lock mode is canceled allowing another cycle to be selected Filter Cycle Setup Example To...

Page 36: ...e rated less than the flow rate marked on the original suction fitting Using improper suction fittings or suction covers can create a body or hair suction entrapment hazard that may lead to drowning o...

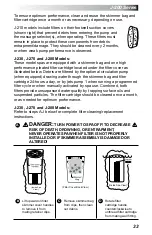
Page 37: ...rough the skimmer bag and filter cartridge 24 hours a day or by jets pump 1 when running a programmed filter cycle or when manually activated by spa use Combined both filters provide unsurpassed water...

Page 38: ...Cover Back View I Install clean skimmer bag back onto the filter cover clips as shown Inside Spa View J Install filter cover by sliding it down into position over mating spa retainer clips Turn spa po...

Page 39: ...ate and remove the synthetic cabinet door screws and door The door is located directly below the control panel 2 Cut Zip Tie s and pull drain hose from equipment area Figure A 3 Hold drain hose above...

Page 40: ...oid dragging it across rough surfaces 12 6 Maintaining The Synthetic Cabinet Your new spa s synthetic cabinet requires little or no maintenance of any kind To clean simply wipe cabinet with a clean to...

Page 41: ...ting Your Spa in Cold Weather If you want to start up your spa after it has sat empty for a time in freezing temperatures be aware that the water remaining in certain sections of the piping may still...

Page 42: ...low pH will be corrosive to metals in the spa equipment A high pH will cause minerals to deposit on the interior surface scaling In addition the ability of the sanitation agents to keep the spa clean...

Page 43: ...14 1 Summer Logic Spas With Circulation Pump Option When the actual spa water temperature reaches up to 2 F 1 C above the set temperature the spa goes into summer logic The 24 hour circulation pump wi...

Page 44: ...water flow is inhibited or the pressure switch has malfunctioned A flashing FL2 display means the pressure switch is malfunctioning closed In either case the heater is deactivated To correct conditio...

Page 45: ...oblem persists contact your authorized Jacuzzi dealer 5 14 8 Panel Displays OH WARNING Risk of Hyperthermia over heating Causing Severe Injury burns or welts Water temperature is above acceptable limi...

Page 46: ...is going to 1 the spa and check the water level If it does not solve the problem contact your authorized Jacuzzi dealer or qualified service technician The main jets pump 1 operates but no water flows...

Page 47: ...dealer so that they may arrange service We build the best spas in the industry Nonetheless we are always striving to improve the quality and features of our products Your input as a Jacuzzi spa owner...

Page 48: ...Panel CIRC PUMP J20 K1 K2 K3 K4 K5 K6 K7 K8 J21 J11 J12 J13 J14 J15 J16 J17 J18 J19 J7 J8 J9 J10 This device complies with Part 15 of the FCC rules Operation is subject to the following two condition...

Page 49: ...tub is to be operated on 30A service make sure the jumper provided at location JP1 1 2 on the circuit board is installed If hot tub is to be operated on 40A service remove the jumper JP1 1 2 on the c...

Page 50: ...LIMIT FREEZE SENSOR TEMPERATURE SENSOR J1 J2 J3 F1 20A 250V SC 20 PUMP 1 PUMP 2 TRANSFORMER 240 VAC J4 F1 7 6 2 4 HI HI LO Control Panel SPA LIGHT J20 K1 K2 K3 K4 K5 K6 K7 K8 J21 J11 J12 J13 J14 J15...

Page 51: ...Heater 2 7kW 230 VAC Pressure Switch Hi limit Freeze Sensor Temperature Sensor J2 J3 Spa Light Transformer 230 VAC J1 Logic Jumper Settings JP1 1 2 ON 20A Logic Factory Setting JP1 1 2 OFF 30A Logic J...

Page 52: ...gs to customize the sound in your spas audio system It s easy simply press the EQ LD button 2 to activate the DSP Then repeatedly press to choose from Jazz Pop Classical Rock and Vocal DSP settings Th...

Page 53: ...ound level of the rear speakers by pressing Volume Up To decrease the sound level of the front speakers press Volume Down Note Bass and Treble settings are available only if EQ is set to DSP Off 10 Pr...

Page 54: ...CD RW disks 16 BND Button Press BND to select one of the following frequency bands FM1 FM2 FM3 AM1 AM2 and WB weather band 17 Tuning UP DOWN Buttons Press Track Up to manually adjust station frequenc...

Page 55: ...r Band Mode Press BND 16 while in tuner mode until WB displays deck automatically skips to the strongest weather channel or press BND a second time to return to previous mode When WB weather band mode...

Page 56: ...e to start playback In addition it may take time for the unit to move to the next MP3 file and the fast forward function may not be performed smoothly When selected to play files and folders are acces...

Page 57: ...hierarchy Folder File Level 1 Level 2 Level 3 Level 4 Level 5 Operation of the keys Press Track Down to select folder down Press Track UP to select folder up Press and hold to return 10 files behind...

Page 58: ...Model Name _ ___________________________ Dealer Name _ ___________________________ Notes _ __________________________________ _________________________________________ _______________________________...

Page 59: ...J 200 Series 55...

Page 60: ...J 200 Series 56...

Reviews: