48
Stereo receiver (optional)
BLUEWAVE™ Spa Stereo System
To start enjoying your new stereo receiver, please read the following
operation instructions in their entirety.
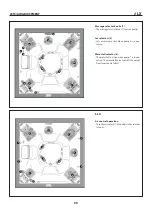
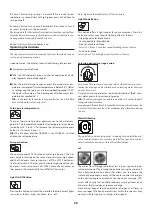
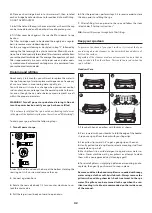
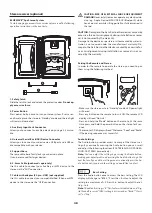
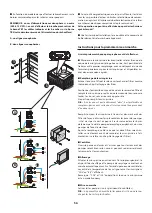
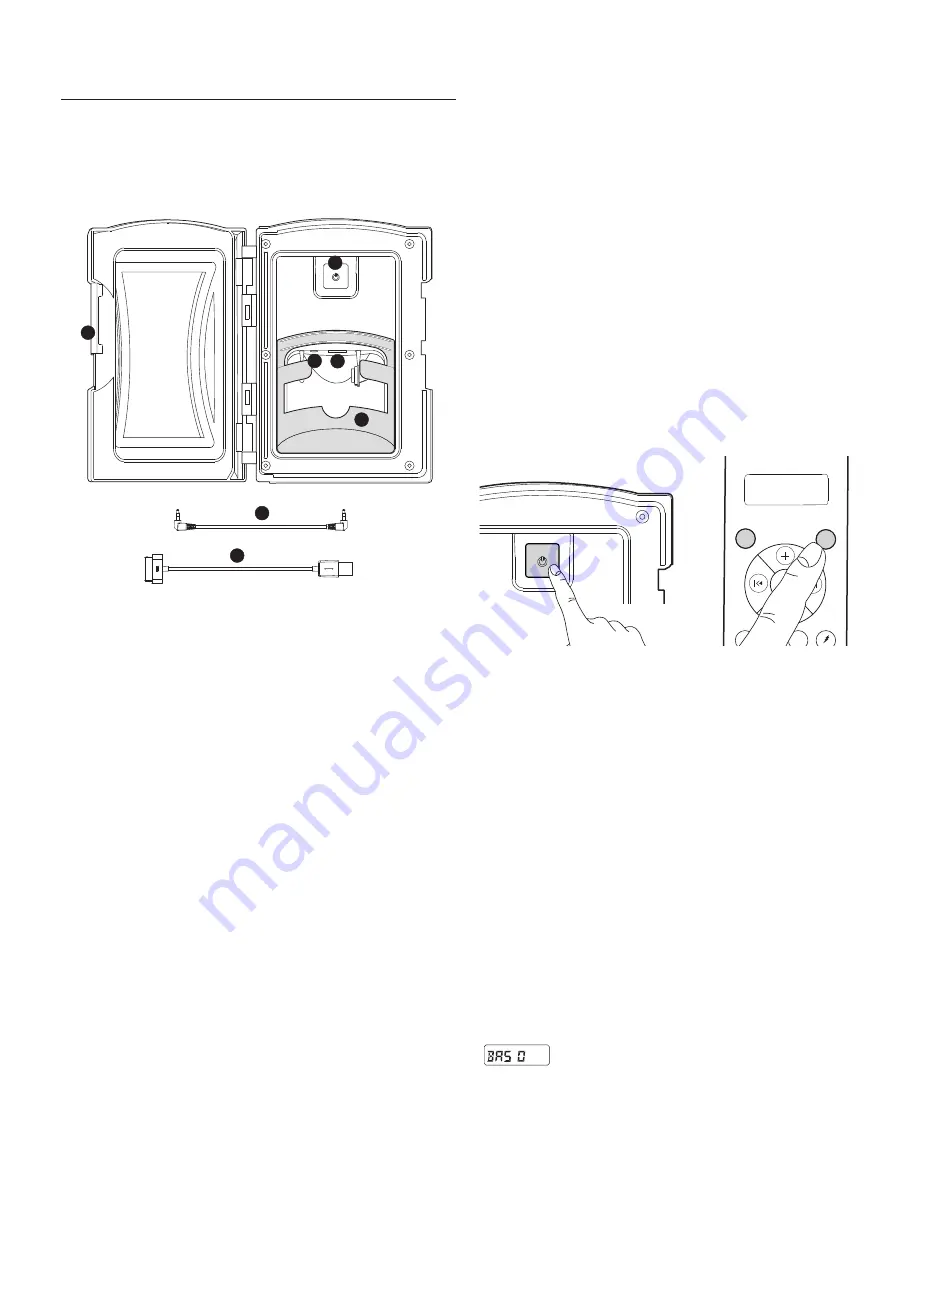
1. Safety latch
Slide the latch to lock and unlock the protective door.
Do not ap-
ply excessive force.
2. Power Button
Press power button once to turn on stereo system. Press a sec-
ond time to place the stereo in “Standby” mode and the red light
will remain illuminated.
3. Auxiliary Input Jack Connector
Allows you to connect an auxiliary device by using a 3.5 mm ca-
ble.
4. Universal Serial Bus (USB) Device Connector
Allows you to connect your device via a USB port and a USB ca-
ble compatible with your device.
5. Support base
The removable base firmly locks your device in place.
It can be removed for larger devices.
6. 3.5 mm Cable (puchased separately)
Use this cable to connect your Auxiliary or MP3 device to the
stereo via the “AUX” connection.
7. Cable with adapter (30 pin - USB) (not supplied)
Use this cable to connect your compatible iPod, iPhone or MP3
device to the stereo via the “USB” connection.
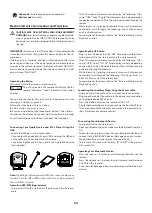
CAUTION: RISK OF ELECTRICAL SHOCK OR EQUIPMENT
DAMAGE!
Never install, remove or operate any electrical de-
vice (e.g. Apple Device/MP3/USB/AUX/Bluetooth) while
hands are wet or while sitting partially or fully immersed in
the spa!
CAUTION:
Damage to the hatch or to other devices caused by
excessive force or misalignment during installation or remo-
val is not covered by the warranty.
Damage to the device or spa stereo system caused by water in-
trusion is not covered under the manufacturer’s warranty!
Da-
mage to the hatch or to other devices caused by excessive for-
ce or misalignment during installation or removal is not co-
vered by the warranty.
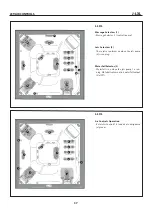
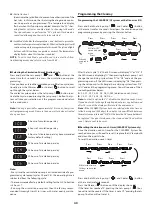
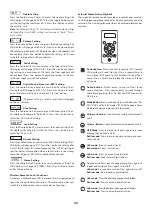
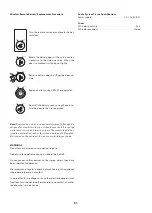
Pairing the Remote and Stereo
In order for the remote to operate the stereo, you need to pair
them using the following method:
- Make sure the stereo unit is in “Standby” mode. LED power light
will be red.
- Press any button on the remote to turn it ON. The remote LCD
display will read “No Link.”
- Press and hold the “Mode” button on the remote. At the same
time, press and hold the power button on the stereo for 2 sec-
onds.
- The remote LCD display will read “Welcome,” “Load” and “Radio”
if the pairing sequence was successful.
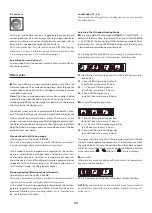
Audio Settings
The Audio button, provides access to many of the stereo’s set-
tings. By continually pressing the Audio button you can scroll
and adjust the following functions: BAS-TRE-BALFAD-DSP-AREA-
LOUD-DX-STEREO (respectively).
Note:
You can adjust the settings by pressing the Audio button,
making your adjustments and pressing the Audio button to go the
next feature. If you exit the setting menus continually press the Au-
dio button until you reach the setting you would like to adjust.
Bass Setting
Press the Audio button once to access the bass setting. The LCD
display will change to “BAS 0,”. Press the + button to adjust the
setting to a maximum of +5. Press the - button to adjust the set-
ting - to -5.
Note:
The default setting is “0.” This feature is disabled when a “Dig-
ital Sound Processor” (DSP) setting is active such as “Rock,” “Classi-
cal,” or “Pop.”
1
2
3
5
4
6
7
USB
AUX
AUDIO
MODE
1
2
3
Summary of Contents for J - LXL
Page 2: ...2...
Page 3: ...Italiano Avvertenze 4 English Warnings 29 Fran ais Recommandations 53 Index...
Page 78: ......
Page 79: ......

