SM-16
Jade Range LLC
– A Middleby Company
Titan
TM
Series Heavy Duty Range
Model Series JTRH, JMRH & JTRHE
REVIEW COPY
7
Thermostat and Thermocouple
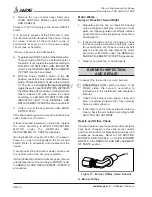
Figure 15: Thermostat and Control Panel
(Convection Model Shown)
A. Switch Panel
B. Thermostat
C. Upper Pipe Clamp
D. Lower Pipe Clamp
E. Door Switch and Bracket
F. Capillary Sensor
G. Oven Shut-Off Valve
H. Upper Gas Fitting
I. Lower Gas Fitting
J. Mounting Screws for Switch Panel
WARNING
PERFORM THE ELECTRICAL LOCKOUT/
TAGOUT PROCEDURE.
1. Shut off all electrical controls and perform the
Electrical LOCKOUT/TAGOUT procedure.
WARNING
PERFORM THE GAS LOCKOUT/TAGOUT
PROCEDURE.
2. Shut off all gas controls and perform the Gas
LOCKOUT/TAGOUT procedure.
3. Remove oven control panel as described under
COVERS AND PANELS.
4. Unbolt switch panel assembly from thermostat.
5. Remove screws from oven door switch bracket
and remove bracket.
6. Disconnect flexible gas lines from top of gas
shut-off valve and bottom of thermostat.
7. From inside the oven, remove the capillary
from its supports and push it through the hole
into cavity of oven control panel.
8. Remove lower pipe clamp.
9. While supporting assembly, remove upper
pipe clamp and carefully remove entire
assembly with the capillary out of the oven
compartment.
10. Reverse the procedure to install the thermostat.
Use caution so as to not kink-damage capillary
when reinstalling.
Oven Pilot Control Valve with Dropout of
45 - 60 Seconds
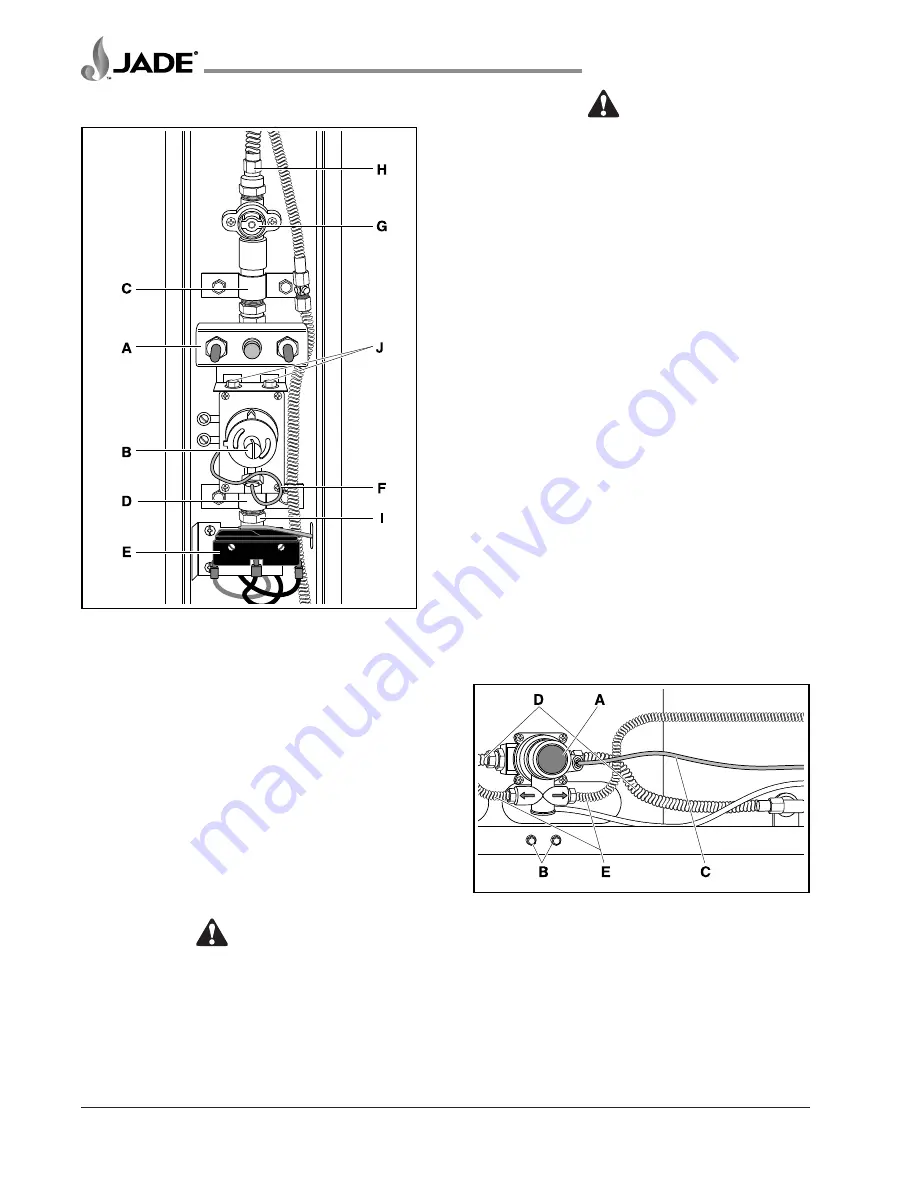
Figure 16: Oven Pilot Control Valve
A. Oven Safety Control Valve
B. Supporting Screws
C. Thermocouple
D. Main Burner Gas Lines
E. Pilot Gas Lines


