SM-19
Jade Range LLC
– A Middleby Company
Titan
TM
Series Heavy Duty Range
Model Series JTRH, JMRH & JTRHE
REVIEW COPY 7
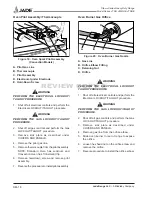
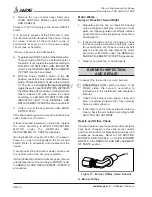
Oven Burner Assembly
Figure 21: Oven Burner Assembly
A. Oven Burner Gas Line
B. Oven Pilot Gas Line
C. Oven Burner Orifice Elbow
D. Oven Burner
E. Oven Burner Box (Firewall)
WARNING
PERFORM THE ELECTRICAL LOCKOUT/
TAGOUT PROCEDURE.
1.
Shut off all electrical controls and perform the
Electrical LOCKOUT/TAGOUT procedure.
WARNING
PERFORM THE GAS LOCKOUT/TAGOUT
PROCEDURE.
2.
Shut off all gas controls and perform the Gas
LOCKOUT/TAGOUT procedure.
3.
Remove kick plate as described under
COVERS AND PANELS.
4.
Remove burner gas line and orifice elbow as
described under OVEN BURNER GAS
NOZZLE.
5.
Lift up front of burner assembly and remove
through opening in firewall.
6.
Reverse the procedure to install burner.
Oven Timer
MINUTES
10
15
20
25
30
35
40
45
50
55
60
5
0
WARNING
TURN OFF ELECTRIC & GAS
TO APPLICNCE BEFORE
SERVICING ALL CONTROLS
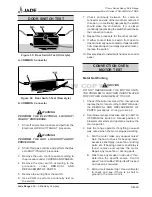
Figure 22: Oven Timer
A. Oven Control Panel
B. Timer
WARNING
PERFORM THE ELECTRICAL LOCKOUT/
TAGOUT PROCEDURE.
1.
Shut off all electrical controls and perform the
Electrical LOCKOUT/TAGOUT procedure.
WARNING
PERFORM THE GAS LOCKOUT/TAGOUT
PROCEDURE.
2.
Shut off all gas controls and perform the Gas
LOCKOUT/TAGOUT procedure.
3.
Remove oven control panel as described under
COVERS AND PANELS.
4.
Loosen set screw and remove timer knob.
5.
Remove timer from panel.
6.
Reverse the procedure to install the timer.


