-44-
•
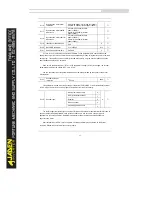
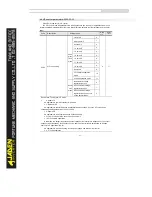
0: No auto-tuning: Auto-tuning is prohibited.
•
1: Asynchronous motor static auto-tuning
It is applicable to scenarios where complete auto-tuning cannot be performed because the
asynchronous motor cannot be disconnected from the load.
Before performing static auto-tuning, properly set the motor type and motor nameplate parameters of
P1.00 to P1.05 first. The Inverter will obtain parameters of P1.06 to P1.08 by static auto-tuning.
Set this parameter to 1, and press RUN. Then, the Inverter starts static auto-tuning.
l
2: Asynchronous motor complete auto-tuning
To perform this type of auto-tuning, ensure that the motor is disconnected from the load. During the
process of complete auto-tuning, the Inverter performs static auto-tuning first and then accelerates to
80% of the rated motor frequency within the acceleration time set in P0.17. The Inverter keeps running
for a certain period and then decelerates to stop within deceleration time set in P0.18.
Before performing complete auto-tuning, properly set the motor type, motor nameplate parameters of
P1.00 to P1.05, "Encoder type" (P1.28) and "Encoder pulses per revolution" (P1.27) first.
The Inverter will obtain motor parameters of P1.06 to P1.10, "A/B phase sequence of ABZ incremental
encoder" (P1.30) and vector control current loop PI parameters of P3.13 to P3.16 by complete
auto-tuning.
Set this parameter to 2, and press RUN. Then, the Inverter starts complete auto-tuning.
l
11: Synchronous motor with-load auto-tuning
It is applicable to scenarios where the synchronous motor cannot be disconnected from the load.
During with-load auto-tuning, the motor rotates at the speed of 10 PRM.
Before performing with-load auto-tuning, properly set the motor type and motor nameplate
parameters of P1.00 to P1.05 first.
By with-load auto-tuning, the Inverter obtains the initial position angle of the synchronous motor,
which is a necessary prerequisite of the motor's normal running. Before the first use of the synchronous
motor after installation, motor auto-tuning must be performed.
Set this parameter to 11, and press RUN. Then, the Inverter starts with-load auto-tuning.
l
12: Synchronous motor no-load auto-tuning
If the synchronous motor can be disconnected from the load, no-load auto-tuning is recommended,
which will achieve better running performance compared with with-load auto-tuning.
During the process of no-load auto-tuning, the Inverter performs with-load auto-tuning first and then
accelerates to 80% of the rated motor frequency within the acceleration time set in P0.17. The Inverter
keeps running for a certain period and then decelerates to stop within the deceleration time set in P0.18.
Summary of Contents for DLB1-0D40S2G
Page 11: ...11 Graph 1 722 30KW product outline dimensions Graph 1 837 55KW product outline dimensions...
Page 12: ...12 Graph 1 875 110KW product outline dimensions Graph 1 9 132 160KW product outline dimensions...
Page 14: ...14 2 Wirings 2 1 Standard wiring diagrams Graph 2 8 0 4 18 5KW inverter wiring diagram...
Page 15: ...15 Graph 2 922 400KW inverter wiring diagram...
Page 159: ...159...

