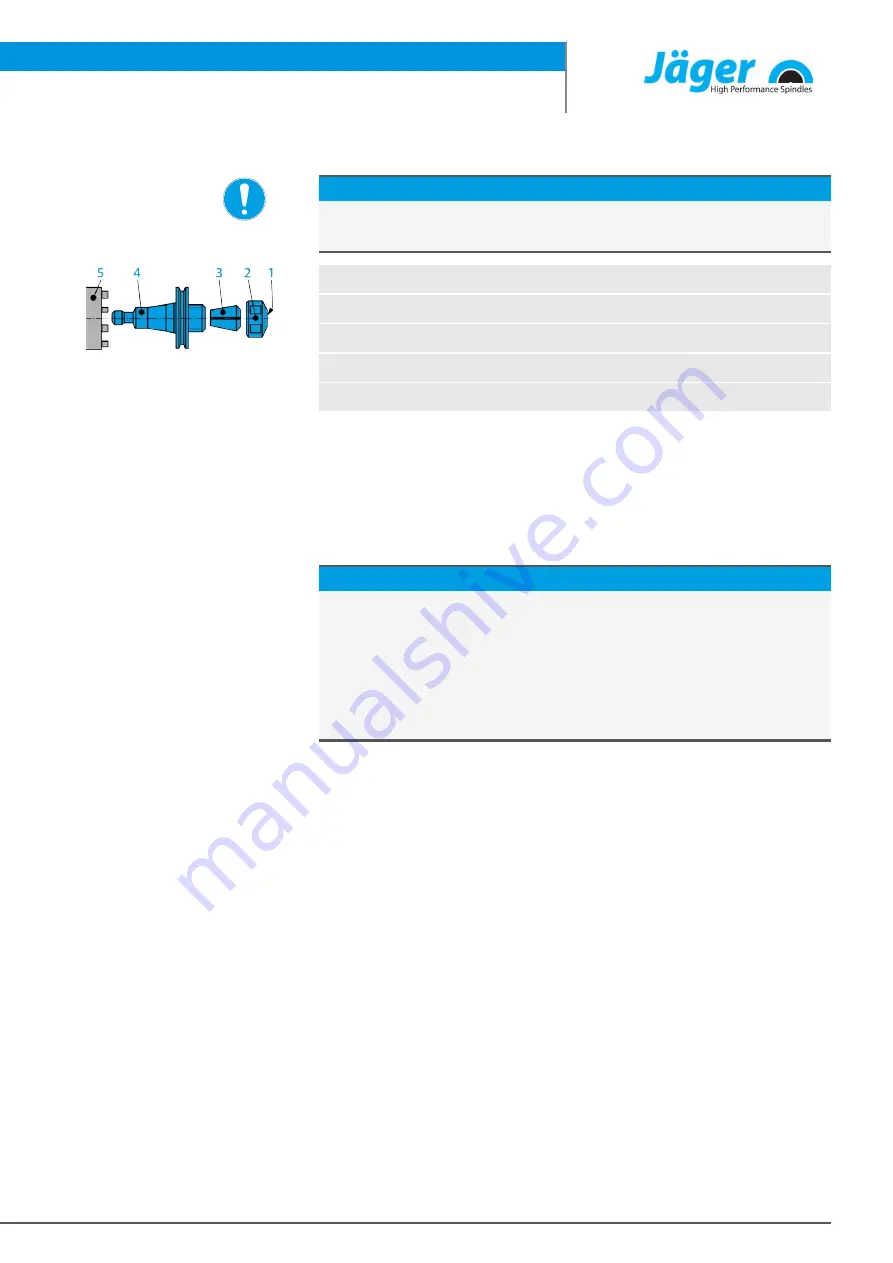
Tool change
Item no. 10404111, Revision 12
29 ( 40 )
10.2.1
Changing the tool
Note: Ensure concentric run-out quality.
u
Only use tool mounts, clamping nuts, and clamping devices that are bal-
anced according to DIN ISO 1940 balance grade G DIN ISO 1940.
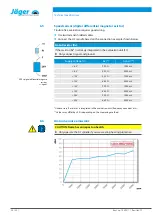
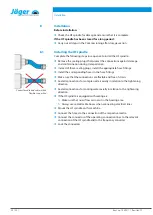
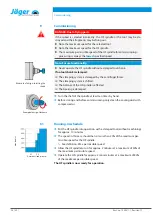
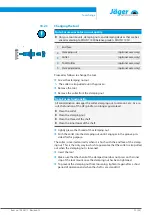
1
End face
2
Clamping nut
(optional accessory)
3
Collet
(optional accessory)
4
Tool Holder
(optional accessory)
5
Clamping device
(optional accessory)
Proceed as follows to change the tool:
Ü
Screw the clamping nut out.
Ä
The collet is also pulled out in the process.
Ü
Remove the tool.
Ü
Remove the collet from the clamping nut.
Note: Ensure functionality.
All contamination damages the collet, clamping nut, tool mount, etc. As a re-
sult, the function of the HF spindle is no longer guaranteed.
u
Clean the collet.
u
Clean the clamping nut.
u
Clean the thread of the shaft.
u
Clean the inner taper of the shaft.
Ü
Lightly grease the thread of the clamping nut.
Ü
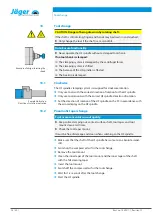
Push the collet into the clamping nut until it engages in the groove pro-
vided for this purpose.
The collet is inserted correctly when it is flush with the end face of the clamp-
ing nut. This is the only way in which to guarantee that the collet is also pulled
out when the clamping nut is loosened.
Ü
Insert the tool.
Ü
Make sure that the shank of the clamped tool does not press on the inner
stop of the tool mount once the clamping nut has been tightened.
Ü
To prevent the clamping nut from loosening, tighten it again after a short
period of operation and when the shaft is at a standstill.


