background image


Tutorial 29


EN Camera Series 


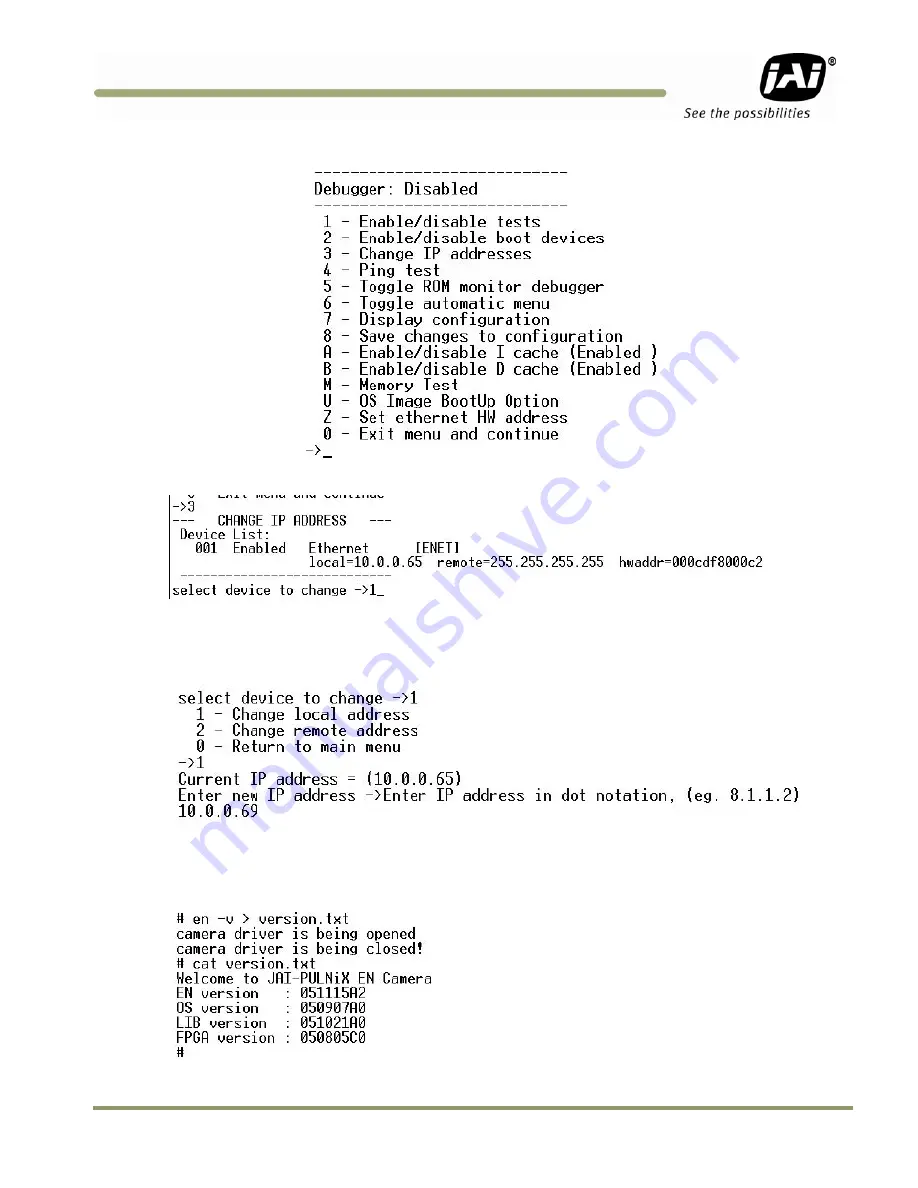
After typing the “/” key, you should see the following monitor menu. 


Enter “3” to select “Change IP addresses” mode. 


Enter “1” to select Ethernet interface 1. 

Enter “1” again to select “Change local address. 

Enter the new IP address. 


After setting the new IP address, type “0” to exit the monitor menu. 

After the boot-up sequence, login to the serial terminal. (Username = root, Password = JAIPULNiX) 

Type “en -v > version.txt.” View the content of “version.txt” to see the firmware version 

.


Summary of Contents for EN Series Cameras TS(C)-1327EN

Page 1: ...EN Camera Series TS C 4032EN TS C 2030EN TS C 2076EN TS C 1327EN Progressive Scan Cameras Document Version D Document P N 10490 ...

Page 2: ......

Page 3: ...00 A2 2003 Immunity EN55024 1998 A1 2001 A2 2003 All JAI Inc products bearing the CE mark have been declared to be in conformance with the applicable EEC Council Directives However certain factory installed options or customer requested modifications may compromise electromagnetic compatibility and affect CE compliance Please note that the use of interconnect cables that are not properly grounded ...

Page 4: ... responsible for FCC compliance could void the user s authority to operate the equipment EN Camera Series Operation Manual JAI Inc 625 River Oaks Parkway San Jose CA 95134 Tel 408 383 0300 Tel 800 445 5444 Fax 408 383 0301 E mail trafficsales americas jai com trafficsales emea jai com www jai com December 19 2008 ...

Page 5: ...onization 24 3 5 Static IP Address Assignment 24 3 5 1 DHCP Client 25 3 6 Maintenance 26 3 6 1 Debug Counters 26 3 6 2 Firmware Upgrade 27 3 6 3 RS 232 PowerPC Debug Port 28 4 Uploading the Firmware 31 4 1 To Verify Version Numbers for all Firmware 31 4 1 1 RS 232 PPC Debug Serial Port Telnet 31 4 1 2 EN Setup Software 31 4 2 Updating the EN Application Software 31 4 3 Updating the FPGA Bitfile 32...

Page 6: ...e 53 7 4 Problem 4 EN Setup Software Does Not Find Any Camera in the Network 53 7 5 Problem 5 EN Setup Software Found the Camera But the Video Image is too Dark or Just Black 53 7 6 Problem 6 TTL Trigger Ethernet Trigger Serial RS 485 Trigger Does not Generate Trigger 54 7 7 Problem 7 JPEG Image is Either Corrupt or Not a Full Size Image 54 7 8 Problem 8 EN Camera Does Not Send any FTP Image to th...

Page 7: ...030EN 39 Figure 16 Timing Chart 2 TS C 1327EN 40 Figure 17 Timing Chart 3 TS C 4032EN 41 Figure 18 CFA Pattern 49 Figure 19 Enable TCP Image 51 Figure 20 Physical Dimensions TS C 2030EN TS C 2076EN TS C 1327EN 60 Figure 21 Physical Dimensions TS C 4032EN 60 Figure 22 Spectral Response B W CCD 61 Figure 23 Spectral Response B W CCD TS 1327EN 61 Figure 24 Spectral Response B W CMOS TS 4032EN 62 Figu...

Page 8: ...EN Camera Series viii List of Figures ...

Page 9: ... VC 34 Table 4 10 100 BaseT Ethernet Pinout Configuration 35 Table 5 Lens Mount Format 37 Table 6 EN Exposure Times 44 Table 7 Factory Default Settings of the ADR Shutter Min and Max 44 Table 8 Gain Table BW EN Camera 45 Table 9 Gain Table Color EN Camera 45 Table 10 Factory Default Storage Setup of Image Buffering 51 Table 11 EN Camera Series Product Specifications Tables 57 ...

Page 10: ...EN Camera Series x List of Tables ...

Page 11: ... EN cameras 1 2 Related Documents Lane Controller to Ethernet Network Camera Interface Document doc number 69 1198 Vehicle Imaging System 300 400 500 Installation Manual 1 3 Key Functions of the EN Camera Sensitive high speed progressive scan CCD camera 1 format for the TS C 2030EN and the TS C 2076EN 2 3 format for the TS C 1327EN 43 3mm format for the TS C 4032EN 10 100 Mbit BaseT Ethernet inter...

Page 12: ...clude Automatic Number Plate Reader ANPR LPR vehicle fingerprints vehicle matching technology optical character recognition OCR and region of interest extraction ROI as used in the market for ITS Intelligent Transportation Systems The EN camera supports external event triggering dynamic light sensor and provides the best quality and sensitivity images for ITS applications Applications include mach...

Page 13: ...mera is as follows IP address 10 0 0 65 Subnet mask 255 255 255 0 Default gateway 255 255 255 255 disabled You must set up your computer network properly in order to allow it to communicate with the camera It is very important that your PC NOT be assigned the same IP address as the camera If you need to change the IP address follow the instructions in Section 2 2 2 on page 4 2 2 2 Changing the IP ...

Page 14: ... up code 2 Type to stop the normal camera boot up and to start the BIOS test mode 3 Type 3 to select the IP address change setting 4 Type 1 to select the first network interface and then 1 again to change the local IP address 5 Type the IP address you want to change 6 Type 0 to return to the main menu and then type 0 to start up the normal boot up 2 3 Installing the Required Software The EN setup ...

Page 15: ...ut on your desktop or go to Start All Programs EN Setup EN Setup Start the EN Setup software Type the case sensitive user name Administrator and password Password You can create a new user and password from User Administration option From the Tools menu select User Administration as shown in Figure 2 below Figure 2 User Administration Click the Properties button to see all the EN cameras the softw...

Page 16: ...nerated by an internal trigger mechanism inside the EN camera This internal trigger is independent of either FTP or message based TCP image Also during live image display Flash is disabled at nighttime The Snap button captures only a single video image The Freeze button disables the Live image option Use the Live or Snap buttons only while the camera is being set up for those occasions you want to...

Page 17: ...Tutorial 17 EN Camera Series Figure 5 Live Image Capturing Figure 6 Focus Bar Use the Focus Bar button to make precise adjustments to the lens focus ...

Page 18: ... correct side of the video field of view Figure 8 Half Size Image Position The Half Size image button is useful for situations in which two EN cameras together cover a single lane Using the Half Size image button to capture two images one on the left side of camera1 the other on the right side of camera2 To activate Half Size click on the camera icon ...

Page 19: ...nt the EN camera to take a single shot of video image as soon as it receives a valid TTL trigger Ethernet trigger or RS 485 serial trigger All trigger mode is continuous trigger sniffing mode Trigger sniffing is a mode of operation that allows the user to continuously and passively monitor images captured by the external trigger without disturbing the trigger process For every trigger input the EN...

Page 20: ...n monitor the image properties of captured images whether it s Live Snap or Trigger Sniffing mode On the Video Window menu select Image Properties under View You can also use the EN setup software to monitor the image properties of saved images and FTP images ...

Page 21: ...f the second triggered image Normally you should ignore the Image 2 Data Subdirectories is normally set to 1000 The EN creates subdirectories under a single Destination DIR When the number of files in the subdirectory reaches 1000 then the EN automatically creates another subdirectory Naming conventions of the subdirectory can be found in the LC to EN interface document Destination DIR is a name o...

Page 22: ... If two IP addresses and port numbers are identical then the EN camera tries to connect only a single light sensor Set the ADR Control register from Manual to ADR Control Using the Light Sensor This will activate the connection to the light sensor If the connection is successful you should see a live data change in the ADR Debug side A B registers Also you should see what camera parameters ADR dec...

Page 23: ...al OFF or ON Generate an Ethernet trigger or input TTL trigger to see Flash The Live or Snap button does not generate Flash because they are independent from normal trigger operation Normally Flash and Night Light are controlled by ADR and a light sensor To take advantage of this feature connect to the light sensor Set the Flash Auto Manual and Night Light Control registers as shown below In this ...

Page 24: ...ing the camera check the Real Time Clock register to check if the current time is properly set Note that this time is GMT If the NTP drift file is empty then the NTP will take about 1 hour to optimize the time During the initialization NTP Status must show USYNC and NTP estimated error is max After 3 4 hours the time drift will become within 10ms Check NTP estimated error and NTP Status registers ...

Page 25: ...y See Section 3 6 3 RS 232 PowerPC Debug Port on page 18 Serial terminal using the debug RS 232 serial power cable This is exactly the same as the previous Telnet solution except that you do not need an Ethernet connection If Ethernet is down or if the IP of the camera is unknown this method is useful You can use ifconfig or test_libcamera utility to assign new IP address temporarily or permanentl...

Page 26: ... hardware TTL triggers that passed noise filter PRE filter and POST filter VINIT count number of reset signals sent to CCD IRQ count number of interrupt generated by FPGA to PowerPC By generating an Ethernet trigger All and HW Trigger button on the EN setup video window you can see only VINIT and IRQ counters are incrementing This is because the first four counters are only for the hardware TTL tr...

Page 27: ...PC Besides POST Filter Noise count and VINIT count all other counters remain the same 3 6 2 Firmware Upgrade In the Properties window right click on the camera icon you want to upgrade Select Update Firmware in Camera s You can update the five pieces of firmware inside the EN camera Each piece of firmware has a distinctive extension Table 1 Firmware Names and Descriptions Firmware Name Description...

Page 28: ...r the serial port This is useful when Ethernet is not available In this tutorial we suppose we have accidentally assigned an invalid IP address to the EN camera and now we cannot communicate with the EN camera over Ethernet When this happens there are two recovery methods The first method requires setting the Hyper terminal to the following setting 9600 8 N 1 No hardware handshake Power up the EN ...

Page 29: ...r 1 to select Ethernet interface 1 Enter 1 again to select Change local address Enter the new IP address After setting the new IP address type 0 to exit the monitor menu After the boot up sequence login to the serial terminal Username root Password JAIPULNiX Type en v version txt View the content of version txt to see the firmware version ...

Page 30: ...Enter the command ifconfig eth0 NEW IP ADDRESS netmask SUBNET MASK This is a temporary IP assignment because the EN camera will lose this setting once you restart it Now you should be able to telnet to the EN cameras If you want to assign the new IP address permanently you can use the test_libcamera utility The test_libcamera utility allows access to EEPROM where all network settings are saved Aft...

Page 31: ... PPC Debug Serial Port Telnet To verify the version numbers of all firmware with the RS 232 PPC debug serial port telnet login to EN camera as ROOT with the following user name and password user name root password JAIPULNiX Type en v to see the version numbers for all firmware currently running Ex en v version txt more version txt Welcome to JAI PULNiX EN Camera EN version 050812A0 OS version 0508...

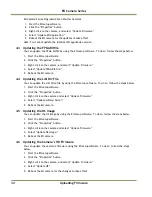
Page 32: ...le You can update the Lib Drive file by using the EN setup software To do so follow the steps below 1 Start the EN setup software 2 Click the Properties button 3 Right click on the camera and select Update Firmware 4 Select Update Library Driver 5 Reboot the EN camera 4 5 Updating the OS Image You can update the OS image by using the EN setup software To do so follow the steps below 1 Start the EN...

Page 33: ...rectory to usr local bin 2 Type ps to see the process running Kill the dhcpcd process if it is running in the background 3 Assign a static IP address to the network interface Example To assign a static IP 10 0 0 65 and subnetmask 255 255 255 0 enter this command ifconfig eth0 10 0 0 65 netmask 255 255 255 0 4 Via FTP manually send the firmware file to the usr local bin directory of the EN camera 5...

Page 34: ... Reserved 2 12V DC 8 Flash strobe output 3 GND analog 9 Reserved 4 Test point 10 RXD RS 232 Power PC debug port 5 GND digital 11 Reserved 6 Trigger input 12 TXD RS 232 PowerPC debug port 5 1 2 High Density 26 Pin D Sub Connector The EN camera has a 26 pin MDR26 connector 3M part number 10226 6212VC on the rear panel The connector pin out is shown in Table 3 Figure 12 26 Pin HD Sub Connector Table ...

Page 35: ...C spare 20 Test point Out 8 Ethernet B In 21 Trigger Input Out 9 Ethernet B In 22 LC TxD TTL In 10 GND Digital Out 23 LC RxD TTL In 11 Flash Strobe Output Out 24 LC DIR Control TTL In 12 Flash Status Input In 25 Ethernet D Spare 13 IO Status Change In 26 Ethernet A Out 5 1 3 10 100 BaseT Ethernet Table 4 10 100 BaseT Ethernet Pinout Configuration 10 100 BaseT Ethernet Pinout Configuration 1 Ethern...

Page 36: ...PD 12UUP 100 240 V AC 1 2A universal voltage power supply with US Plug and 12 pin connector PD 12UE 100 240V AC 12V DC 1 2A universal power supply with European Plug PD 12UEP 100 240V AC 12V DC 1 2A universal power supply with European Plug and 12 pin connector If you are providing power through the 12 pin connector the PD 12UUP and PD 12UEP power supplies are available with the 12 pin mating conn...

Page 37: ...ulated and of sufficient current to properly power the camera 5 3 4 Attaching the Power Cable to the Connector The 12 pin connector is keyed and will only fit in one orientation Follow these directions to properly attach the power cable to the camera connector 1 Rotate the connector while applying slight pressure until the keyways line up 2 Press the connector into place until firmly seated 3 Plug...

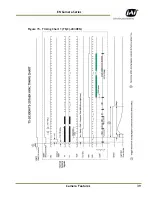
Page 38: ...e TS C 2030EN model 1920 x 512 resolution enables the 30Hz frame rate by scanning 512 lines out of the entire 1080 lines This technique significantly reduces smear and blooming which tend to be significant problems in daylight outdoor applications such as intelligent transportation systems ITS The TS C 2076EN model 1920 x 768 resolution enables the 21Hz frame rate by scanning 768 lines The TS C 20...

Page 39: ...Camera Features 39 EN Camera Series Figure 15 Timing Chart 1 TS C 2030EN ...

Page 40: ...EN Camera Series 40 Camera Features Figure 16 Timing Chart 2 TS C 1327EN ...

Page 41: ...Camera Features 41 EN Camera Series Figure 17 Timing Chart 3 TS C 4032EN ...

Page 42: ...de is for factory use only ADR LS Gain for Side A This parameter is used to fine tune cameras to environments with a different lighting conditions lenses or optical filters The raw A side reading of the light sensor is multiplied by ADR LS Gain for Side A If LSA_Gain 1 0 the light sensor value becomes larger and the camera assumes the lighting is brighter at that particular location so it reduces ...

Page 43: ...R Control ADR Debug Side B See ADR Debug Side A This is for Light Sensor Side B ADR White to Blue Ratio ADR White to Blue Ratio is the ratio between a white plate and blue plate and is used to optimize the camera parameters This value is optimized by JAI and should be kept at factory default Please do not change it Camera Shutter Mode This is read only status Current setting of camera exposure tim...

Page 44: ...user can monitor the shutter value in EN setup software by accessing Camera Shutter status register Address 233 Note that this Shutter value is dial number and not actual exposure time left side of the table above User needs to set appropriate ADR Shutter Max and ADR Shutter Min config registers Address 53 and 58 respectively to limit exposure time In daytime ADR Shutter Min limits the shortest ex...

Page 45: ...tallation site The following table shows the gain setting against the actual gain dB Gain Table BW EN Camera Table 8 Gain Table BW EN Camera TS 2030EN TS 2076EN TS 1327EN TS 4032EN Gain Value dB Gain Value dB Gain Value dB 0 7 6 0 10 0 5 7 36 9 9 100 14 3 32 6 3 60 11 4 205 19 64 6 9 83 12 9 255 21 96 7 5 112 14 9 128 8 1 143 16 8 160 8 7 176 18 9 192 9 4 200 20 5 224 10 0 230 22 4 255 10 6 255 24...

Page 46: ... the plate is over exposed there is no information to be extracted for post processing such as LPR or matcher HDR mode prevents the image from saturating too fast while maintaining the sensitivity in a dark area Therefore you can always capture readable plate images regardless of severe abnormal conditions In the example above Pixel P1 and P2 dark pixels continue integration without reset Pixel P3...

Page 47: ...and click Save in Camera button If HDR mode is enabled set the target grayscale of the license plate to 190 200DN during the installation by adjusting ADR A side Gain daytime and ADR A side Offset night time See section 6 3 1 for detail 6 4 Flash Nighttime Light Control The strobe and continuous nighttime light controls are critical at nighttime ADR Automatic Dynamic Range control inside the EN au...

Page 48: ...rigger RS 485 is a differential signal communication for longer distance Since RS 485 is not a common port for PCs a plug in 485 board such as ULTRA 485 Industrial Computer Source San Diego CA 800 523 2320 or compatible is required 6 5 2 Ethernet The primary benefit of Ethernet is the scalability of the system you can add as many EN cameras as you want to the system For example you can connect up ...

Page 49: ... linear LUT is used Also it is important to keep in mind that a lossy JPEG encoding will cause color information loss Viewer software cannot reconstruct the color image properly after it has been encoded to JPEG format In order to reconstruct the color properly users must use the raw TIF image format only 6 7 Image Formats Two image formats are supported TIF and JPEG The TIF Format image is always...

Page 50: ...sed image transfer Half image and quarter images are supported only on the UDP setup channel The raw image format is the only one supported by the UDP setup channel JPEG is not supported UDP setup images are easy to enable and disable The user can access the EN Setup Trigger Source register Address 111 and EN Setup Image size register Address 112 to change the trigger source and image size Live im...

Page 51: ...030 BW 2030 Color 2076 BW 2076 Color 1327 BW 1327 Color 4032 BW 4032 Color TiF queue size 20 25 15 20 10 13 15 15 20 23 JPEG size 20 0 15 0 10 0 15 0 20 0 Please refer to the EN to LC Interface Document for more information 6 10 FTP FTP File Transfer Protocol is the industry standard file transfer protocol All EN cameras have an FTP client built in TIF image JPEG image or both can be transferred t...

Page 52: ...r is recycled the EN camera will read the saved NTP Drift file and the next settlement will not take too long If NTP is still not synchronized with the NTP server s NTP status register address 239 shows UNSYNC status 0x40 After NTP is finally synchronized with NTP servers s NTP status register shows PLL status 0x01 and NTP Estimate Error status register address 238 shows the estimated clock drift ...

Page 53: ...and that their IP addresses are not identical If the EN camera s IP address is 192 168 30 65 then you should not set the same IP address to the host PC 2 If you have a firewall set up on your Windows computer disable it Also be sure to enable network data transfer of the EN setup software 3 If the EN camera s IP address is unknown use the RS 232 debug cable For more information please see Section ...

Page 54: ...of JPEG The user can either increase the size of JPEG image size See the Allocate Image Size section or decrease JPEG Quality Setting The factory default JPEG image size is 300Kbyte and quality setting is 85 7 8 Problem 8 EN Camera Does Not Send any FTP Image to the FTP Server 1 Make sure that the FTP server allows anonymous user for full access operation write read modify create directories 2 If ...

Page 55: ...ect multiple MOXA devices up to 2 MOXAs do not assign the same port number for performance reasons Assign different port numbers For TCP connections not recommended but for customers who require TCP connections The maximum number of connections is four 1 Access to HTTP server of MOXA RS 485 to Ethernet converter Check the version of firmware Firmware must be 2 2 or later If not update the firmware...

Page 56: ...n the Error Register 1 If you use an AC Flash Unit enter 1 in the config register address 42 decimal so that the flash status is Normally High Goes Low at alarm 2 If you use DC Flash Unit enter 2 to config register address 42 decimal so that flash status is Normally Low Goes High at alarm 3 After changing the register save the setting to FlashROM 7 16 Problem 16 Timestamp is Not Set to Current Loc...

Page 57: ...2 V 1920 H x 768 V S N Ratio 50dB min BW 48dB min Color Video Output Digital output JAI Inc proprietary protocol over TCP IP Gamma Gamma 0 55 forBW Linear for Color Lens Mount C mount Power Req 12V DC 10 450 mA typical at 25 C 800mA required at power up Operating Temp 10 Cto55 C Random Vibration 7 Grams 10Hz to 2000Hz Shock 70G Weight 290 grams 10 2 oz EN Camera Processor Module CPU Power PC 333MH...

Page 58: ...tter No delay async shutter 1 15 1 32 000 Spectral response 400 800 nm mono 300 750 nm color Lens mount C mount use 2 3 format lenses Power requirement 12V DC 10 420 mA typical at 25 C 900 mA powerup surge current Operating temperature 10 C to 55 C Vibration 7 Grms 10 Hz to 320 Hz Random Shock 70G 11 ms half sine Weight 297 grams Processor Module CPU Power PC 333 MHz SDRAM 64 MB O S Real time Linu...

Page 59: ...or controlled Gamma Mono Color 0 45 Electronic shutter No delay async global shutter 1 2000 1 42 000 5 msec max Spectral response 400 1000 nm Lens mount M42 mount Power requirement 12V DC 10 TBD mA typical at 25 C 1 2 A powerup surge current Operating temperature 10 C to 55 C Vibration 7 Grms 10 Hz to 320 Hz Random Shock 70G 11 ms half sine Weight 417 grams Processor Module CPU Power PC SDRAM 128 ...

Page 60: ...EN Camera Series 60 Specifications 8 2 Physical Dimensions Figure 20 Physical Dimensions TS C 2030EN TS C 2076EN TS C 1327EN Figure 21 Physical Dimensions TS C 4032EN ...

Page 61: ...Specifications 61 EN Camera Series 8 3 Spectral Response Figure 22 Spectral Response B W CCD TS 2030EN TS 2076EN Figure 23 Spectral Response B W CCD TS 1327EN ...

Page 62: ...EN Camera Series 62 Specifications Figure 24 Spectral Response B W CMOS TS 4032EN Figure 25 Spectral Response Color CCD TSC 2030EN TSC 2076EN ...

Page 63: ...Specifications 63 EN Camera Series Figure 26 Spectral Response Color CCD TSC 1327EN Figure 27 Spectral Response Color CMOS TSC 4032EN ...

Page 64: ...EN Camera Series 64 Specifications Figure 28 IR Cut Filter Response for monochrome cameras Figure 29 Red Filter Optical Characteristics for monochrome cameras ...

Page 65: ...Specifications 65 EN Camera Series Figure 30 Color filter spectrum response of TSC 1327EN Figure 31 Color filter spectrum response of TSC 4032EN ...

Page 66: ...EN Camera Series 66 Options 9 Configurable Order Options for EN Cameras 9 1 OP IR Monochrome only No IR cut filter 9 2 OP RED Monochrome only Red filter ...

Page 67: ......

Page 68: ...www jai com Europe Middle East Africa Phone 45 4457 8888 Fax 45 4491 8880 Asia Pacific Phone 81 45 440 0154 Fax 81 45 440 0166 Americas Phone Toll Free 1 800 445 5444 Phone 1 408 383 0301 ...

Reviews: