Version: 3.1.0
59
position (As long as the robot isn't colliding with anything or the cable isn't being pulled, a larger range
of motion will yield more accurate identification results). Tap [Confirm] to exit;
e.
Tap and hold [Set start position] to make the robot return to the initial position, and tap and hold [Pilot
operation] to confirm that the identification trajectory is safe;
f.
Tap and hold [Set start position] to make the robot return to the initial position. Tap [Start identification],
and it will take 1 minute for the App to display the identification result. If the result is correct, tap
[Confirm], and the app will automatically update the load data; If the result is incorrect, exit and re-enter
the sensor configuration interface for identification.
3.1.2.3 Safety Function
To use the safety function, follow the steps below:
a.
Correctly construct the sensor system to ensure that the sensor is operating properly;
b.
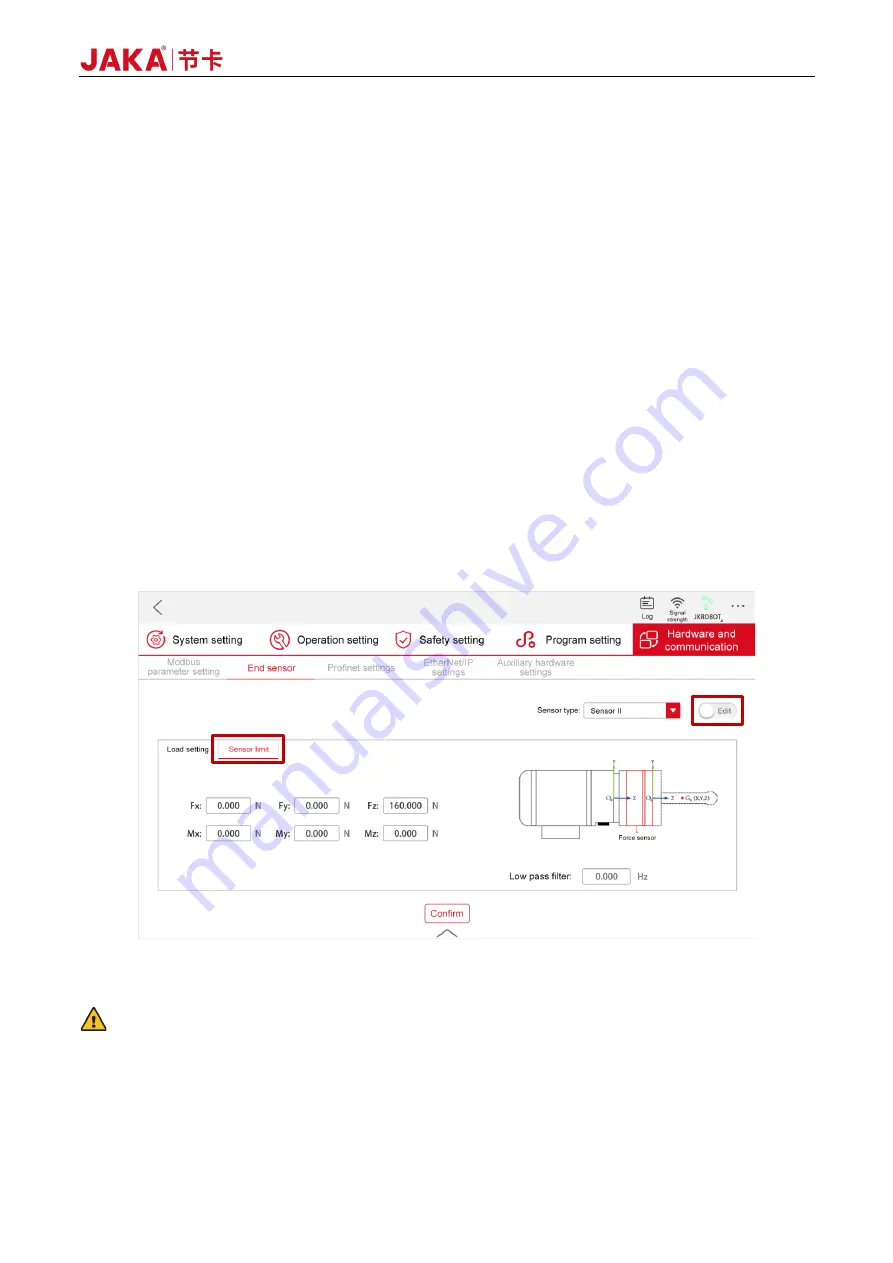
Tap [Settings] at the upper right of the Home page, then tap [Hardware and communication] → [End
sensor] → [Sensor limit] to enter the load setting interface, and change the toggle switch status to [Edit]
(See Figure 3-10);
c.
Set the maximum allowable safety force in the [Sensor limit] tab. During the motion of the robot, if the
absolute value of the force on the end of the sensor is greater than this set value, the robot will stop
immediately to avoid danger or property loss. If you set it to 0, it indicates no limit. Unless specified
differently, it's recommended to set the safety force value at 80% of the sensor's range;
Figure 3-10 JAKA Zu Se Safety Function Settings
d.
Tap [Confirm] and change the toggle switch status to [Run].
CAUTION:
Sensor limit is not a part of the robot's standard safety function. It is only effective when using the traction
teaching function for the end sensor, the constant force compliance function, and the velocity compliance
control function.
Summary of Contents for Zu Series
Page 1: ...JAKA ROBOTICS Force Control Products JAKA Se and JAKA Sp...
Page 3: ......
Page 4: ......
Page 17: ...Version 3 1 0 13 M3 2 0 M4 4 0 M5 8 0 M6 13 0 M8 35 0...
Page 41: ...Version 3 1 0 37 Figure 2 36 Installation and Dimensions of the Force Sensor Indicator light...
Page 61: ...Version 3 1 0 57 Figure 3 8 Force Display Interface of the App...
Page 75: ...Version 3 1 0 71 Figure 3 19 Force Display Interface of the App...
Page 79: ...Version 3 1 0 75 Figure 3 21 Collision Detection Function Settings of JAKA Zu Sp...


