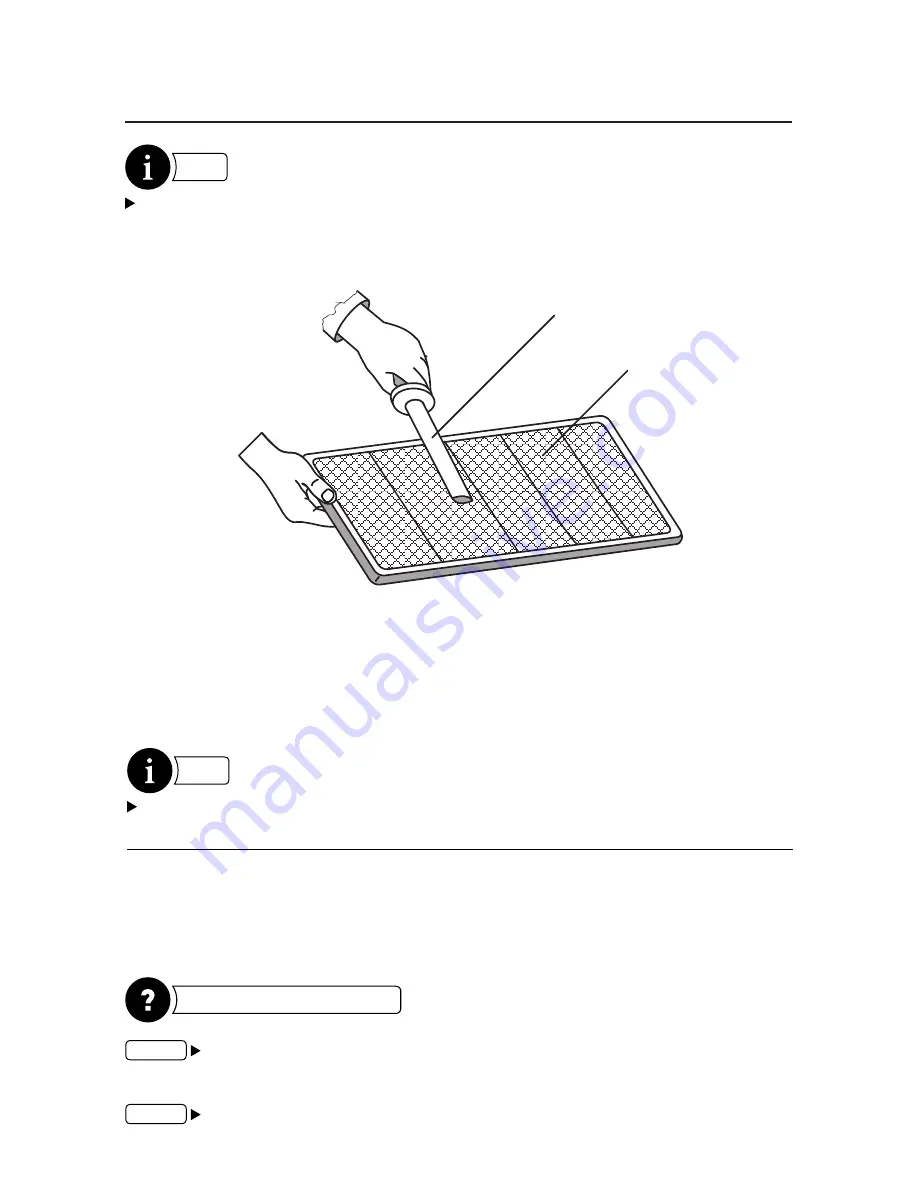
background image

Maintenance

8

Filter

Vacuum Cleaner

Clean  the  filter  with  a  vacuum  cleaner.  To  remove  dense  dust  build-ups,  prepare 

a  solution  with  cold  water  and  natural  detergent or soap powder and submerge the 

filter  in  the  solution.  Later  pull  out  the  filter  from  the  solution  and  leave  it  to  dry.  In  any 

case, do not scrub or apply force on the filter material. After it is completely dry, mount the 

filter  to  the  unit,  close  the  service  door  and  tighten the screws thoroughly.

NOTE 

JAKKA  Controllers  for  this


u

nits have a preset timer to monitor filter occupancy 

a

ccording 

to  factory  set  timer

.


Re

mote  controller  informs  the  user  to  check  the  filters.  After  the 

filters are cleaned by the


user, filter warning alarm must be reset.

NOTE 

It may be 

handy

 to keep 

spare

 clean 

and dry 

filters 

for quick r

eplace

ment


of

 dirty

 filters to 

minimize unit downtime for filter maintenance.

Exchanger

 Maintenance

For best performance, c

lean up the air 

exchanger


periodically.

If the filters are maintained regularly, clean exchanger at least once in every two years.

STEP 1

  To open the service 

cover that is located on the bottom side of unit

unscrew and 

remove out 4 screws 

that secure the heat recovery exchanger service cover

.

STEP 2


While performing removal of service cover make sure heat recovery exchanger 

does not fall down.

HOW TO ACCESS 

EXCHANGER


Summary of Contents for JRH/700

Page 1: ...JAKKA heat recovery units JRH73 Series User s Manual ...

Page 2: ...Contents Safety 1 Control List 2 Components 3 Dimensions 3 Installation 4 Maintenance 7 Technical specification 3 Troubleshooting 10 ...

Page 3: ...the fresh outside air by a duct heater etc Select a position for introducing the outside air where no exhaust or combustion gases will be sucked into the fresh air duct and where it will not be covered by snow Failure to ensure a supply of air can result in producing a state of Oxygen deficiency inside the room Select an adequately sturdy position for installing the product and install it properly...

Page 4: ...ure the drain hose is connected and check for any blockages through the drain line If needed clean it 06 Please check that the duct dimensions used in the duct system are correct and of the same dimension of the units duct connection If wrong correct it with appropriate one 07 Make sure electrical connections are done as it is described in this manual Make necessary corrections if there is any fau...

Page 5: ...r Power W 2x135 2x219 2x278 2x656 2x540 2x560 2x650 2x920 Maximum Current A 2x0 60 2x0 90 2x1 20 2x1 45 2x2 30 2x2 40 2x2 70 2x1 90 1 It is measured when external static pressure is 0 Pa 2 Sound level data are measured at 250 Hz and 1 5 m away from the unit s bottom 3 The filter class is specified according to EN779 2012 standard Units 700 1200 1500 2000 3000 4000 5000 6000 Working Range 12 C 46 C...

Page 6: ...out referring to the Installation and Operational Manual Check that the ground wire is securely connected Connect a fuse of specified capacity Do not install the unit remote controller and cable within approximately 3 meters from strong electromagnetic wave radiators CAUTION Anchor bolt provided by user Duct Elbow To prevent rain water from entering into the duct system EA exhaust air outlet SA Su...

Page 7: ...it are made of ABS material hence do not need additional insulation After connecting the unit make sure that there is no leakage between the duct connections of the unit and the duct Use a duct tape where necessary 5 SERVICE AREA SERVICE AREA A A MODEL DIMENSIONS A mm JRH73 700 355 1200 410 1500 460 2000 510 3000 560 4000 600 5000 600 6000 660 ...

Page 8: ...h Air Alternative Air Outlet Alternative Air Outlet Air Inlet Return Air or Outside Air Air Outlet Exhaust Air or Fresh Air Air Inlet Return Air or Outside Air Air Outlet Exhaust Air or Fresh Air Alternate Air Outlet Alternate Air Outlet RIGHT HAND SIDE INSTALLATION LEFT HAND SIDE INSTALLATION CAUTION Install the drain plug on the side of the fresh air ...

Page 9: ...od junction of the ducts 2 Fit the ducts securely into the duct connection flanges and wind Aluminum tape to prevent air leakages 3 Suspend the ducts from the ceiling so that their weight will not be applied to the unit 4 The outdoor ducts must be covered with heat insulating material in order to prevent forming of condensation CAUTION Do not install the ducts as shown on the following figures Doi...

Page 10: ...g Follow proper lockout tagout procedures to ensure the equipment cannot be inadvertently energized Secure drive sheaves to ensure rotor cannot freewheel Failure to secure drive sheaves or disconnect power before servicing could result in death or serious injury If there is a heater wait for the heater to cool WARNING STEP 1 To open the service door remove out 4 screws on the service cover STEP 2 ...

Page 11: ...o factory set timer Remote controller informs the user to check the filters After the filters are cleaned by the user filter warning alarm must be reset NOTE It may be handy to keep spare clean and dry filters for quick replacement of dirty filters to minimize unit downtime for filter maintenance Exchanger Maintenance For best performance clean up the air exchanger periodically If the filters are ...

Page 12: ...powder if need be Leave it to dry after cleaning and mount it to the unit after it is completely dry Tighten the service cover screws thoroughly and make sure the heat recovery exchanger does not fall down NOTE Maximum mass of the exchanger is 22 kg Heat recovery exchanger Clean with hot water or steam ...

Page 13: ...a Filters clogged or dirty a Change or clean filters b Air duct is clogged b Check the air ducts c Channel connections are incomplete c Check the duct system for leaks and complete the connections HIGH AIR FLOW a Channel connections are incomplete a Check the duct system for leaks and complete the connections b Supply voltage is low b Measure the current drawn by the motor against overloading c Gr...

Page 14: ...For Troubleshouting Please Contact Boulevard Zoran Djindjic 80 11070 Novi Beograd Tel 381 11 2600 901 Fax 381 11 2600 906 www jakkagroup com jakkagroup jakkagroup com ...

Reviews: