Installation
CAUTION
Control the strength of the bolts before installation.
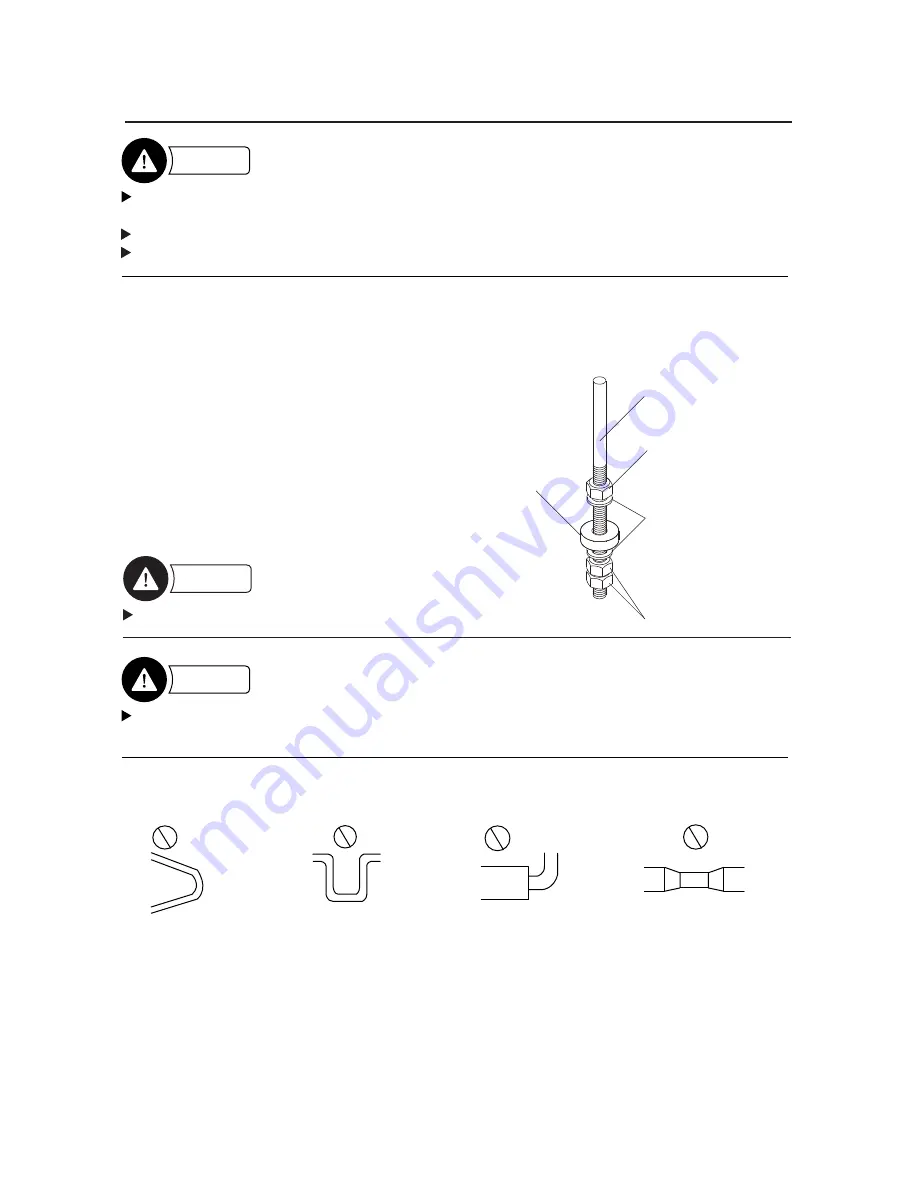
Hang the rubber anti-vibration pad to the bolt and balance the unit so that it remain horizontally.
Make sure the unit is attached securely with a lock nut.
Anti-vibration pad
(vibration absorber)
Bolt (M10 or M12)
Lock nut
Nut
Washer
The distribution ducts should be connected to the unit through rigid or semi flexible ducts
in order to avoid abnormal sounds and vibration. Flexible ducts may also be used ensuring
that the structure of the duct does not block the air stream and cause vibration. The unit is
equipped with pre-drilled duct flanges made of ABS for distribution duct connections.
1
Set the supplied ABS-made duct adapter to each duct connection to assure a good junction
of the ducts.
2
Fit the ducts securely into the duct connection flanges and wind Aluminum tape
to prevent
air leakages.
3
Suspend the ducts from the ceiling so that their weight will not be applied to the unit.
4
The outdoor ducts must be covered with heat insulating material in order to prevent forming
of condensation.
CAUTION
Do not install the ducts as shown on the following figures. Doing so will increase the pressure
drop, decrease the air volume from the unit and give rise to abnormal sounds.
Extremely
sharp bends
Multiple
Bends
Bends right next
to the outlet.
Sudden contraction and/or
expansions in duct diameter
CAUTION
Before connecting the ducts, check that no sawdust or any other foreign material (scaps of
paper, vinyl, building material etc.) exist in the ducts.
Make sure service doors open easily and fan/ filter can be pulled out.
Pay attention to the warnings before connecting the units to ducts.
6
Preparation of roof bolts


