2
1
2
1
3
4
5
6
7
Avete acquistato un modello RTR. Ciò significa che il veicolo è in gran parte pronto per
l‘uso immediato. Tuttavia, è essenziale controllare che il modello non presenti possibili
danni meccanici o elettrici o difetti prima e dopo ogni utilizzo. È inoltre necessario
verificare la libertà di movimento di tutti gli elementi mobili e la tenuta dei collegamenti
a vite.
You have purchased a RTR model, which means it should be ready for immediate use after
charging all batteries. You need to check the car, electronics and all plastic parts after each use to
make sure no parts are damaged. Also all the moving parts must be checked for their clearance,
bolts and screws that they are tight.
Primi passi
Getting Started
Attenzione!
Dopo ogni carica e importante di: Scollegare sempre subito la batteria dal
caricatore ed il caricatore dalla rete elettrica. Se dopo la carica si lascia
collegato l’uno o l’altro può causare danni alla batteria, al caricatore o
addirittura alla rete elettrica (pericolo di incendio).
Danger!
Always disconnect the battery from the charger immediately after charging. Al-
ways disconnect the charger from the power supply immediately after discon-
necting the battery. Inserting the rechargeable battery or charger after charging
will result in damage to the battery, charger or the power supply (fire hazard).
Attenzione: Applicabile solo per batterie LiPo
Caricare solo batterie adeguate per questo caricatore. Batterie adeguate sono batterie di litio poli-
mero con massimo 2 celle, massimo 7.4V tensione nominale e massimo 5000mAh. La batteria deve
avere un collegamento di bilanciamento del tipo JST-XH. Il caricamento di batterie inadatte può
causare danni al caricabatteria e le batterie. Pericolo di incendio! Il collegamento di bilanciamento
del caricabatteria non deve mai essere risaldato o modificato!
Caution: Only applicable for LiPo batteries
Only charge suitable battery‘s with this charger. Suitable battery‘s are lithium polymer battery‘s with
max. 2 cells, max. 7.4 V nominal voltage and max. 5000mAh. The battery must have a balancer
plug type JST-XH. The charging of unsuitable battery‘s can cause damage to the charger and the
battery‘s. Fire Hazard! The balancer plug of the charger is not allowed to get altered or soldered to
a different balancer plug type!
Attenzione: Applicabile solo per batterie NiMh
Caricare solo batterie adeguate per questo caricatore. Batterie adeguate sono batterie di Nickel me-
tal hydride con massimo 6 celle, massimo 7.2V tensione nominale e massimo 2000mAh. La batteria
deve avere un collegamento di bilanciamento del tipo JST-XH. Il caricamento di batterie inadatte
può causare danni al caricabatteria e le batterie. Pericolo di incendio! Il collegamento di bilancia-
mento del caricabatteria non deve mai essere risaldato o modificato!
Caution: Only applicable for NiMh batteries
Only charge suitable battery‘s with this charger. Suitable battery‘s are Nickel metal hydride battery‘s
with max. 6 cells, max. 7,2 V nominal voltage and max. 2000mAh. The battery must have a tamiya
plug. The charging of unsuitable battery‘s can cause damage to the charger and the battery‘s.
Fire Hazard! The charging connection of the charger is not allowed to get altered or soldered to a
different balancer plug type!
IT -
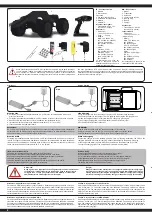
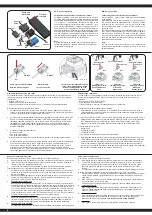
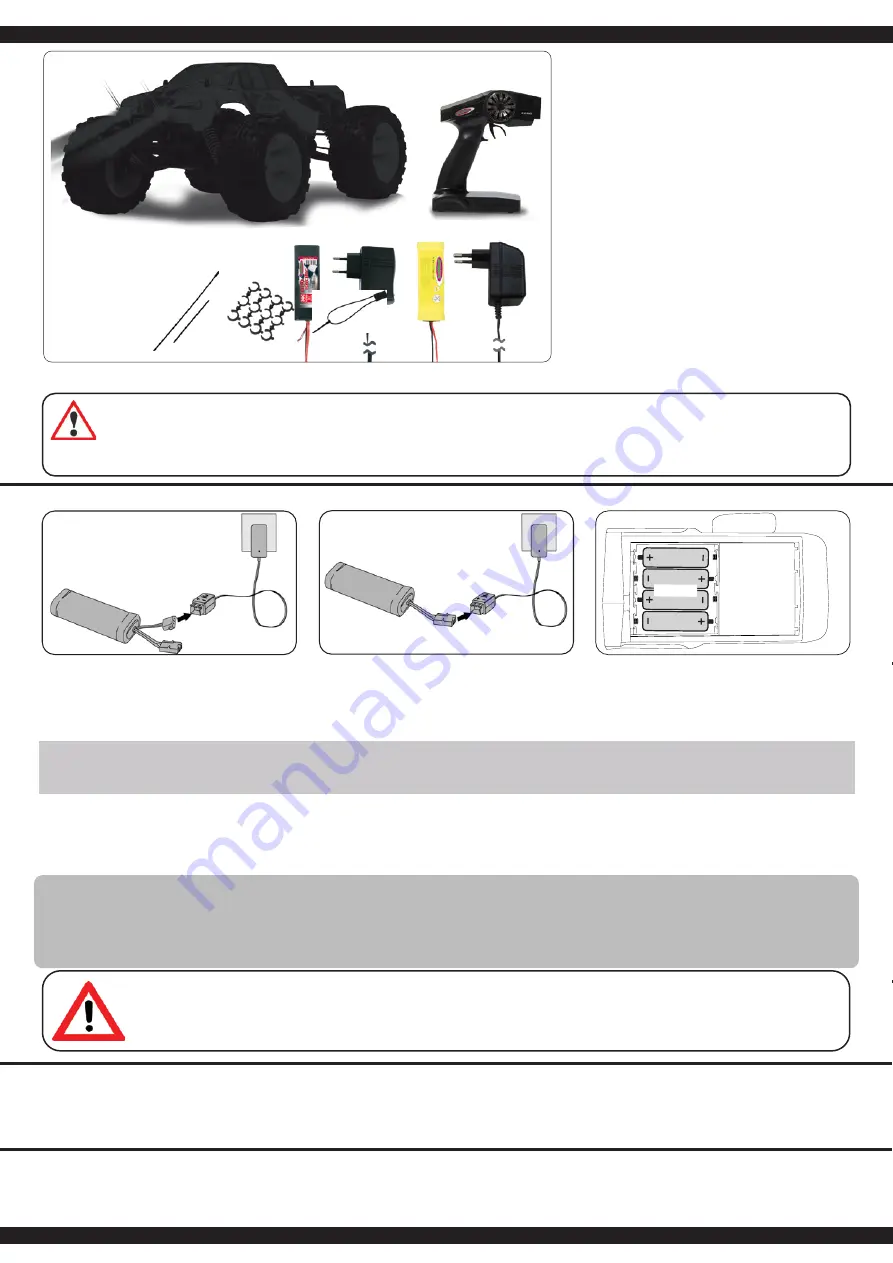
Contenuto del kit:
1. Modello
2. Telecomando
3. Antenna
4. Clip per precarico molla
5. Connettore di collegamento
6. Batteria
7. Caricatore
Accessori consigliati:
• Trasmittente: 4 x AA 1,5V,
No. 140267 (4 pezzi)
Dati tecnici:
• Dimensioni:
~ 445 x 335 x 203 mm
• Peso:
2200 g
• Batteria:
NiMh 7,2 V 2000 mAh
(No. 053360, No. 503853)
LiPo 7,4 V 5000mAh
(No. 053361 / 053362 /
503854)
• Motor:
Venti 600, 270 W
(No. 053360 / 053361)
Venti 600, 290 W
(No. 503853 / 503854)
3650, 420 W 3200 KV
(No. 053362)
Le informazioni non sono ga-
rantite. Ci riserviamo il diritto di
apportare modifiche tecniche e la
possibile presenza di errori
GB
- Box contents
1. Model
2. Transmitter
3. Antennas
4. clip for spring tension
5. Binding Plug
6. Battery
7. Charger
Accessories:
• Transmitter: 4 x AA 1,5V,
No. 140267 (4 pieces)
Technical data:
• Dimensions:
~ 445 x 335 x 203 mm
• Weight: 2200 g
• Battery:
NiMh 7,2 V 2000 mAh
(No. 053360)
(Nr. 503853 Tiger)
LiPo 7,4 V 5000mAh
(No. 053361 / 053362)
(Nr. 503854 Tiger)
• Motor:
Venti 600, 290 W (Tiger)
270 W
(No. 053360 / 053361)
420 W 3200 KV
(No. 053362)
No responsibility is taken for the
correctness of this information.
Informazioni relative alle pile:
Le batterie non ricaricabili non devono essere caricate! Non aprire!
Non gettare nel fuoco! Non usare contemporaneamente pile nuove e pile usate!
Non usare contemporaneamente pile alcaline, standard (zinco-carbone) e ricaricabili!
Le batterie ricaricabili devono essere rimosse dal giocattolo!
Le batterie ricaricabili possono essere ricaricate solo sotto la supervisione di un adulto!
I morsetti di collegamento don devono essere cortocircuitati!
Battery warning:
Non-rechargeable batteries are not to be recharged! Do not open!
Do not dispose of in fire! Do not mix old and new batteries!
Do not mix alkaline batteries, standard (carbon-zinc) or rechargeable batteries!
Rechargeable batteries are to be removed from the toy before being charged!
Rechargeable batteries are only to be charged under adult supervision!
The supply terminals are not to be short-circuited!
4x AA
Ricarica LiPo
● Collegare il caricabatterie all’alimentazione CA. Il LED verde sul caricabatterie indica che è
pronto per la ricarica.
● Collegare il caricabatterie alla batteria. Il LED si illumina in rosso durante il processo di ricarica.
● Quando il LED cambia di nuovo colore, la batteria è completamente carica.
● Il processo di carica completo con batteria scarica dura ca. 5 ~ 7 ore (LiPo)
● Inserire 4 batterie AA nella trasmittente
Attenzione:
Se il LED inizia a lampeggiare quando la batteria è collegata, scollegarla Batteria immediatamente
dal caricatore. Un LED lampeggiante segnala una batteria difettosa. Le batterie difettose non devo-
no essere caricate, c‘è un aumentato rischio di incendio!
Ricarica NiMh
Collegare il caricabatterie all’alimentazione CA. Il LED sul caricabatterie indica che è pronto per la
ricarica. Collegare il caricabatterie alla batteria. Se la spina del caricabatterie e la spina della batte-
ria dell‘unità non corrispondono, il modello viene fornito con un adattatore di ricarica. l processo di
carica completo con batteria scarica dura ca. 6 - 8 ore (NiMh)
LiPo Charging
● Plug the charger into the mains socket. The green LED indicates ready to charge.
● Connect the battery to the charger. The LED lights up red during the charging process.
● When the charging process is complete, the LED changes to green again.
● The average charging time of the empty battery is about 5-7 hours (LiPo)
● Put 4 AA Batteries into the Transmitter
WARNING:
If the LED starts to flash when you connect the battery, disconnect the
Battery immediately from the charger. A fl ashing LED signals a defective battery.
Defective batteries must not be charged, there is an increased risk of fire!
NiMh Ladevorgang
Connect the charger to the AC Network and plug it into a grounding receptable. The LED on the
charger will indicate it is ready for charging. Connect the charger to the battery. If the plug
of the charger and battery do not match, then you will find a connection lead in your box.
The average charging time of the empty battery is about 6-8 hours (NiMh)
LiPo
NiMh


