1
2 3
4
4x AA
1
2
33
IT
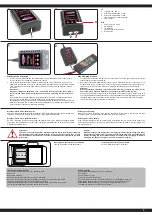
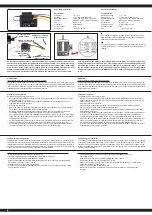
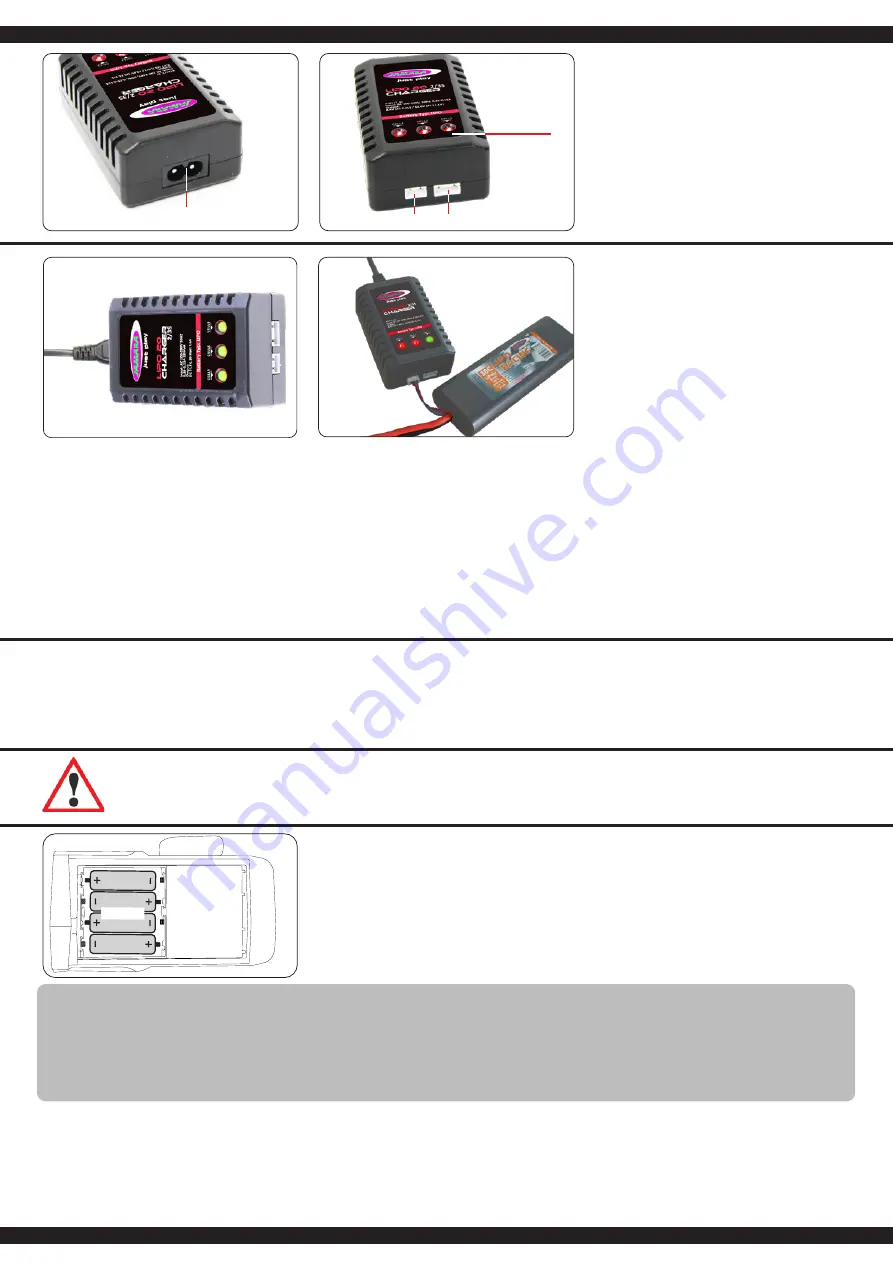
1. Ingresso 100 - 240 V
2. Attacchi di bolanciatore 2 cella
3. Attacchi di bolanciatore 3 cella
(Non richiesto per questo modello)
4. LED di stato
GB
1. Power Slot 100 - 240 V
2. 2S Balancer
3. 3S Balancer
(Not required for this model)
4. Status LEDs
LiPo Processo di ricarica
1. Inserire il cavo di alimentazione del caricabatterie in una presa adatta. I LED si illuminano di
verde e indicano che la batteria è pronta per la ricarica
2. Ora collega la batteria vuota al caricatore. Batterie 2S da 7,4V al connettore a 3 poli o 11,1V
batterie 3S al connettore a 4 poli. Non usare la forza e fare attenzione a non invertire la polarità.
I LED diventeranno rossi dopo pochi secondi, indicando che le celle della batteria si stanno
caricando.
Attenzione!
Quando si collega una batteria 2S, solo i primi 2 LED (Cell1-2) diventano rossi, il LED 3
(Cell 3) rimane verde. Quando si collega una batteria 3S, tutti i LED (Cell1-3) diventano
rossi.
Non appena una cella della batteria è completamente carica, il LED corrispondente diventa
verde. Poiché le celle sono caricate individualmente, è possibile che una cella sia
completamente carica prima delle altre, a seconda dello stato della batteria. Lasciare sempre la
batteria sul caricatore fino a quando tutte le celle collegate sono completamente cariche (verde)
per permettere al caricatore di bilanciare la batteria.
LiPo Charging process
1. Plug the power cord of the charger into a suitable socket. The LEDS light up green and indicate
that the charger is ready for charging.
2. Now connect the empty battery to the charger. 7.4V 2S batteries to the 3 pin connector or 11.1V
3S batteries to the 4 pin connector. Do not use force and pay attention to reverse polarity. The
LEDs change to red after a few seconds and indicate that the battery cells are charging.
Attention:
When connecting a 2S battery, only the first 2 LEDs (Cell1-2) change to red, LED 3 (Cell 3)
will remain green. When 3S batteries are connected, all LEDs are red (Cell1-3).
As soon as a the battery cell is full, the corresponding LED changes to green. Because the cells
are charged individually in a balanced way, it is possible that one cell is fully charged earlier than
the others. Always leave the battery on the charger until all connected cells are fully charged
(green) to allow the charger to balance your battery
Riconoscimento di una batteria carica.
Quando si collega una batteria carica al caricatore, i LED diventeranno rossi per alcuni secondi e poi
torneranno verdi. Questo significa che la batteria è già completamente carica.
Riconoscimento di una batteria difettosa.
Se i LED rimangono verdi quando si collega una batteria vuota, c‘è un difetto nella batteria (difetto
della cella o scarica profonda). In questo caso, scollegare immediatamente la batteria dal caricatore
e utilizzare un‘altra batteria.
Detecting a full battery.
When you connect a full battery to the charger, the LEDs will turn red for a few seconds and then
turn green again. This means that the battery is already fully charged.
Detecting a defective battery.
If the LEDs remain green when an empty battery is connected, there is a defect in the battery (cell
defect or deep discharge). In this case, immediately disconnect the battery from the charger and
use another battery.
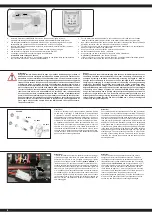
Montaggio delle batterie nel trasmettitore
Inserire 4 batterie AA nella trasmittente.
Inserting batteries into the transmitter
Put 4 AA Batteries into the Transmitter
Informazioni relative alle pile:
Le batterie non ricaricabili non devono essere caricate!
Non aprire!
Non gettare nel fuoco!
Non usare contemporaneamente pile nuove e pile usate!
Non usare contemporaneamente pile alcaline, standard (zinco-carbone) e ricaricabili!
Le batterie ricaricabili devono essere rimosse dal giocattolo!
Le batterie ricaricabili possono essere ricaricate solo sotto la supervisione di un adulto!
I morsetti di collegamento don devono essere cortocircuitati!
Battery warning:
Non-rechargeable batteries are not to be recharged!
Do not open!
Do not dispose of in fire!
Do not mix old and new batteries!
Do not mix alkaline batteries, standard (carbon-zinc) or rechargeable batteries!
Rechargeable batteries are to be removed from the toy before being charged!
Rechargeable batteries are only to be charged under adult supervision!
The supply terminals are not to be short-circuited!
Attenzione!
Dopo ogni carica e importante di: Scollegare sempre subito la batteria dal caricatore
ed il caricatore dalla rete elettrica. Se dopo la carica si lascia collegato l’uno o l’altro
può causare danni alla batteria, al caricatore o addirittura alla rete elettrica (pericolo
di incendio).
Danger!
Always disconnect the battery from the charger immediately after charging. Always
disconnect the charger from the power supply immediately after disconnecting the
battery. Inserting the rechargeable battery or charger after charging will result in
damage to the battery, charger or the power supply (fire hazard).
Summary of Contents for Monstertruck Crossmo EP
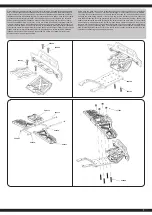
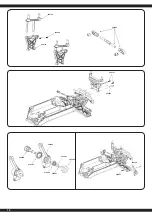
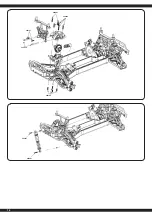
Page 8: ...506135 506156 506185 505023 506155 506157 8...
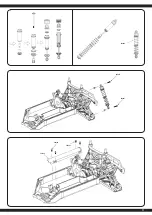
Page 9: ...9 506112 059081 506145 059082 059081 506145 506147...
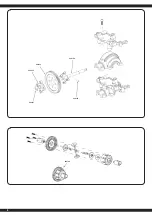
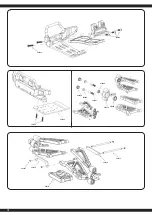
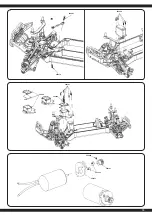
Page 11: ...11 505064 505057 505053 059081 506149 506120...
Page 13: ...13 506121 506121 506150 506145 506125 506125 079996 506133 505076 059078 059078...
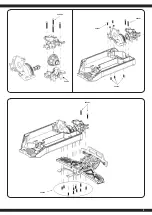
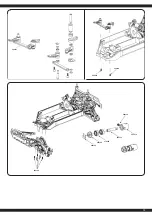
Page 14: ...505057 059081 059081 059082 506147 505054 506145 14...
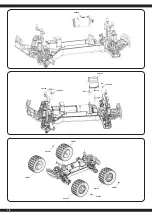
Page 15: ...15 505060 506141 505053 506131 059079 059081 506147 506118 059082 505058...
Page 16: ...505060 506120 506120 505060 059109 503581 505187 503581 505187 503581 505187 505187 505058 16...
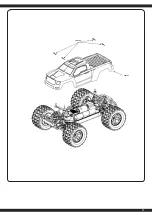
Page 17: ...17 506143 506151...
Page 18: ...18...


