9
James Loudspeaker | 535 Airpark Road, Napa, CA94558 | 707.265.6343 | www.JamesLoudspeaker.com
®
2017106
SPL5
FLAT
MOUNTING BRACKET
8
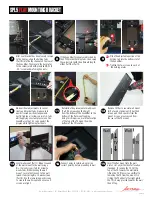
- Slide the adjustable portion of the
holding tab into the bottom slot of
the SoundBar.
- Tighten the two screws on each of
the holding plates
A
B
A
B
7
If the SoundBar terminals are blocked by
the SPL5 bracket holding tabs, then swap
the swivel joint with the alternate length,
either Part B or Part C.
11
10
Remove tilt bar to convert wall mount
for flat use by removing tilt bar,the 4
screws and the 4 spacers from the
mount. Screws are accessed from
the rear of the TV mount.
Determine the placement of wall mount
(Part J) by measuring the height
from the bottom of the SoundBar to the
bottom of the flat mount landing.
Using this dimension, mark the location
of the top of the TV mount from the
bottom of the TV location.
12
Connect wires to terminals, ensuring
correct polarity, before mounting to wall.
Insert the flat mount into the wall
plate’s slot, adjust horizontal location
if needed. To remove the TV, tilt the
top of the TV towards the wall while
lifting the TV. If there is any difficulty
removing the TV from the mount, try
sliding the TV either left or right while
the TV is being pressed towards the wall
then lift up.
Level wall mount (Part J). Mount one end
of the wall mount to the wall using a
No. 12 wood screw (Part K). Screw to
wood studs. While leveling the wall
mount, secure the free end to the wall
(wood studs) using No. 12 wood screws
(Part K). Use the remaining wood screws
to secure the wall mount and ensure all
screws are tight.
14
13
15
After your bracket has been loosely secured
to the display, align the holding tabs
(Part D) into the top channel on the rear of
the SoundBar. Then secure the bar plates
to the swivel joints with provided UNC 1/4
- 20” screw and matching hex nuts.
Make all final adjustments to swivel
joints and bracket tabs, make sure to
avoid stressed positions/alignments.
Lastly, tighten all screws on joints & tabs
while applying constant pressure on the
SoundBar so that it’s snug against the
display while tightening fasteners.


