background image

14

OPERATING GUIDELINES

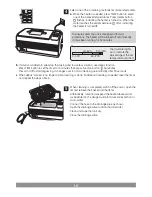
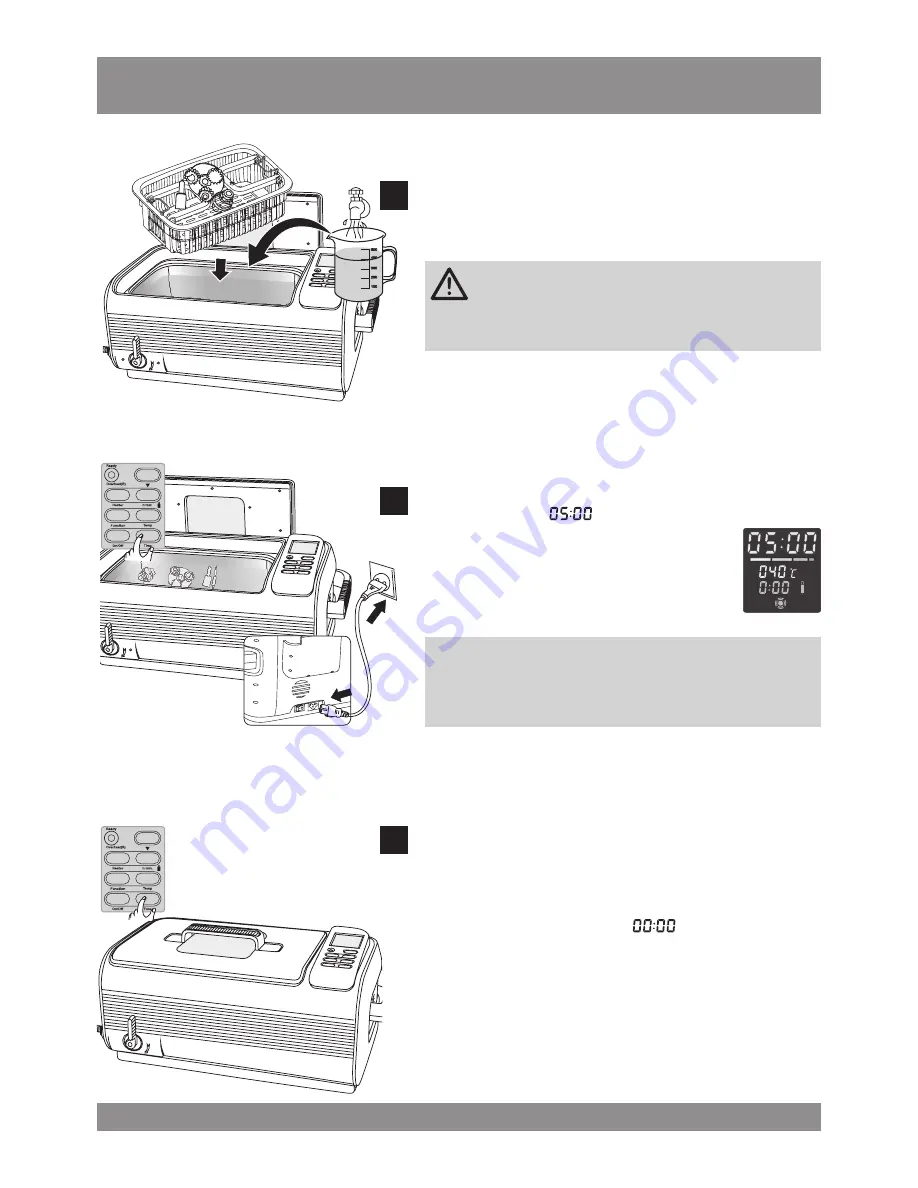
Remove the cover and put it on the cover holder vertically. 

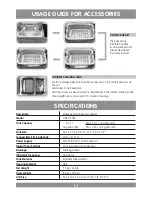
Put items in the basket then put them in the cleaning tank. 

Add water to a level between “MIN” and “MAX” and above 

the area to be cleaned.

 If the unit is turned on without water, ultrasonic  

 energy will not be absorbed. This model also has 

high power. Once on for over 15 seconds, it may damage 

the unit or severely reduce the life of the unit.

Connect the power cord to an outlet and turn the switch on. 

LED display shows 

. This is the most common timer 

setting and working state. If the timer needs 

to be adjusted, press Time button and button. 

The timer can be set between 1 to 30 minutes. 

Common cleaning times are 5, 10 or 15 minutes.

Prolonged cleaning time may result in:

a. Loosening of the screws if used.

b. Increasing pre-existing cracks.

c. Peeling of coating which was already separated.

Press On/Off button to start cleaning. During cleaning, 

buzzing sound can be heard from the cleaning tank, 

indicating that the cleaning is underway. Closing the lid will 

reduce the noise level. 
The digital timer will count down to show the remaining 

cleaning time. When it displays 

, the cleaning is done. 

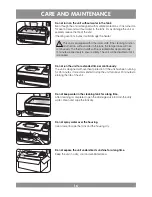
To stop cleaning at any time, press On/Off button. The unit 

is designed with overheating protection to avoid extended 

and continuous operation for too long. When the red light is 

on, the unit will not turn on even if it is forced to. The unit will 

be idled for about 20 minutes and can be restarted after 

the green light comes on.

500

400

300

200

100

1

2

3

Summary of Contents for ULTRA 9020

Page 1: ...rature thermometer degas and solution usage timer Independent control circuit 40 higher efficiency not susceptible to for each ultrasonic transducer interference more durable Multiple circuit protecto...

Page 2: ...4 Suspendible basket to drain water conveniently 2 x industrial grade ultrasonic transducers 2 x 55 W 110 W 2 x ceramic heaters 2 x 80 W 160 W 3 x colour LED display 1 to 30 minute full range timer 5...

Page 3: ...perate the device unattended Follow the manual to operate the device Do not use components unapproved by the manufacturer When removing the power cord from the socket grab the power plug not the cord...

Page 4: ...fore servicing or cleaning To reduce the risk of electrical shock do not put the appliance in water or other liquid Do not place or store appliance where it can fall or be pulled into a tub or sink Al...

Page 5: ...easily remove the debris 3 Biology Chemical Laboratories Labs can use ultrasonic cleaners to clean test tubes and other glass or metal containers to remove residual chemicals and debris that can affec...

Page 6: ...raditional methods 9 Special Education Institutes Kindergartens Speech therapy tools or small toys that are reused need to be cleaned to prevent the growth and spread of bacteria Ultrasonic cleaning c...

Page 7: ...ands shavers or razors Ultrasonic cleaning can clean the debris in the crevices It is quick and convenient This model has a large tank When cleaning small items the Indirect Cleaning method can be use...

Page 8: ...gears valves tools fuel injectors etc BABY ITEMS Toys baby items speech therapy tools etc SILVER COPPER OR BRASS Silverware silver copper or brass decorations etc LAB ITEMS Test tubes beakers flasks...

Page 9: ...e pipe fitting E Drainage valve handle F Control panel G Handles H Power switch I Power socket J Cover holder Indirect cleaning tank Size 21 7x18 5x7 4 cm Capacity 2 1 L Internal size 19 8x16 6x7 35 c...

Page 10: ...8 PRODUCT EXPLODED VIEW...

Page 11: ...l valve Standard part 23 Bracket ABS 24 Valve handle ABS 25 Elbow ABS 26 Inner tank ABS 27 Bottom cover ABS 28 Power PCB 1 94Vo 29 Power PCB 2 94Vo 30 Right cover ABS 31 Right down handle ABS 32 Right...

Page 12: ...ater button again dims indicating the heater is turned off 10 Working Status Green Ready G Normal working status ready to use Red Overheat R Under overheat protection 20 minutes or more of waiting tim...

Page 13: ...ton to select the temperature in the following sequence 40 C or 104 F 45 C or 113 F 50 C or 122 F 55 C or 131 F 60 C or 140 F 17 Timer Quick Set Button Press Time button LED display shows Each pressin...

Page 14: ...ower switch on Press Time button to set the timer to 10 minutes Press On Off button to start cleaning Ultrasonic waves will penetrate the container and clean the items NOTE Optional stainless steel in...

Page 15: ...r brass cartridges 3 Turn the power switch on Press Temp button to set the water temperature to 50 C 122 F Press Heater button to turn on the heater flashes Close the lid LED lights up indicating the...

Page 16: ...utes Common cleaning times are 5 10 or 15 minutes Prolonged cleaning time may result in a Loosening of the screws if used b Increasing pre existing cracks c Peeling of coating which was already separa...

Page 17: ...o speed up the mixing and to use less solution use degas function Press TIME button to set the timer to 10 minutes then press Function button illuminates Press On Off to start degassing It changes ove...

Page 18: ...r approximately 15 minutes respectively to ensure safety The unit will be disabled until it is repaired Do not run the unit for extended time or continuously The unit is designed with overheat protect...

Page 19: ...direct cleaning SPECIFICATIONS Description Professional Ultrasonic Cleaner Model ULTRA 9020 Tank Capacity 6 0 L Max 5 0 L 1 3 gallon US 1 6 gallon US Min 3 35 L 0 9 gallon US Tank Size 32 3 x 20 5 x...

Page 20: ...g your unit please call our Returns Department on 44 0 1258 822516 for a RMA Returns Materials Authorisation number Please return your unit in its original packaging along with a covering letter stati...

Reviews: