IS295-20H
J&D Manufacturing • 6200 Hwy 12 • Eau Claire, WI 54701 • 1-800-998-2398 • www.jdmfg.com
Page 2/12
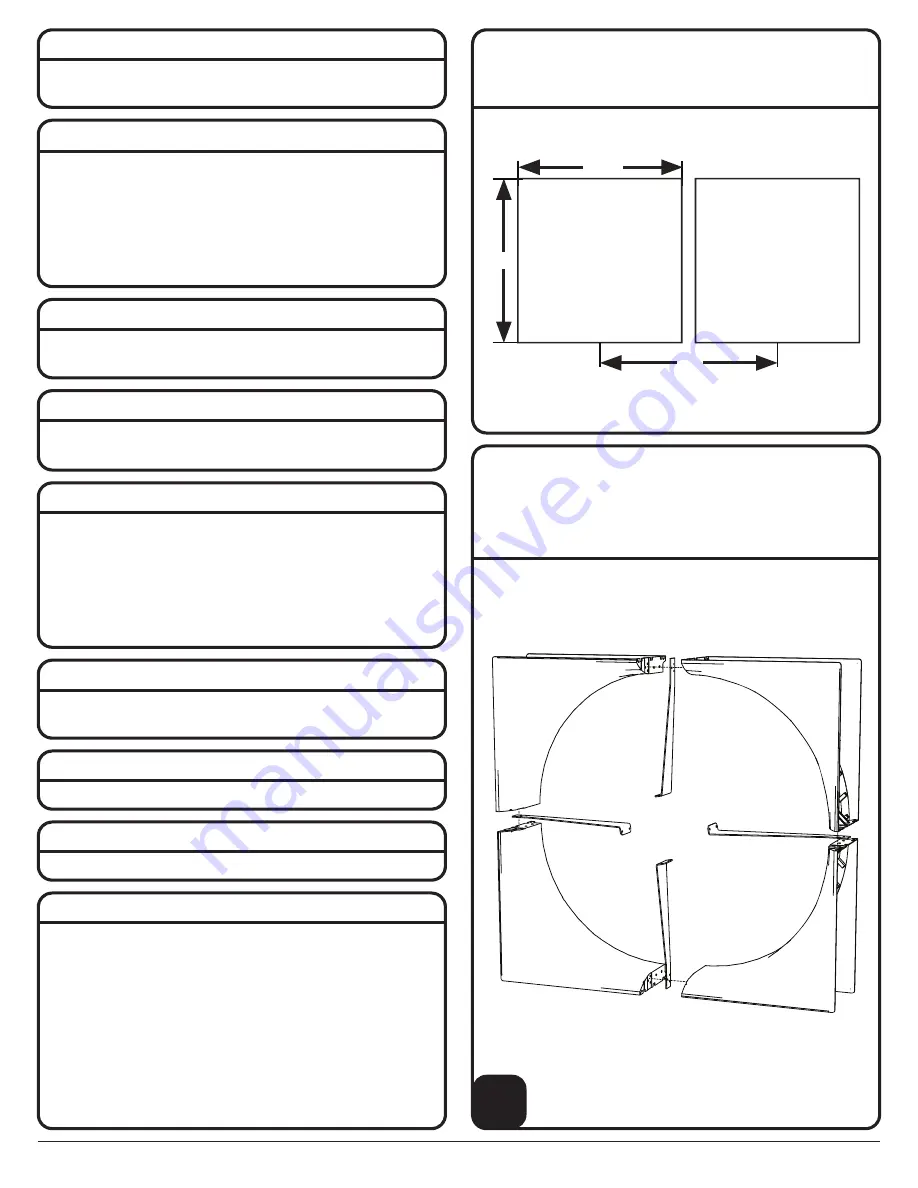
Venturi Assembly:
• Lay out the (4) venturi sections flat on the floor with the curve side of
the sections facing up.
• Assemble the motor mount brackets (flat side down) in-between each
venturi section.
1
Bag 1 (Tools)
- #3 Phillips Bit
- 1/16” Hex Wrench
Bag 2 (Housing)
Bag 2 (Part 1)
- (28) 5/16”-18 x 7/8” Bolts
Bag 2 (Part 2)
- (28) 5/16”-18 Serrated Flange Nuts
Bag 2 (Part 3)
- (24) #14-10 x 2” Screws (Use
#3 Phillips Bit from Bag 1
)
Bag 3 (Motor)
- (8) 3/8”-16 x 3/4“ Bolts
- (8) 3/8” Washers
Bag 9 (Misc. Hardware)
- (2) SS Eyebolts
- (4) SS Serrated Flange Nuts #10-24
- (1) 1/4” x 2” Machine Key
- (4) SS Damper Door Striker Plates
- (4) Damper Door Magnets
- (4) 1/2” OD 1/8” ID Nylon Spacers
- (5) 1¼” OD .38“ ID Nylon Spacer
- (2) SS Damper Door Springs
- (1) Front Guard Plate Hub w/Hardware
- (4) 11” Cable Ties
Bag 6 (Cone Guard)
- (8) 5/16”-18 x 1” Bolts
- (8) 5/16”-18 Serrated Flange Nuts
Bag 7 (Mounting Screws)
- (4) #12-11 x 3½” Screws (Use
#3 Phillips Bit from Bag 1
)
Bag 8 (Motor Guard)
- (10) #12-11 x 5/8” Screws (Use
#3 Phillips Bit from Bag 1
)
Bag 5 (Cone)
Bag 5 (Part 1)
- (50) #14-10 x 2” Screws (Use
#3 Phillips Bit from Bag 1
)
Bag 5 (Part 2)
- (50) 5/16”-18 x 7/8” Bolts
Bag 5 (Part 3)
- (50) 5/16”-18 Serrated Flange Nuts
Bag 4 (Damper Doors)
- (5) #4-40 x 1” Screw
- (5) #4-40 Lock Nuts
Site Requirements:
•
Rough Opening
- 65¼” W x 65¼”H
•
Side-By-Side Recommended OC Dimension
- Minimum 75”
65¼”
65¼”
ROUGH
OPENING
75”
ROUGH
OPENING


