background image

Page 26

Legacy

 Model LRZM Pool/Spa Heater Installation and Operation Manual

 CAUTION

In order to prevent property damage, the heater is 
designed to run only when the 

fi

 lter pump is run-

ning. If the heater does not immediately turn off 
when the pump turns off, turn the heater off at the 
control panel. The heater's pressure switch may 
need adjusting (see Section 7.5)


ATTENTION

Pour éviter les dommages à la propriété, le réchauf-
feur est conçu pour fonctionner seulement lorsque 
la pompe à 

fi

 ltration est en marche. Si le réchauf-

feur ne s'éteint pas immédiatement lorsque vous 
arrêtez la pompe, éteignez le réchauffeur sur le 
panneau de commandes. Le commutateur de pres-
sion du réchauffeur devra peut-être être ajusté (voir 
la Section 7.5).

Once the pool/spa water temperature reaches the 

thermostat setting, the heater will automatically stop 

fi

 ring. As the pool/spa water temperature falls below 

the thermostat setting the heater will once again start 

the heating cycle. 

Rotate the thermostat dial clockwise to increase 

the temperature setting and counterclockwise to 

decrease the setting. It may take several attempts to 

set the thermostat dial to the desired temperature. Be 

sure to use an accurate thermometer to measure water 

temperature. Once the desired temperature setting is 

found, loosen the screw on the Temp-Lok ring and 

rotate the ring until the stop rests against the knob. 

Tighten the screw  to hold the knob in position. This 

will prevent accidental moving of the dial and possible 

overheating of the water.

IMPORTANT:

 The temperature controls cannot 

be calibrated in the 

fi

 eld. If the control is faulty, 

shut down the heater by following the procedures in 

Section 7.3 and have a quali

fi

 ed service technician 

replace the control. DO NOT use the thermostat switch 

to completely shut down the heater.

7.5 

Adjusting the Water Pressure 
Switch


CAUTION

The water pressure switch should be adjusted to 
turn the heater off when the pump is off. Setting the 
switch to close at too low of a 

fl

 ow can damage the 

appliance. Adjust the switch to turn the heater off, 
not on.


 ATTENTION

Le manocontact de pression d’eau doit être réglé 
de façon à ce que l’appareil cesse de fonctionner 
si la pompe s’arrête. Si le manocontact est réglé 
pour se fermer lorsque le débit d’eau est trop faible, 
l’appareil risque de s’endommager. Réglez le mano-
contact pour qu’il arrête l’appareil, et non pour qu’il 
le mette en marche.

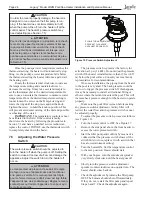
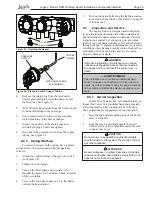
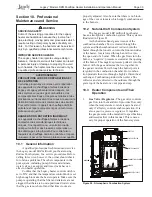
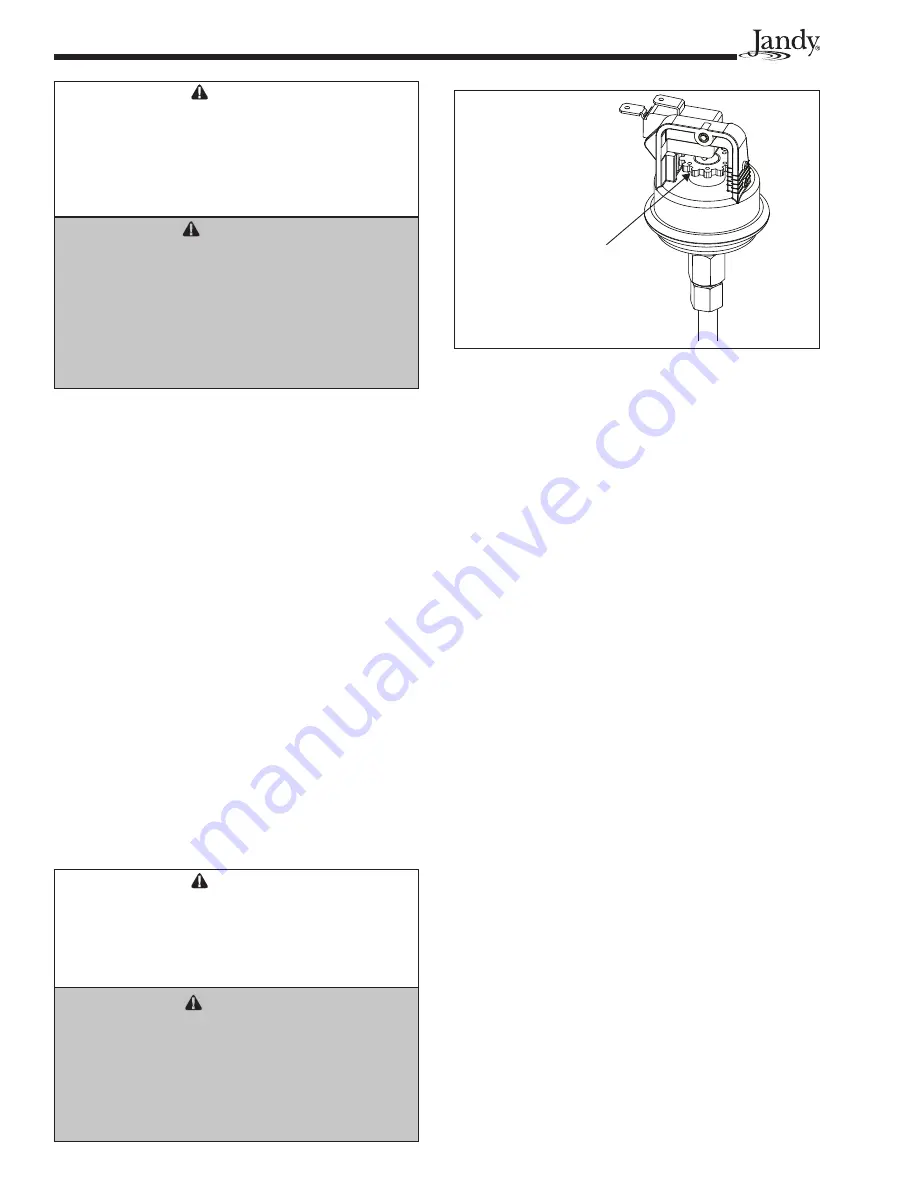
SLOWLY TURN ADJUSTMENT 
SPROCKET CLOCKWISE 
UNTIL HEATER GOES OFF.

Figure 19. Pressure Switch Adjustment

The pressure switch is preset at the factory for 

activation at 2 psi (14 kPa). Do not adjust the pressure 

switch if the heater is installed more than 15 feet (4.57 

m) below the pool surface. Consult your local Jandy 

representative for recommendations.

On some installations, the piping from the heater 

to the pool is very short. The back pressure could be 

too low to trigger the pressure switch. If this happens, 

it may be necessary to install a directional 

fi

 tting or 

elbows where the return line enters the pool. This will 

increase back pressure enough for the heater to operate 

properly.

Make sure the pool 

fi

 lter is clean before making 

any pressure switch adjustment. A dirty 

fi

 lter will 

restrict the water 

fl

 ow and the pressure switch cannot 

be adjusted properly.

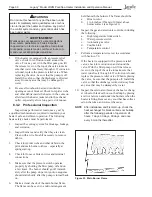
To adjust the pressure switch, proceed as follows 

(see Figure 19).
1. 

Turn the heater control to OFF. See Figure 17.

2. 

Remove the side panel above the front header to 

access the water pressure switch.

3. Start 

the 

fi

 lter pump and con

fi

 rm by means of a 

voltmeter that the pressure switch closes (if the 

switch fails to close, replace it with a switch that 

has a lower minimum setting).

4. 

Turn the heater ON. Set the temperature control 

to the max position. Heater should start.

5.   With your 

fi

 ngers, turn the adjustment sprocket 

very slowly clockwise until the heater goes off. 

6.   Slowly turn the pressure switch adjustment 

sprocket counterclockwise one-quarter turn. The 

heater should come back on.

7.   Check the adjustment by turning the 

fi

 lter pump 

OFF. The burners should shut off immediately. 

If they do not, restart the 

fi

 lter pump and repeat 

Steps 6 and 7. Check the adjustment again.

Summary of Contents for Legacy LRZM

Page 1: ...additional measure of safety Zodiac Pool Systems Inc strongly recommends installation of suitable Carbon Monoxide detectors in the vicinity of this appliance and in any adjacent occupied spaces Improp...

Page 2: ......
Page 3: ...Replacement of Existing Vent System with New Components 14 Section 4 Gas Connections 14 4 1 Gas Supply and Piping 14 4 2 Manifold Pressure 15 4 3 Special Precautions for LP Gas 16 Section 5 Water Conn...

Page 4: ...lot Generator 36 10 4 3 Fusible Link 36 10 4 4 Fireman Switch and External Interlocks 36 10 4 5 Limit Switches 36 10 4 6 Water Pressure Switch 37 10 4 7 Temperature Control Circuit 37 10 4 7 1 ON OFF...

Page 5: ...ing the spa AVERTISSEMENT Les R glements suivants pour Cuves Thermales tel que recommand s par la Commission U S de S curit des Produits pour les Consommateurs devraient tre respect s lors de l utilis...

Page 6: ...fied on the back cover of this manual Make all warranty claims to a Jandy dealer or directly to the factory Claims must include the heater serial number and model this information can be found on the...

Page 7: ...r all outdoor installations where wind conditions may cause downdrafting Vent caps are available from your Jandy distributor 1 7 Specifications 1 7 1 General Specifications 1 Installation Location Cer...

Page 8: ...codes and ordinances and in accordance with the latest edition of the appropriate national code see Section 1 4 Codes and Standards All gas fired products require correct installation to assure safe o...

Page 9: ...es for maintenance and inspection There must also be minimum distances maintained from combustible surfaces see Table 2 At least 18 inches 457mm access must be avail able in front of the heater for bu...

Page 10: ...ble panel 2 3 4 Outdoor Installation Legacy heaters can be installed in the low profile top configuration as received from the factory or with an optional high wind vent cap Locate the heater in an op...

Page 11: ...tion downdraft conditions exist locate the heater at least 3 feet 0 91 m from vertical surfaces e g nearby buildings and walls The addition of a vent cap may be necessary In Florida it is required tha...

Page 12: ...e Air Supply When combustion air is supplied directly through an outside wall each opening should have a minimum free area of one square inch per 4 000 BTU h 1 2kW input of the total input rating of a...

Page 13: ...rways or car ports Be sure to support all venting so that connec tions will not separate and so that the weight of the vent pipe does not rest on the heater draft hood All connections should be made w...

Page 14: ...ARNING The Legacy pool and spa heaters are designed for use with either natural gas or LP gas Check the rating plate on the inner panel to be sure that the heater is designed to use the type of gas be...

Page 15: ...1 8 NPT fitting to connect your manom eter The pressure will be zero when the heater is not running When the heater is operating the manifold gas pressure should be 4 0 WC for natural gas heaters and...

Page 16: ...ctions in your area Section 5 Water Connections 5 1 Water Piping Figure 7 illustrates typical piping for pool equip ment in pool spa combination pools For normal installations do not install a shutoff...

Page 17: ...ving the heat exchanger headers and reinstalling them on opposite ends of the tube assembly Some of the heater wiring must be discon nected and re routed so this procedure must be done only by a train...

Page 18: ...from the inlet outlet header and remove the sensor 7 Tag and disconnect the black and white wires from the water pressure switch CAUTION In order to prevent property damage or injury en sure that the...

Page 19: ...ied with the Legacy heater However it is recommended that a pressure relief valve be installed and may even be required by local codes Be sure to check any appli cable installation codes in your area...

Page 20: ...ipe does not endanger anyone near the heater Refer to your local installation codes for more detailed information The valve setting should be at or below the maximum working pressure of any component...

Page 21: ...G in Canada Failure to do so will void warranty Additionally in the United States the National Electrical Code and in Canada the Canadian Electri cal Code require that all metallic components of a poo...

Page 22: ...e max 130 Pressure Switch Manostat Pilot Gen G n rateur de veilleuse Pilot Veilleuse Piezo Sparker tinceleur pi zo lectrique Fusible Link l ment fusible Fireman Switch Connection Montage contacteur po...

Page 23: ...before starting the heater Start the heater in accor dance with the Operating Instructions section of this manual with particular attention to the lighting and shutdown instructions and temperature c...

Page 24: ...our preferences follow the instructions outlined on the following page Figure 18 Read and follow all safety instructions first A more detailed set of instructions of the opera tion of the controller f...

Page 25: ...4 5 Faire tourner le bouton du robinet gaz vers la gauche jusqu la position ON 6 Apr s avoir remis en place le panneau d acc s r gler le thermostat sur la valeur voulue et mettre l interrupteur g n r...

Page 26: ...at too low of a flow can damage the appliance Adjust the switch to turn the heater off not on ATTENTION Le manocontact de pression d eau doit tre r gl de fa on ce que l appareil cesse de fonctionner...

Page 27: ...lug removed install the special thread adapter and Pete s Plug fitting and insert a pocket thermometer A temperature rise measurement kit is available through your Jandy distributor See Section 11 of...

Page 28: ...e water Be sure to keep your chemical levels within the values indicated in Table 7 Zodiac Pool Systems Inc does not warrant heat exchangers damaged by corrosive chemical levels or excess dissolved so...

Page 29: ...ing start up are impor tant to keep your heater running safely and efficiently through the years Improper maintenance can result in conditions where nausea or asphyxiation from carbon monoxide or flue...

Page 30: ...il a t plong dans l eau m me partiellement Faites inspecter l appareil par un technicien qualifi et remplacez toute partie du syst me de contr le et toute com mande qui ont t plong s dans l eau 3 If t...

Page 31: ...tre t te et votre visage loin du br leur pour viter tout risque de blessure NOTE Keep this manual in a safe place for future reference by you and your professional technician when inspecting and servi...

Page 32: ...s if dirty 6 Not enough heat A Inadequate gas supply B Low manifold gas pressure C Heater size inadequate D Low temperature rise A Gas meter too small Gas line from meter to heater too small B Gas pre...

Page 33: ...ol system including pump filters and strainers water valves gas supply and time clocks have an effect on heater operation Confirm that the Legacy heater control switch is set to ON and that the temper...

Page 34: ...ut will cause the link to fail This opens the safety circuit which shuts off the gas valve and shuts the heater down 10 4 Electrical Troubleshooting This section describes procedures for check ing the...

Page 35: ...RZM Pool Spa Heater Installation and Operation Manual Figure 25 Test Point Identification Diagram 1 2 3 4 5 6 7 8 9 10 11 12 13 14 15 16 18 19 20 21 BK Black Noir W White Blanc Y Yellow Jaune R Red Ro...

Page 36: ...LOT position Leave the red voltmeter lead in place at test point 1 Touch the black lead of the meter to the terminal of the fusible link where the white wire from the gas valve is connected test point...

Page 37: ...east a 220mV signal at test point 11 move the black lead of the meter to the other terminal on the water pressure switch test point 12 If there is no voltage the pressure switch contacts are open This...

Page 38: ...or outside of the ranges shown the temperature sensor should be replaced Table 9 Temperature Sensor WATER TEMP IN HEADER F C APPROX RESISTANCE IN 1000 S OF OHMS kOhms 50 10 19 9 60 15 15 3 70 21 11 9...

Page 39: ...l R0457401 39 High Limit Set 130 F 150 F All R0457200 40 High Limit Switch 130 F All R0457300 41 High Limit Switch 150 F All R0023000 Key No Description Model No Order Part No Electrical System Contin...

Page 40: ...5 400 R0483901 05 98 Weather Stripping All R0491000 99 Grommet 7 8 All R0492800 Optional Components 100 Noncombustible Base 125 400 R0471001 05 101 Press Relief Valve Kit 75 PSI Bronze All R0040400 10...

Page 41: ...Legacy Model LRZM Pool Spa Heater Installation and Operation Manual 11 3 General Exploded View 49 50 51 46 47 45 48 86 92 91 90 54 35 95 81 88 89 99 87 96 94 16 81 11 97 82 83 84 53 56 42 43 93 20 37...

Page 42: ...Legacy Model LRZM Pool Spa Heater Installation and Operation Manual 11 4 Detailed Exploded View 57 61 41 40 60 59 25 33 58 27 77 78 75 57 18 17 13 15 44 9 22 28 31 29 23 24 38 8 3 4 6 1 2 10 5 7 12 3...

Page 43: ...Page 43 Legacy Model LRZM Pool Spa Heater Installation and Operation Manual 71 72 68 69 74 38 41 40 25 67 66 74 75 77 78 75 65 70 35 73 65 64 63 62 80 53...

Page 44: ...H0299600D Zodiac Pool Systems Inc 6000 Condor Drive Moorpark CA USA 93021 800 822 7933 FAX877 327 1403 2010 Zodiac Pool Systems Inc 1007...

Reviews: