4
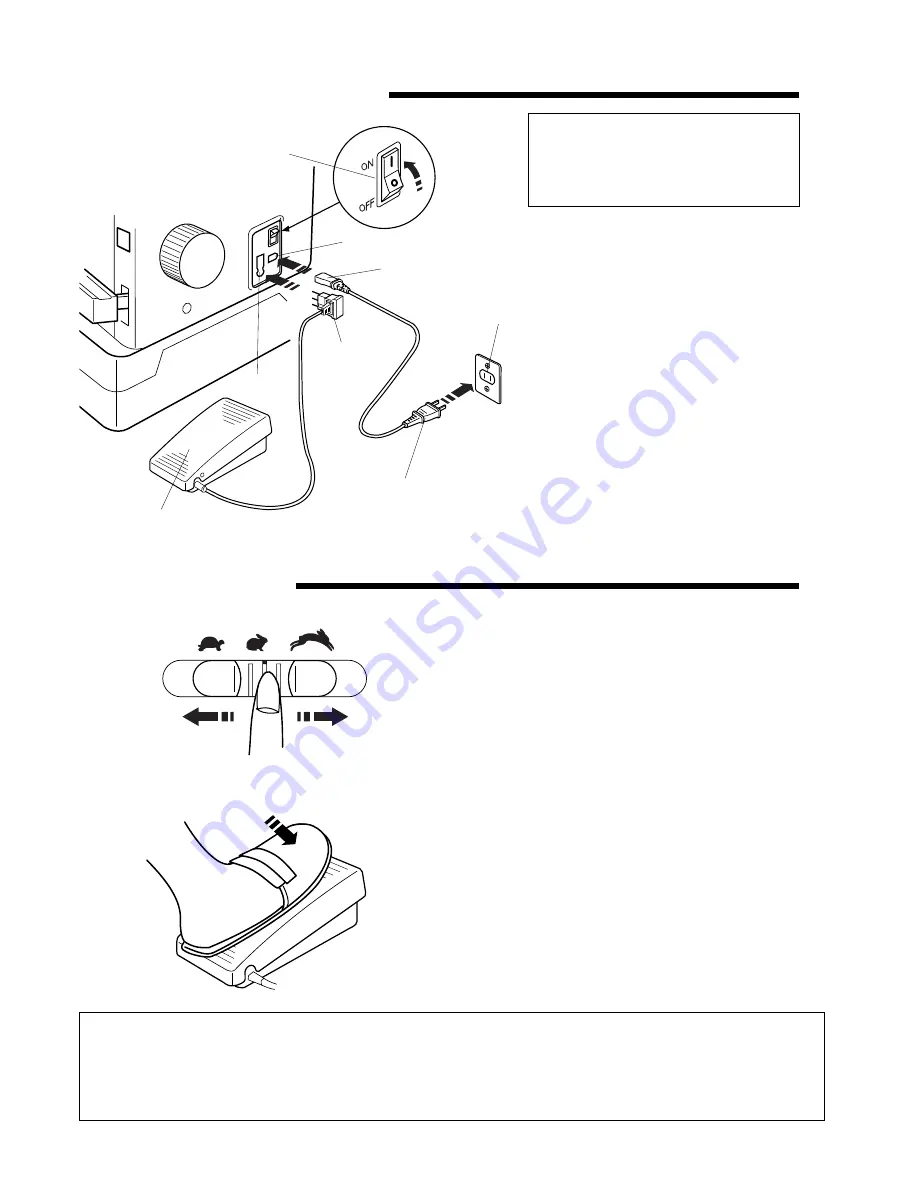
Connecting Machine to Power Supply
i
w
q
t
y
r
e
u
q
Machine plug
w
Machine socket for power supply plug
e
Power supply plug
r
Outlet
t
Machine socket for foot control
y
Foot control plug
u
Foot control
Turn off the power switch.
Insert the foot control plug
y
into the
machine socket
t
.
Insert the machine plug
q
into the
machine socket
w
.
Insert the power supply plug
e
into the
wall outlet
r
.
Turn on the power switch
i
.
CAUTION
Always turn the power switch off and
unplug the sewing machine from the
electrical outlet when the machine is not
in use.
Operating Instructions:
The symbol "O" on a switch indicates the "off" position of a switch.
For appliances with a polarized plug (one blade wider than the other): To reduce the risk of electric shock, this plug is
intended to fit in a polarized outlet only one way. If it does not fit fully in the outlet, reverse the plug. If it still does not fit,
contact a qualified electrician to install the proper outlet. Do not modify the plug in any way.
* Foot control model TJC-005 is used with sewing machine model 1600P.
Speed control slider
Sewing speed can be varied with the speed control
slider according to your sewing needs.
To increase sewing speed, slide it to the right.
To decrease sewing speed, slide it to the left.
Foot control
Sewing speed is varied by the foot control.
The harder you press down on the foot control, the
faster the machine runs.
The machine runs at the maximum speed set by the
speed control slider when the foot control is being fully
depressed.
Controlling Sewing Speed
GETTING READY TO SEW
Summary of Contents for 1600P series
Page 1: ......


