4
Connecting the Machine to the Power Supply
[f]
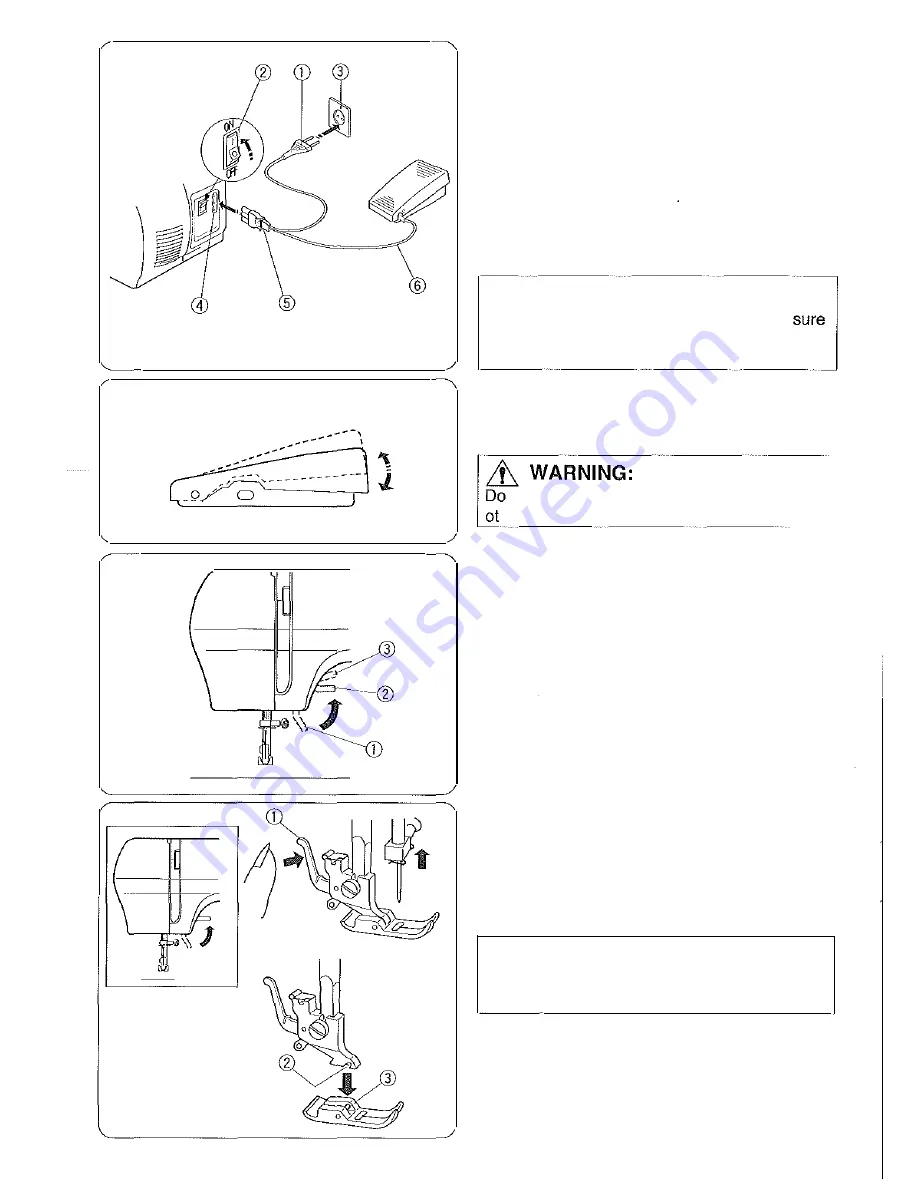
Turn off the power switch.
[I]
Insert the machine plug into the machine
socket.
[l]
Insert the power supply plug into the outlet .
Ill
Turn on the power switch to turn on the power
and sewing light.
G)
Power supply plug
CV
Power switch
® Outlet
@
Machine socket
®
Machine plug
L't
cAUTION:
Before connecting the power cord, make
the voltage and frequency shown on the
machine conform to your electrical power.
Foot Control
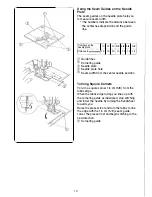
Sewing speed can be varied by the foot control.
The harder you press on the control, the faster the
machine runs.
J
not place anything on the foot control,
herwise the machine will run intermittently.
Operating Instructions:
The symbol "O" of a switch indicates the "off"
position of a switch.
Presser Foot Lifter
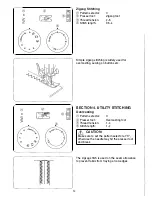
The presser foot lifter raises and lowers your
presser foot.
You can raise it about 0.6 cm (1/4") higher than
the normal up position for easy removal of the
presser foot or to help you to place heavy fabric
under the foot.
G)
Lowest position
CV
Normal up position
® Highest position
To Attach and Remove the Presser Foot
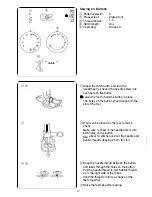
To remove
Turn the handwheel toward you to raise the
needle to its highest position. Raise the presser
foot. Press the lever on the back of the foot
holder. The presser foot will drop off.
G)
Lever
L:h
cAUTION:
Turn off the power switch when changing a
presser foot.
To
attach
Place the presser foot so the pin on the foot lies
just under the groove of the foot holder.
Lower the foot holder to lock the foot in place.
CV
Groove
@Pin


