
MODEL 3128
3
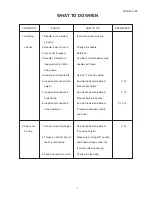
CONDITION
CAUSE
HOW TO FIX
REFERENCE
5. Needle
1. Needle is hitting the needle
See mechanical adjustment
P.11
breaks
plate.
“Needle drop.”
2. Needle is bent or worn.
Change the needle.
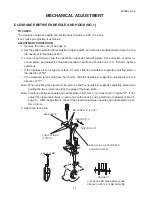
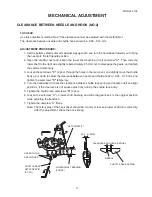
3. Needle is hitting the hook
See mechanical adjustment
P.12, 13
race.
“Clearance between needle
and hook”.
4. The fabric moves while the
See mechanical adjustment
P.10
needle is piercing it, or the
“Needle swing”.
needle zigzags while in
fabric.
5. Fabric is being pulled too
Guide the fabric gently
strongly while sewing.
while sewing.
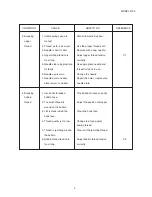
6. Noisy
1. Backlash between shuttle
See mechanical adjustment
P.13
Operation
hook gear and lower shaft
“Clearance between needle
gear is too great.
and hook (No.2)”.
2. Lower shaft gear is loose.
Eliminate the looseness.
3. Inappropriate belt tension.
See mechanical adjustment
P.19
“Motor belt tension”.
4. Upper shaft gear is loose.
Eliminate the looseness.
5. Not enough oil.
Oil all moving parts.
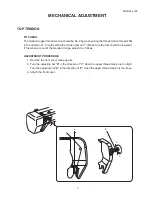
7. Deformation
1. Inappropriate zigzag
See mechanical adjustment
P.10
pattern
synchronization.
“Needle swing”.
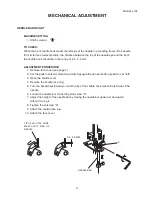
2. Inappropriate
See mechanical adjustment
P.18
disengagement of cam
“Disengagement of cam”.
follower.
3. Upper thread tension is
Adjust upper thread tension
P.7
too strong.
correctly.


