background image

Summary of Contents for 385.4052LX200

Page 1: ...NA DE COSER Manual de Instrucciones MACHINE COUDRE Manuel d instructions Model Modelo Modele 385 4052LX200 Sears Roebuck and Co Hoffman Estates IL 60179 U S A www sears com 502 800 102 Sears Canada In...

Page 2: ...sewing machine to the nearest Sears store or service center for examination repair electrical or mechanical adjustment 4 Never operate this sewing machine with any air opening blocked Keep ventilatio...

Page 3: ...exarninar reparar o realizar ajuste mecdnico o el6ctrico 4 Nunca opere la m _quina con cualquier saiida de aire bloqueada Mantenga las aberturas de ventilacibn de la m quinade coser y el pedal de con...

Page 4: ...le est tomb_e _ reau Rapportez la machine au magasin Sears le plus proche pour une v6rification une r6paration un r6glage 61ectrique ou m6canique 4 N utilisez jamais une machine dent les ouvertures de...

Page 5: ...ODAS LAS PARTESY AJUSTES MECANICOS Durante 90 dies desde la fecha de la compra Sears ofrece librade ccato reemplazar cualquiera parte y proveer el servicio mecanico necesario para la apropiada operaci...

Page 6: ...DIAS SOBRE TODAS LAS PARTESY AJUSTES MECANICOS Durante 90 alias desde la tachs de la compra Sears ofrece libre de costa reemplazsr cualquiera parte y proveer el servicio mec_nico necesario para la apr...

Page 7: ...on 26 Pattern Selector Dial 28 Stitch Length Dial 28 Stitch width dial 28 Reverse Stitch Button 30 Dropping the Feed Dog 30 SECTION 3 BASIC SEWING 32 Straight Stitch Sewing 32 To change Sewing Directi...

Page 8: ...puntada 29 Pedlla de anchura de puntada 29 Bot6n de puntada inversa 31 Descenso de las garras transportadoras 31 SECCION 3 OPERACIONES B_ SICAS DE COSTURA _ 33 Costura de puntada recta 33 Cambio de d...

Page 9: ...Iongueur du point 29 Cadran de r6glage de la largeur du point 29 Bouton point arriere 31 Abaisser la griffe d entrafnement 31 SECTION 3 COUTURE DE BASE 33 Utilisation du point droit 33 Changer la dir...

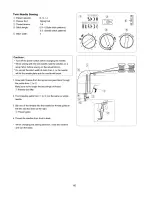
Page 10: ...Bobbin winder thread guide Thread guide Thread take up lever Thread tension dial Face plate Thread cutter Needle threader Needle plate Presser foot holder Needle clamp Needle _9_ Presser foot _0_ Ext...

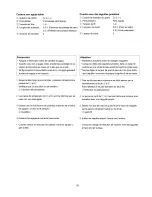
Page 11: ...cord6n el6ctrico Braze libre _ Palanca para ojales _ Elevador del prensatelas Nom des pieces Bouton point arri6re 2 Cadran de s61ection du point C3_Cadran de r6glage de la Iongueur du point _4 Cadran...

Page 12: ...e until it snaps into the machine Advantages and uses of free arm sewing Avoid fabric bunching around the needle when bartacking to reinforce pockets plackets and waistlines For stitching sleeves wais...

Page 13: ...peut 8tre facilement d6tach6e pour les coutures sur bras libre D6tacher I extension de plateau Tirer I extension de plateau vers I ext6rieur Replacer I extension de plateau Pousser I extension de plat...

Page 14: ...11000 743813008 480001009 000009803 647808009 647803004 741814003 802424004 200117100 941850000 940250000 940320000 611404000 214509003 200262101 214015007 031119115 Description 3 x Bobbin Needle set...

Page 15: ...no se proveen con la m_quina pero pueden ser ordenados con las instrucciones arriba descritas Accessoires et pieces disponibles Pour commander les pi_ces et les accessoires list6s ci dessous composez...

Page 16: ...This appliance has a polarized plug one blade wider than the other To reduce the risk of an electric shock this plug is intended to fit in a polarized outlet only one way If the plug does not fit in...

Page 17: ...disehada de forma que s61o puede introducirse en un sentido dentro de una toma de corriente polarizada Si no encaja completamente en la toma de corriente invierta la clavija Si tampoco encaja de esta...

Page 18: ...the foot _ Normal up position _2_Highest position To Attach and Remove the Presser Foot To remove Turn the handwheel toward you to raise the needle to its highest position Raise the presser foot Pres...

Page 19: ...del prensatelas Desmontaje Gire el volante manual hacia usted para subir la aguja a su posici6n m_s alta Suba el prensatelas Presione la palanca en la parte posterior del soporte del prensatelas El p...

Page 20: ...o the clamp push it up as far as it will go and tighten the clamp screw firmly with the screwdriver Check your needles frequently for barbed or blunted points Snags and runs in knits fine silks and si...

Page 21: ...oblada o sin filo Changer d aiguille Relever I aiguille en tournant le volant vers sol et rabaisser le pied presseur Desserrer la vis du pince aiguille en tournant dans le sens oppos6 des aiguilles d...

Page 22: ...n caused by damaged needles Always purchase a good quality thread It should be strong smooth and consistent in thickness f WEIGHT FABRIC TYPE OF NEEDLE NEEDLE SIZE Chiffon Georgette Fine Lace Organdy...

Page 23: ...cuencia para comprobar que no est n embotadas o despuntadas Las agujas da adas suelen causar enganches y carrels irreparables en tejidos de punto sedas finas y imitaci n de seda Adquiera siempre hilo...

Page 24: ...fines et les toffes semblables la sole sont d finitifs et sont souvent provoqu s par des aiguilles ab m es Achetez toujours du fil de bonne qualit 11 dolt tre solide lisse et d paisseur r gull re Diam...

Page 25: ...blank page p_gina blanca page blanche 17...

Page 26: ...ing thread which has tendency to tangle around spool pin thread through the hole of spool pin as shown The hole shou d face the thread spoo z Removing or Inserting the Bobbin Case Open the hook cover...

Page 27: ...s _2_Oeillet C3_ Nid de ills Remarque Lorsque vous utilisez un fil qui a tendance b s enrouler autour de la broche porte bobines passezde darts I oeillet de la broche porte bobines comme sur I illustr...

Page 28: ...thread close to the hole in the bobbin 61Depress the foot control again When the bobbin is fully wound stop the machine Return the bobbin winder spindle to its original position by moving the spindle...

Page 29: ...le trou de la canette depuis I int6rieur vers I ext6rieur Mettre la canette sur la broche du d6vidoir 411 Le guider vers la droite 51Tenir le bout libre du filet appuyer sur la commande p6dale Arr6te...

Page 30: ...spool draw thread down into the tension area and then around the check spring holder Ii_ Firmly draw the thread up and through the take up lever from right to left 1411 Then draw the thread down and s...

Page 31: ...sort de tension tout en le maintenant pros de la bobine 131 Lleve firmemente el hilo hacia arriba y a trav6s de la palanca 131Tirer le fil fermement en le faisant monter pois passer par le tirahilo de...

Page 32: ...he thread through the needle eye The needle threader can be used with a 11 to 16 needle or a Janome Blue tipped needle Thread size 50 to 100 should also work well Drawing Up Bobbin Thread II11 Raise t...

Page 33: ...sur rillustration en faisant passer la boucle du fil darts raiguille 1411 Enfiler le fil dans I aiguille Le dispositif d enfilage s utilise avec les aiguilles n l 1 et n 16 ou les aiguilles Janome _...

Page 34: ...c _Wrong side Bottom side of fabric 5_ Thread tension dial _6_Setting mark 121Needle thread tension is too tight The bobbin thread bottom thread will appear on the right side top side of the fabric Lo...

Page 35: ...6paisseurs de tissus comme le montre I agrandissement Pour un point en zigzag ideal le fil de la canette ne se volt pas sur rendroit le dessus du tissu et le fil de raiguille se distingue 16g6rement s...

Page 36: ...recommended setting for buttonhole stitching Adjust the dial in the 0 5 4 range when you sew the zigzag stitch Set the dial at S S to sew the stretch stitch pattern sewing If the stretch stitch patter...

Page 37: ...ueur du point Tourner le cadran de reglage de la Iongueur du point de fapon placer le repere en face de la Iongueur de point d6siree Plus le chiffre est 6leve plus le point sera long _ Repere _ repr6s...

Page 38: ...e hook cover d_ Hook cover 121To drop the feed dog pull down the drop lever and move it to the right as illustrated 2 Drop lever 131To raise the feed dog pull down the drop lever and move it to the le...

Page 39: ...omo se muestra en la ilustraci6n Abaisser la griffe d entrainement II11Ouvrir ie couvercie du boTtier d_ Couvercle du boTtier 121Pour abaisser la griffe d entrafnement tirer le levier d abaissement ve...

Page 40: ...fabric along the guide line letting the fabric feed by itself 121For fastening the end of seams press the reverse stitch button and sew several reverse stitches Raise the presser foot and remove the f...

Page 41: ...le pied presseur et placer le tissu en en alignant le bord sur le guide de couture de la plaque _ aiguille Planter I aiguille dans le tissu Baisser le pied presseur et repousser les ills vers I arrie...

Page 42: ...orner 1 6 cm 5 8 from the fabric edge When the fabric edge facing you lines up with the cornering guide as illustrated stop stitching and lower the needle by turning the handwheel towards you Raise th...

Page 43: ...la orilla de la tela enfrente de usted se alinee con la guia para esquinas come se muestra en la ilustraci6n detenga la cestura y baje la aguja al girar el volante hacia usted Levante el prensatelas y...

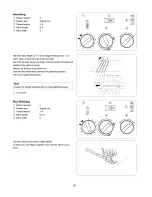
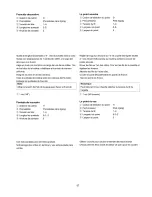
Page 44: ...igzag stitching is widely used for overcasting sewing on buttons etc Ss E H SECTION 4 UTILITY STITCHING Overcasting Pattern selector C Presser foot Zigzag foot 3 Thread tension 1 4 _4_Stitch length 1...

Page 45: ...otones etc les boutons etc SECCI6N 4 PUNTADAS DE USO GENERAL SECTION 4 LES POINTS UTILIAIRES Sobrehilado Le point de surjet Selector de patr6n C _ Cadran de s61ection du point C Prensatelas Prensatela...

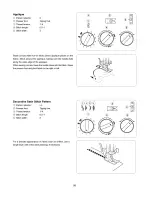
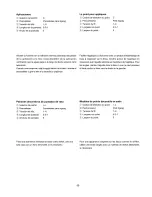
Page 46: ...eam allowance after sewing Note Be carefu not to cut the st tches It is also handy for darning and mending tears Knit Stitch _0 Pattern selector G _2_Presser foot Zigzag foot _3_Thread tension 1 4 _4_...

Page 47: ...termin6e Remarque II faudra faire attention _ ne pas couper la couture Ce point peut 6galement etre utilis6 pour repriser et raccommoder des accrocs Tejido de punto _L_Selector de patr6n G _2_Prensat...

Page 48: ...A _2_Presser foot Zigzag foot C3_ Thread tension 2 6 _4_Stitch length S S C5_ Stitch width aD 0 or ID 5 The stitch is sewn with two stitches forward and one stitch backward forming a seam that does n...

Page 49: ...Cadran de s61ection du point A _2_Pied presseur Pied zigzag C3_ Tension du ill 2 6 _4_Longueur du point S S C5_ Largeur du point _ 0 out3 5 La puntada es formada por dos puntadas hacia delante y una C...

Page 50: ...e The holes on the button should align with the slot of the foot 131A pin can be placed on the foot to form a shank Make sure to check if the needle enters into both holes on the button Sew about 10 s...

Page 51: ...a y de la bobina dejando 20 cm 8 en el extremo 1411 Lleve los hilos de la aguja entre el bot6n y la tela a trav6s de los orificios del bot6n Estire los hilos de la aguja para Ilevar los hilos de la bo...

Page 52: ...already selected reset the dial once according to the procedure in 112 131Attach the automatic buttonhole foot 1411 Pull the button holder to the back and place the button in it Push back the button...

Page 53: ...resorte Si hay un espacio la Iongitud de las filas ser_ diferente tal como se muestra _2 Punto de inicio C3_Deslizador _4 No debe haber espacios Soporte del resorte C6_Diferencia La taille de la bout...

Page 54: ...s I1_ Insert a pin inside the barrack Then cut the opening with seam ripper Take care not to cut the stitches 112To repeat buttonhole sewing turn the stitch selector to _ _ r then back to again as sho...

Page 55: ...de I aiguille et celui de la canette en laissant environ 10 cm 4 pouces de ill Guider le fil de I aiguille sur I envers du tissu en tirant le fil de la canette Ensuite nouer les fils I _ Inserer une e...

Page 56: ...e foot clearing the front end Hook the filler cord into the forks on the front of the automatic buttonhole foot to hold them tight Lower the needle into the garment where the buttonhole will start and...

Page 57: ...y solamente corte los hilos de costura 131Tire del extremo izquierdo del cord6n de relleno para apretarlo Enhebre el extremo en una aguja de zurcido 116veloal rev6s de la tela y corte Para cortar la...

Page 58: ...n or baste zipper tape to fabric and place it under the foot Smooth the threads toward the back and lower the foot To sew the left side of the zipper guide the zipper teeth along the edge of the foot...

Page 59: ...prensatelas Para coser el lado izquierdo de la cremallera guie los dientes de la cremallera a Io largo del borde del prensatelas y cosa a trav6s de la prenda y de la cinta de la cremallera Gire la te...

Page 60: ...B Fine or medium weight fabrics 121Position the fabric so that the needle just pierces the edge of the fold when the needle swings to the extreme right Lower the presser foot 131Turn the guide screw...

Page 61: ...de la orilla doblada guiando la tela de manera que la aguja Ilegue a la orilla doblada _3 Tornillo guia _4_Guia 5_ Orilla doblada 1411 Abra el latela _ Derecho de la tela Si la aguja cae demasiado a l...

Page 62: ...edge of the fabric on the right forming a tuck Stretch Stitch Patterns _1_Pattern selector A L Presser foot Zigzag foot _3_Thread tension 1 4 _4_Stitch length S S _5_Stitch width 5 If forward and reve...

Page 63: ...es de puntadas elbsticas _L_Selector de patr6n A L Prensatelas Prensatelas para zigzag 3 Tensi6n del hilo 1 4 _4_Longitud de puntada S S Anchura de puntada 5 Le point extensible Cadran de s61ection du...

Page 64: ...threads and distribute the gathers evenly Secure the threads at the other end Sew the decorative stitch between the gathering stitches Pull out the gathering stitches Note Loosen the need e thread ten...

Page 65: ...m 3 8 R6gler la Iongueur de point sur 4 et coudre des lignes droites 1 cm d 6cart 3 8 pouces sur toute la surface _ couvrir de points smocks Nouer les ills sur I un des c6t6s Tirer sur les ills de la...

Page 66: ...ure the needle falls along the outer edge of the applique When sewing corners lower the needle down into the fabric Raise the presser foot and pivot fabric to the right or left Decorative Satin Stitch...

Page 67: ...roduit d assemblage de tissu _ repasser sur le tissu Coudre autour de I applique en s assurant que I aiguille retombe sur rext6rieur de I applique Pour es angles planter raiguille darts le tissu Lever...

Page 68: ...s Do not set the stitch width at more than 3 or the needle will hit the needle plate and the needle will break 1 Draw both threads from the spools and pass them through the points from LI to 16 Make s...

Page 69: ...de point _ plus de 3 de pour 6viter que I aiguilie n accroche la plaque _ aiguille et ne se casse 1 Saque ambos hilos de los carretes y p_selos a trav6s de los puntos del I1 al L6 Verifique que los d...

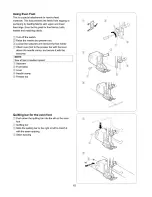
Page 70: ...aise the needle and presser foot Loosen the setscrew and remove the foot holder Attach even foot to the presser bar with the lever above the needle cramp and secure it with the setscrew NOTE Sew at lo...

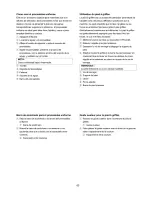
Page 71: ...s grace _ des griffes d entrai nement sup6rieures et inf6rieures Le pied _ griffes est particuli_rement appropri6 pour les tissus fins les tricots le cuir et le tissu 6cossais II11Mettre le bouton de...

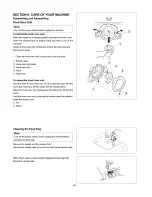
Page 72: ...ace ring _4_Hook 5_ Hook race To assemble hook race unit Hold the hook by the center pin and fit it carefully back into the hook race forming a perfect circle with the shuttle driver Attach the hook r...

Page 73: ...ler Ouvrir le Ioquet _ charnieres de la bofte _ canettes et la sortir de la machine Ouvrir les supports de ranneau de la coursiere et sortir I anneau D6gager le crochet Nettoyer la coursi6re au moyen...

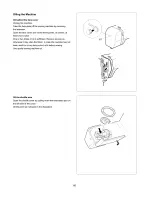
Page 74: ...n at least once a year One or two drops of oil is sufficient Remove excess oil otherwise it may stain the fabric In case the machine has not been used for a long time period oil it before sewing Use q...

Page 75: ...6t Ouvrez le couvercle frontal et lubrifiez les deux points indiqu6s au moins une fois par an Une ou deux gouttes d huile sent suffisantes Nettoyez I exc6s d huile qui pourrait t_cher le tissu Si vous...

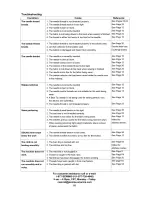
Page 76: ...not suitable for the work being sewn A Blue Tip needle is not being used for sewing stretch very fine fabrics and synthetics The needle thread is not threaded properly The needle thread tension is too...

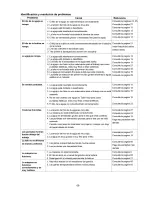
Page 77: ...la aguja es muy alta 2 La m_quina no est_ enhebrada correctamente 3 La aguja es demasiado gruesa para la tela que est_ cosiendo 4 Las puntadas son demasiado gruesas para la tela que se est_ cosiendo...

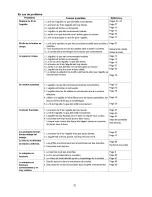
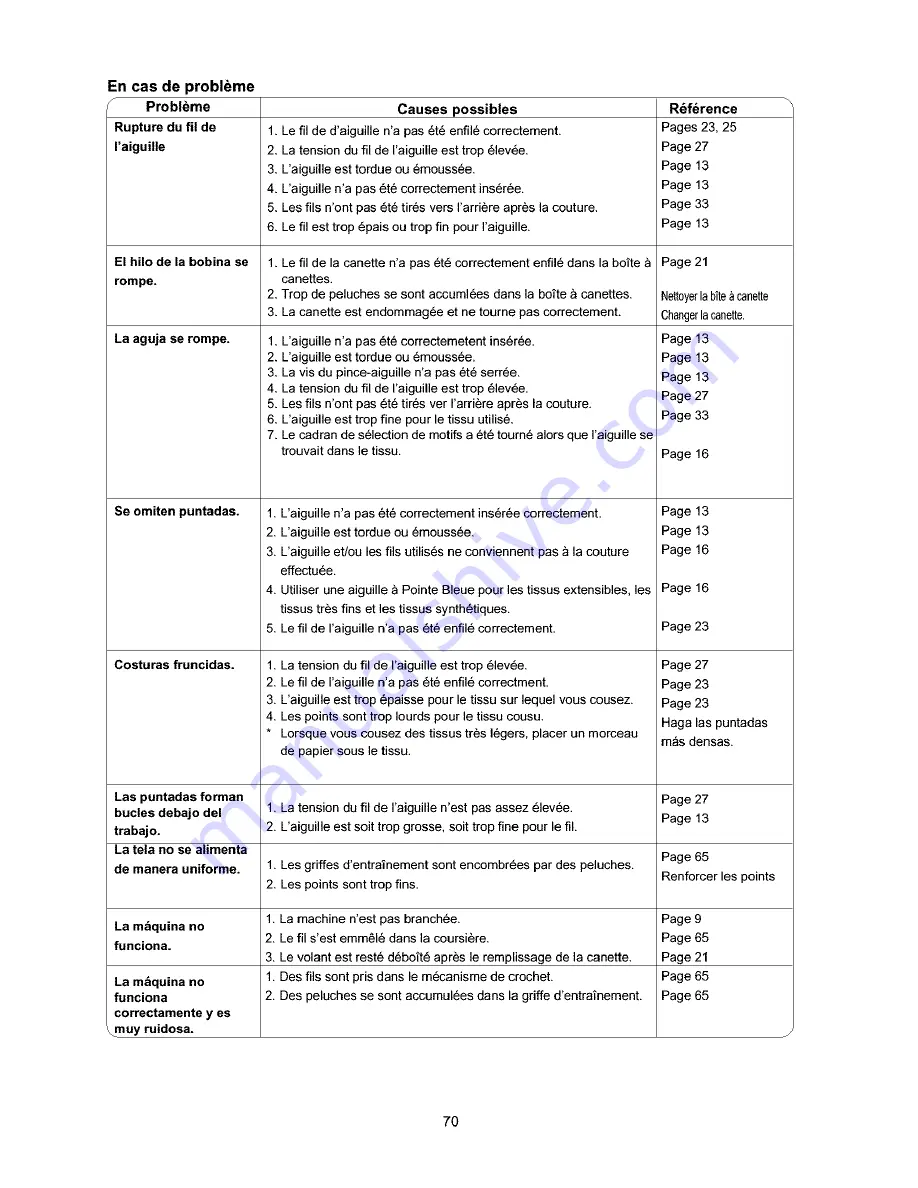
Page 78: ...une aigugle _ Pointe Bleue pour les tissus extensibles les tissus tr6s fins et les tissus synth6tiques 5 Le fil de I aiguille n a pas 6t6 enfil6 correctement 1 La tension du fil de I aiguille est tro...

Page 79: ...366 PART 1 800 366 7278 6 a m 11 p m CST 7 days a week U S A only www sears com partsdirect To purchase or inquire about a Sears Service Agreement or Sears Maintenance Agreement 1 800 827 6655 U S A...

Reviews: