
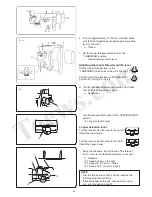
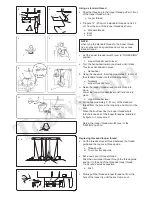


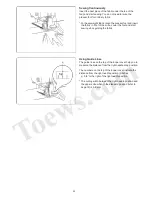

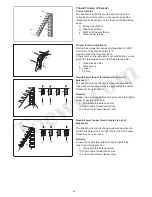


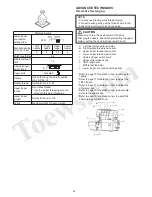


Securing Ends
To avoid raveling, you need to leave a thread chain
approximately
2˝ (5 cm) long at the beginning and at the
end of a seam. To secure the beginning and end of a
seam, choose one of the following methods.
At the beginning of the seam
A. Separate and tie the thread ends together.
B. Thread the chain through a large eyed needle, and
weave that chain through the overlock stitches on the
fabric.
C. Cut the chain at the edge of the fabric, and apply a
small amount of seam sealant
(Fray Check™ or Fray-
No-
More™) to the thread ends.
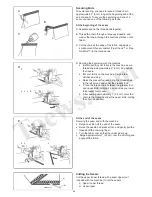
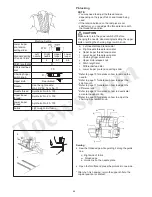
D. Securing the beginning with the machine
z
Before putting your fabric in the machine, sew a
thread chain approximately
2˝ (5 cm) long behind
the needle.
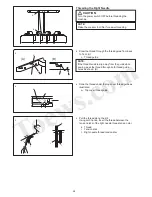
x
Put your fabric on the machine. Serge a few
stitches and stop.
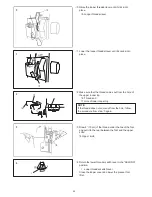
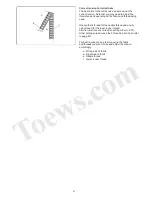
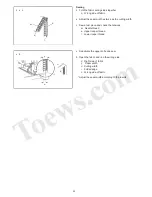
c
Raise the presser foot and bring the thread chain
to the left around and under the presser foot.
v
Place the thread chain between the presser foot
and upper knife, holding it in position as you lower
the presser foot to sew.
b
After sewing approximately
1˝ (2.5 cm), move the
chain to the right and under the upper knife, cutting
the chain as you sew.
D
A
B
C
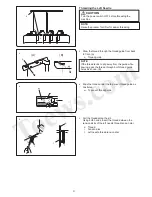
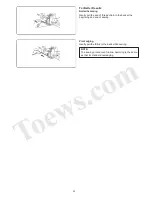
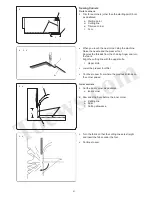
At the end of the seam
Securing the seam end with the machine
z
Serge one stitch off the end of the seam.
x
Raise the needle and presser foot, and gently pull the
threads off the chaining finger.
c
Turn the fabric over so that the under side is up.
v
Serge approximately
1˝ (2.5 cm) over the stitching and
angle off the fabric.
E
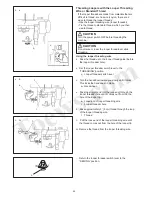
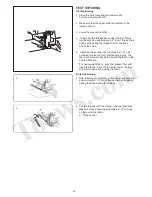
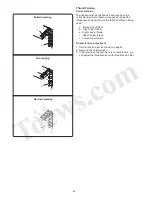
Cutting the Seams
Cut the upper looper thread with a seam ripper (not
included with the machine) to cut the seams.
q
Upper looper thread
w
Seam ripper
q
36
w
z
z
x c v b
x c
v


