
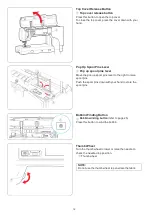


18
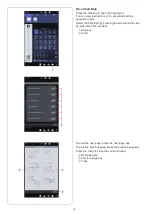
NOTE:
• When the positioning marker key is turned on, the
presser foot height is automatically adjusted to suit
the fabric thickness.
• Adjust the LED pointer position if the LED pointer
do not highlight the needle drop position (refer to
page 19).
z
x
e
w
q
r
q
z
x
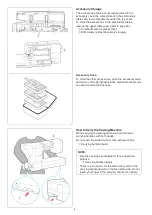
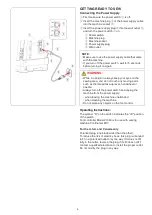
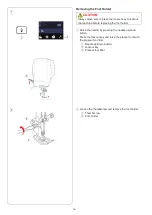
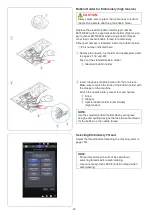
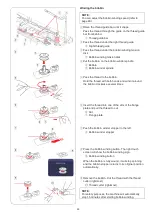
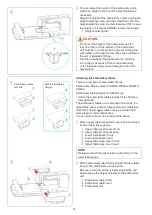
Attaching positioning marker embroidery foot PM
The positioning marker embroidery foot PM allows you to
highlight the point where the needle drops.
Press the lockout key and remove the foot holder (refer to
the previous page of step
z
to
x
).
z
Attach the positioning marker embroidery foot PM to
the presser bar from behind. Tighten the thumbscrew
partially by hand.
q
Positioning marker embroidery foot PM
x
Tighten the thumbscrew securely with the screwdriver.
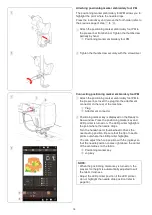
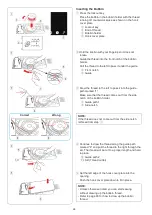
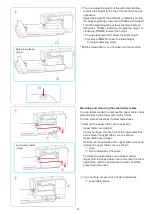
Connecting positioning marker embroidery foot PM
z
Attach the positioning marker embroidery foot PM to
the presser bar. Insert the plug into the attachment
connector on the rear of the machine.
q
Plug
w
Attachment connector
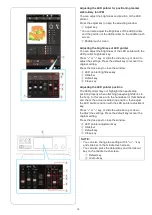
x
Positioning marker key is displayed on the Ready to
Sew window. Press the positioning marker key and
LED pointer is turned on. The LED pointer highlights
the point where the needle drops.
Turn the handwheel or thumbwheel to check the
needle drop position. Be sure that the tip of needle
points out where the LED pointer highlights.
You can adjust the hoop position with the jog keys so
that the needle position comes right above the center
of the centerlines on the fabric.
e
Positioning marker key
r
Jog key


