


36
Stabilizers
To create the best quality embroidery, it is important to
use stabilizers.
In case the embroidery design pattern you are going
to sew is dense, attach layers of stabilizers or a thick
stabilizer on the back of the fabric for better sewing
results.
How to use:
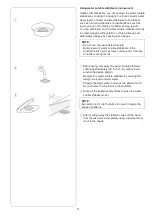
Attach the stabilizer to the wrong side of the fabric.
You may need to use more than one layer.
For firm fabrics, you may place a thin sheet of paper
under the fabric.
The non-adhesive type should be used when
embroidering fabric which cannot be ironed or for
sections which are difficult to iron.
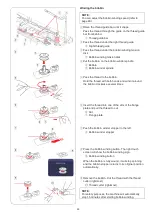
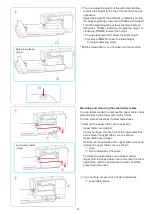
Cut the stabilizer larger than the embroidery hoop and
set it on the hoop so that the entire piece is fastened to
the hoop to prevent any looseness in the fabric.
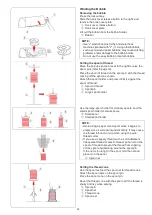
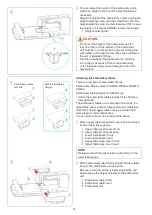
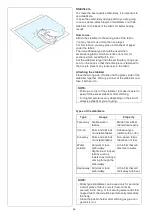
Attaching the stabilizer
Place the wrong side of fabric and the glossy side of the
stabilizer together. Fold up a corner of the stabilizer and
fuse it with an iron.
Types of the stabilizers
NOTE:
• Sticky type stabilizers can be used only for securing
a small piece of fabric or work that cannot be
secured in the hoop, or for securing velvet and other
napped fabric that would be permanently marked by
the hoop.
• Clean the bobbin holder after stitching as glue can
get stuck on it.
NOTE:
• Fold up a corner of the stabilizer, to make it easier to
peel off the excess stabilizer after stitching.
• Ironing temperatures vary depending on the kind of
adhesive stabilizer you are using.
Type
Usage
Property
Tear-away Stable woven
fabrics
Made from a fiber
that will tear easily.
Iron-on
Knits and all kinds
of unstable fabrics
Adhesive type
fusible with an iron.
Cut-away
Knits and all kinds
of unstable fabrics
Non-woven fabric
that does not tear.
Water
soluble
Cutwork or lace
embroidery.
Right side of looped
fabrics such as
towels to avoid loops
coming through the
embroidery
A thin film that will
dissolve in water.
Heat-away Cutwork or lace
embroidery
A thin film that will
melt away with heat.


