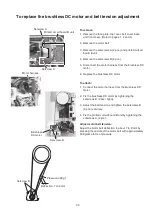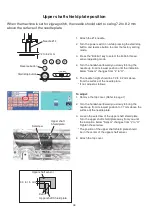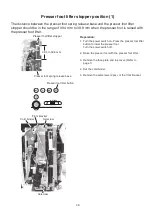
49
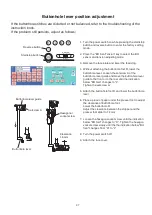
Optical bottom thread sensor adjustment
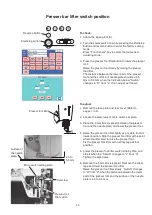
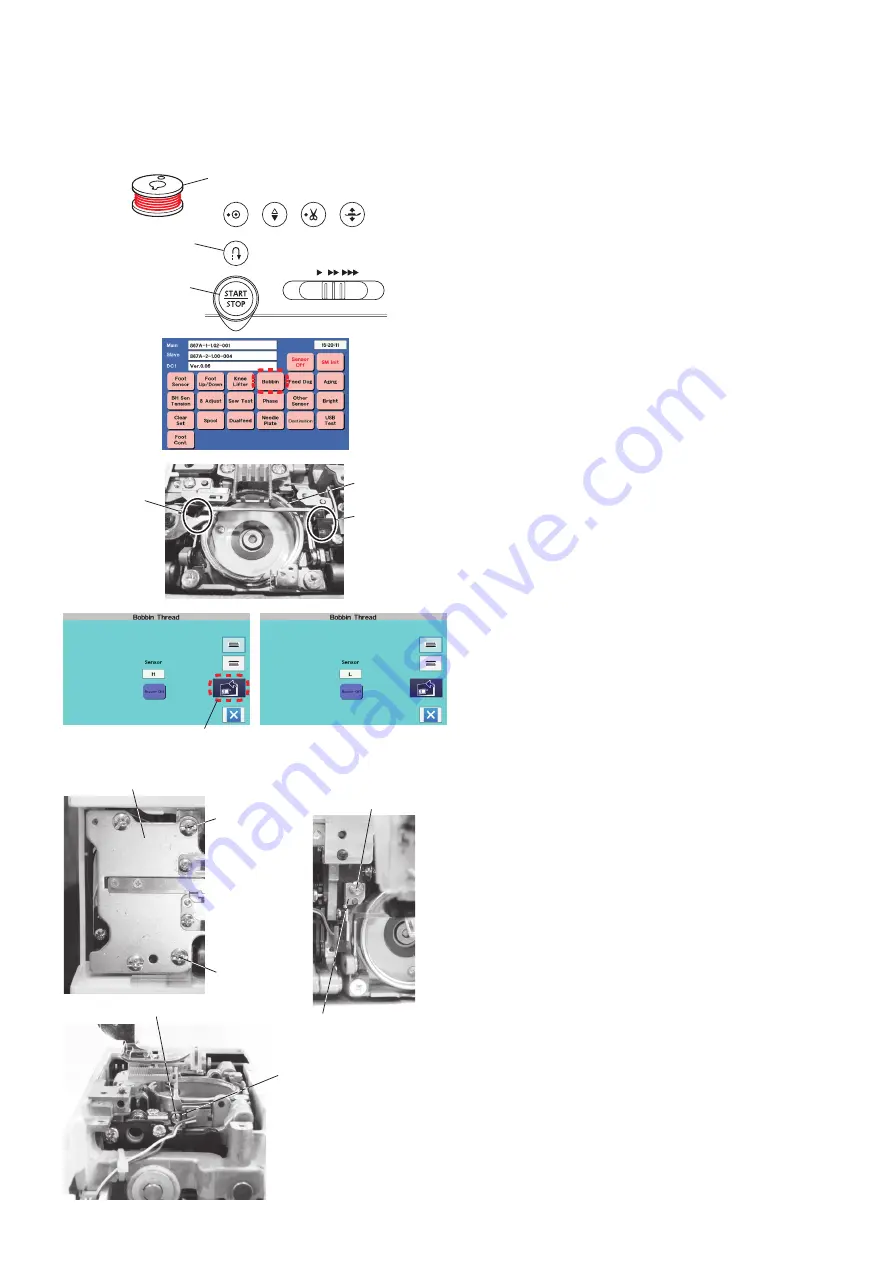
To check:
1. Prepare the wound bobbin.
2. Turn the power switch ON while pressing the start/
stop button and the reverse stitch button to enter the
factory setting mode.
Press the “Bobbin” key to select the bobbin thread
sensor adjusting mode.
3. Be sure that “Sensor” indicates “H” when the wound
bobbin is inserted.
When the bobbin is not inserted, turn the handwheel
and be sure that “Sensor” indicates “L” when the light
passes from A to B.
Be sure that “Sensor” indicates “H” when the light is
blocked by the hook and does not pass from A to B.
If not, follow the adjustment procedure below.
Reverse button
Wound bobbin
Start/stop button
Needle plate
release key
Setscrew A
Thread cutter unit
Setscrew B
Light emitting
device plate
Setscrew A
Setscrew C
To adjust:
1. Press the needle plate release key and remove the
needle plate.
2. Remove the thread cutter cover. (Refer to page 3)
3. Remove the setscrews A (2 pcs.) and thread cutter
unit.
4. Loosen the setscrews B.
Move the light emitting device plate forward and
backward to adjust the position of the plate.
5. Loosen the setscrews C.
Move the light emitting device holder up and down to
adjust the position of the holder.
After this adjustment, check if the “Sensor” indicates
correct sign at the step 3 at “To check” on this page.
Light enittibg
device holder
(A)
(B)
Hook race

