56
Darning
z
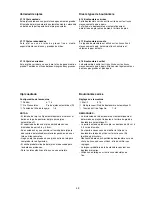
Pull the button holder to the rear.
x
Place the fabric under the foot.
Press the up/down needle button twice. Pull the
fabric from the left to draw both threads under the
foot and place the fabric back under the foot.
c
Lower the needle at the starting point then lower
the foot.
q
Button Holder
w
Starting Point
Depress the foot control and the machine will sew a
darning 2 cm (3/4˝) long and stop automatically.
e
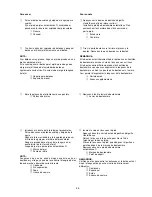
Darning length (Maximum: 2 cm)
r
Darning width (0.7 cm)
The same sized darning can be sewn when the dot is
blinking.
t
Blinking dot
Repeat sewing in a different direction until the
darning covers the rip or hole.
To sew a shorter darning
To sew a darning shorter than 2 cm (3/4˝), first stop
the machine after sewing the required length, then
press the reverse button.
The required length has been determined.
Restart the machine and continue sewing until the
machine stops automatically.
y
Reverse Button
u
Required Length
To adjust the evenness of darning
The evenness of darning may vary depending on the
sewing conditions, such as type of fabrics, number of
layers etc.
(A): If the right corner is lower than the left side, press
the minus (–) key to correct it.
(B): If the left corner is lower than the right side, press
the plus (+) key to correct it.
NOTE:
The evenness can be adjusted within d1 to d9
(default setting is d5).
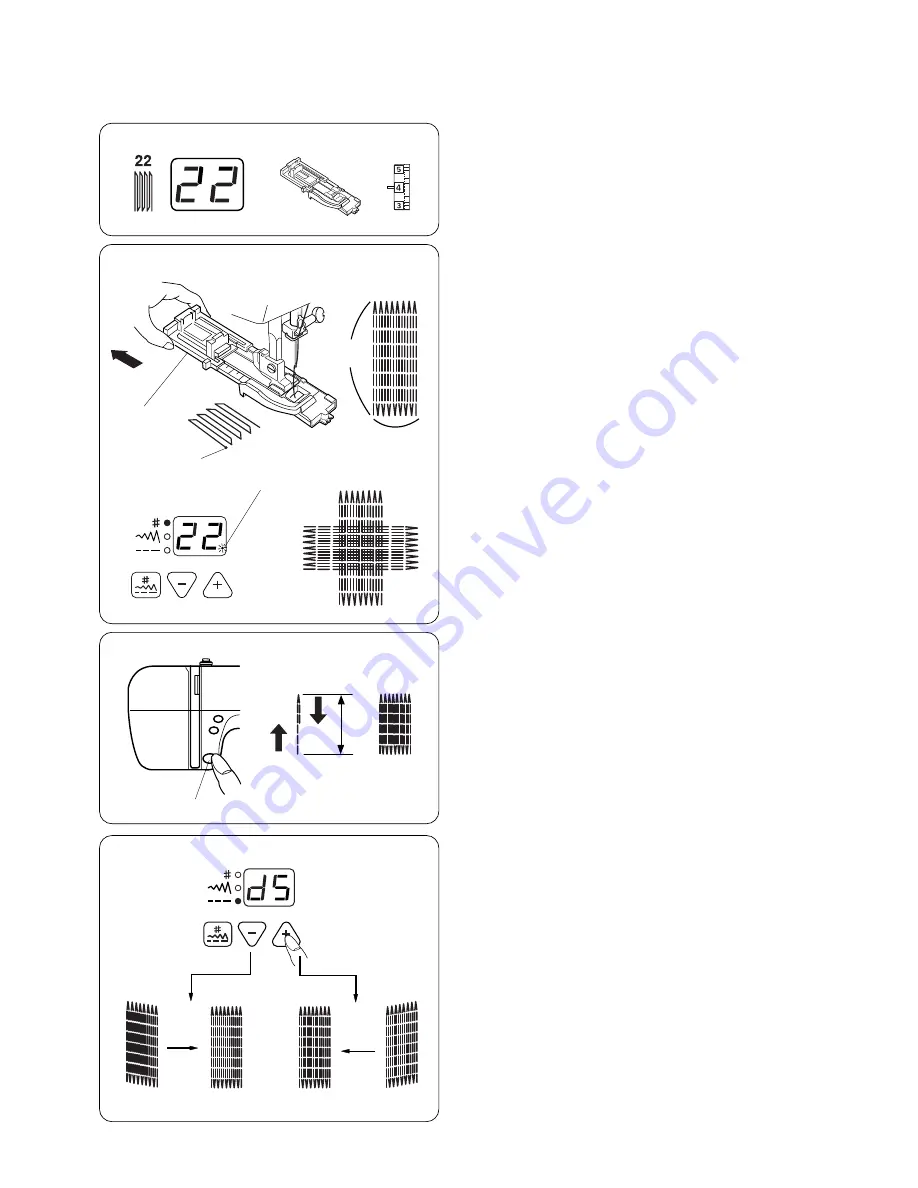
Machine Settings
q
Pattern:
#22
w
Presser foot:
Automatic buttonhole foot R
e
Needle thread tension: 1–6
zxc
q
w
e
r
v
t
y
u
(A)
(B)
q
w
e


