9
q
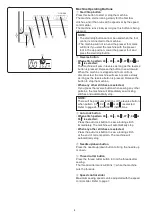
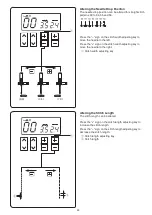
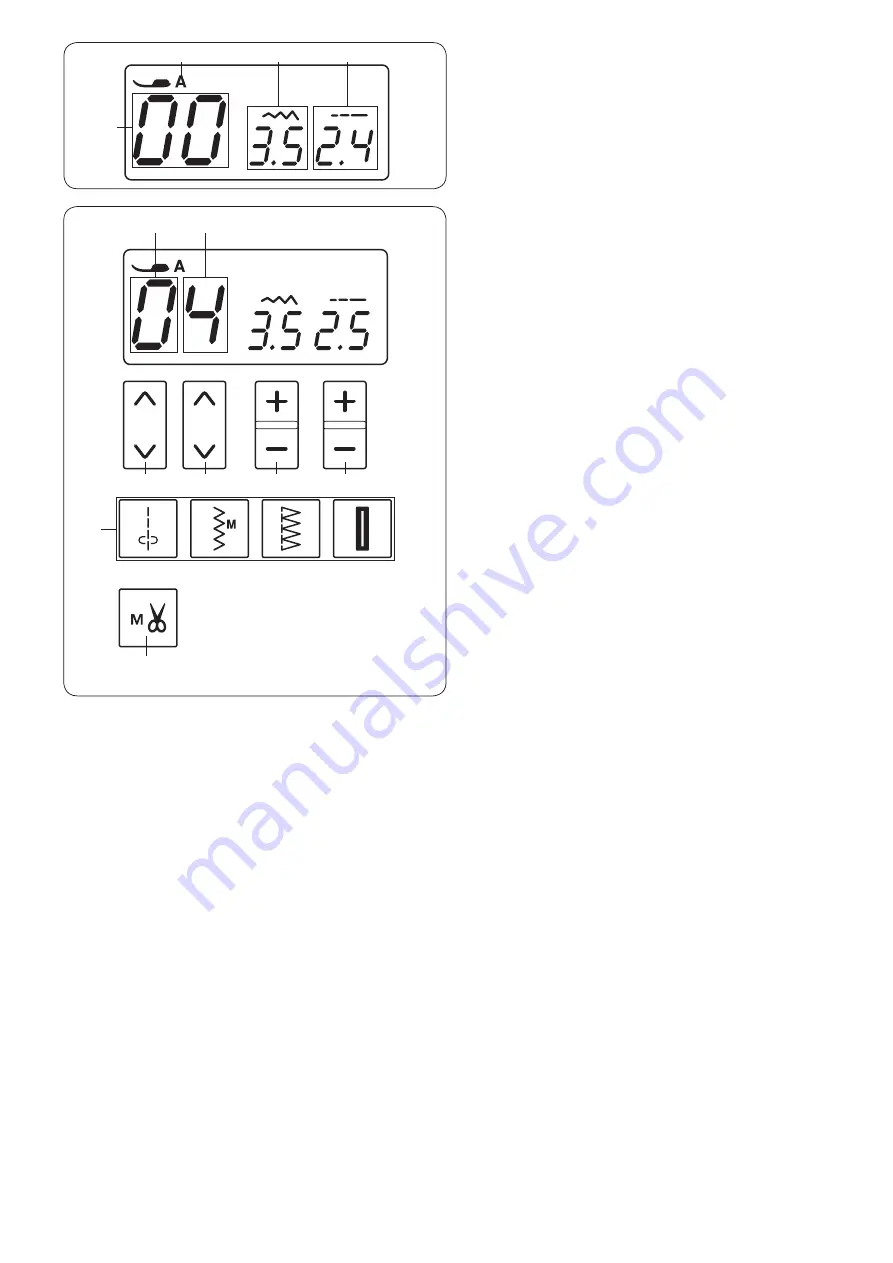
LCD Display
The LCD display shows following information when the
machine is turned on.
q
Identification letter of the recommended foot
w
Stitch pattern number
e
Stitch width
r
Stitch length
w
e
r
Function Keys
Selecting the Stitch Patterns
To select the desired stitch pattern, press the arrow keys
(
q
and
w
) until the pattern number of the desired stitch
is indicated.
To change the first digit
e
of the stitch pattern number,
press the arrow keys
q
under the first digit of the pattern
number.
To change the second digit
r
of the stitch pattern
number, press the arrow keys
w
under the second digit
of the pattern number.
q
Arrow keys (first digit)
w
Arrow keys (second digit)
e
First digit
r
Second digit
Direct pattern selection
You can select stitch patterns 00, 06, 09 and 18 directly
by pressing the corresponding direct pattern selection
key
t
.
The stitch image of stitch pattern are indicated on each
key.
Stitch width adjusting key
Press “+” or “–”
y
to change the stitch width or needle
drop position, depending on the selected stitch pattern.
Refer to
pages 23, 26 and 32.
Stitch length adjusting key
Press “+” or “–”
u
to change the stitch length of the
selected pattern. You can also adjust the buttonhole
density, the evenness of darning, and the size of eyelet
with this key. Refer to pages 23, 26 and 32.
Thread cut memory key
To cut the threads automatically after locking stitches,
press the thread cutter memory key
i
(Refer to page
21).
w
q
r
e
t
y
u
i
Summary of Contents for DC6100
Page 1: ...Instruction Book...
Page 2: ......
Page 58: ...56 Stitch Chart...
Page 59: ......
Page 60: ...812 800 032 EN...


