


18
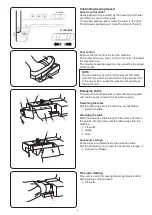
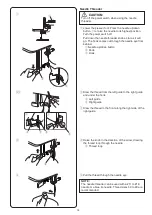
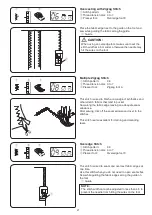
CAUTION:
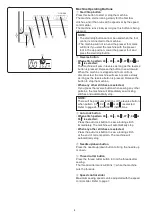
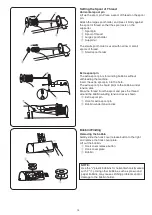
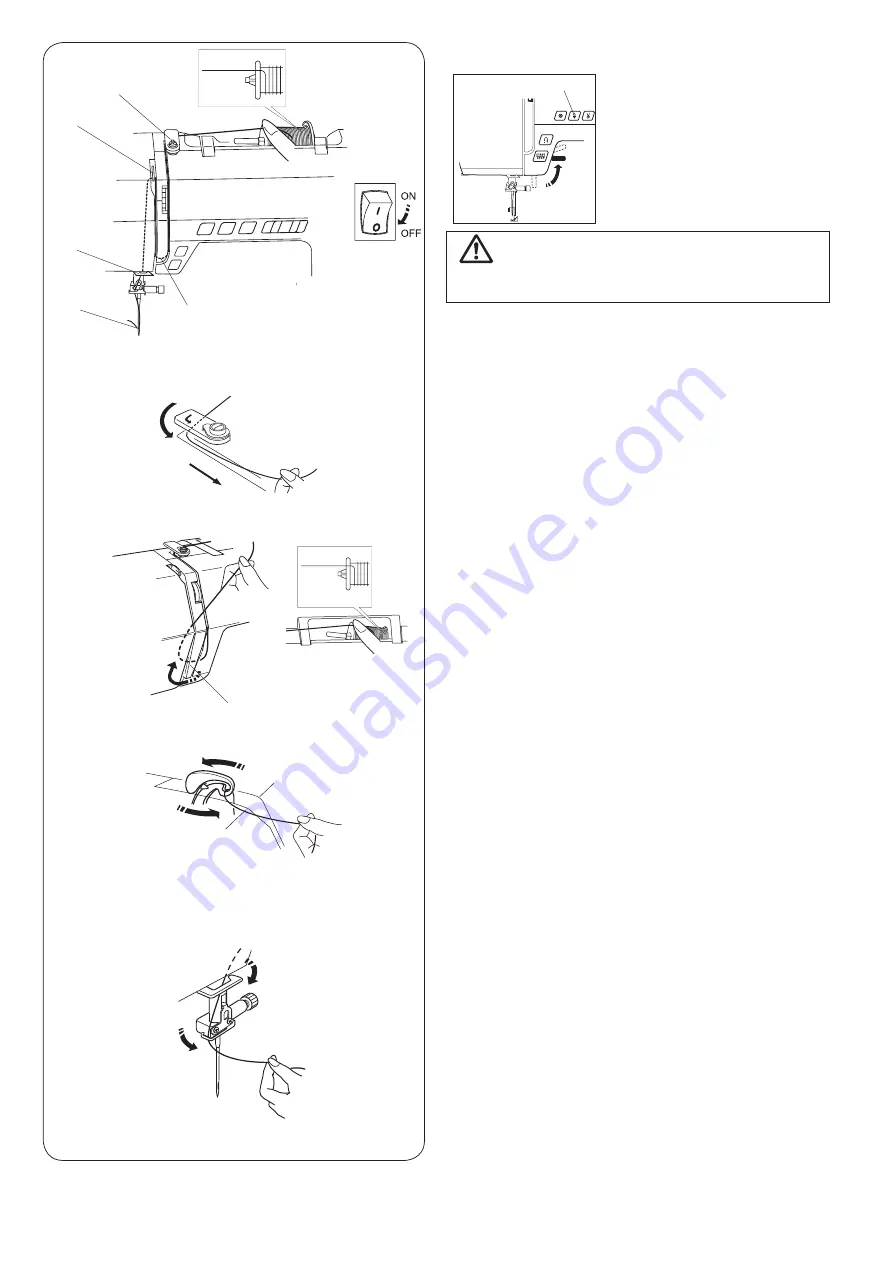
Turn OFF the power switch before threading the
machine.
z
x
c
v b
w
z
c
v
b
x
z
Turn the power switch off.
Draw the end of the thread around the upper thread
guide.
Threading the Machine
x
While holding the thread near the spool
w
, draw
the end of the thread down around the check spring
holder
e
.
w
Spool
e
Check spring holder
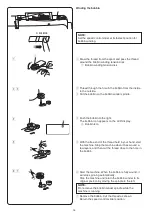
c
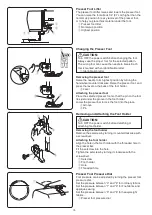
Firmly draw the thread up from right to left over the
take-up lever, and down into the take-up lever eye.
v
Pass the thread through the lower thread guide. Slide
the thread behind the needle bar thread guide on the
left.
b
Use the needle threader to thread the needle (see
page 19).
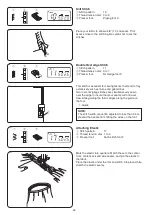
w
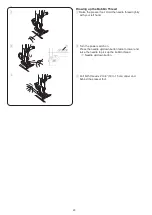
Raise the presser foot. Press the
needle up/down button
q
to raise
the thread take-up lever to its
highest position.
q
Needle up/down button
q
e
Summary of Contents for DC6100
Page 1: ...Instruction Book...
Page 2: ......
Page 58: ...56 Stitch Chart...
Page 59: ......
Page 60: ...812 800 032 EN...


