JANOME Embroidery Software Instruction Book
Chapter 10 Embroidery Stamps and Motifs
78
Creating Motif Fill objects
Digitize Parallel Fill objects with the Parallel Motif
Fill tool to create decorative fill stitching using
current settings. Alternatively apply it to existing
Parallel Fill objects. You can select patterns, adjust
settings, or change layouts at any time before or
after digitizing.
Note The
stitch angle
has no effect on motif
layout.
To create a Motif Fill object
1
Choose a
Parallel Motif Fill
tool and digitize an object.
As soon as the entry and exit points are entered the
Motif Fill stitches are generated using current settings.
See also
Digitizing complex shapes with fixed stitch
angles
.
2
Double-click the Motif Fill object.
The
Object Details > Fill Stitch > Motif Fill
dialog
opens.
3
Click
Select
to change pattern sets as required. See
Adjusting motif fill settings
for details.
4
Select a pattern from the dropdown list and click
OK
.
The selected Motif Fill object is updated.
Try this!
Select a motif with
no
object selected and
click
OK
to make the selection current.
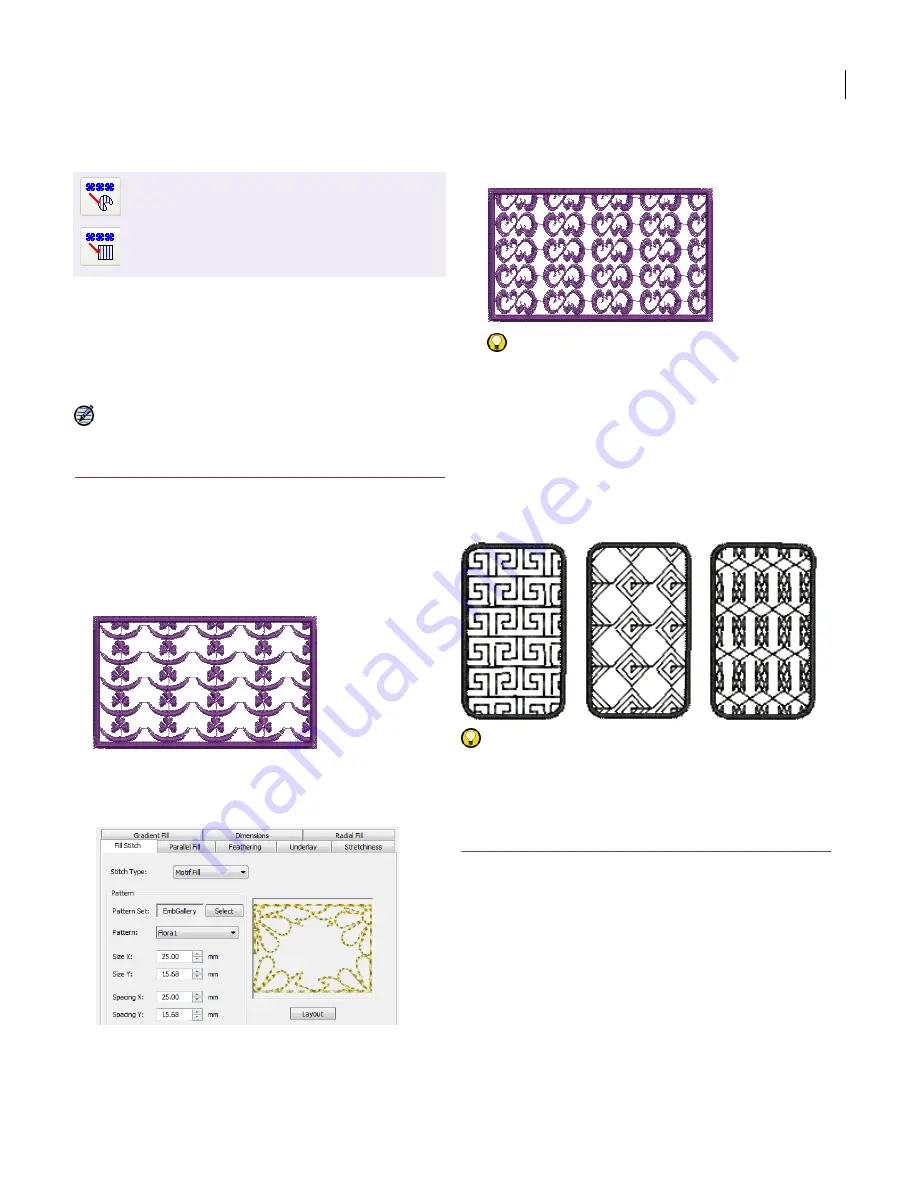
Adjusting motif fill settings
You can insert a motif fill at its original size and
spacing, and then adjust settings later. You can
also set the exact size and spacing as you insert
the pattern fill. Spacing
is the distance between
each pattern repetition.
Try this! Blackwork gets its name from the black
silk thread traditionally used in this form of
embroidery. Use the special Blackwork Fill
pattern set to create interesting scrolling or
geometric patterns.
To adjust motif fill settings
1
Double-click a Motif Fill object.
The
Object Details > Fill Stitch
dialog opens with the
current pattern in the preview panel.
Use Digitize > Parallel Motif Fill to create motif
fills using current settings.
Use Digitize > Parallel Motif Fill: Rectangle to
create rectangular shapes filled with motif fills
using current settings.
Summary of Contents for DigitizerPro
Page 236: ...234 Part IX Software Feature Table ...


