JANOME Embroidery Software Instruction Book
Chapter 10 Embroidery Stamps and Motifs
79
2
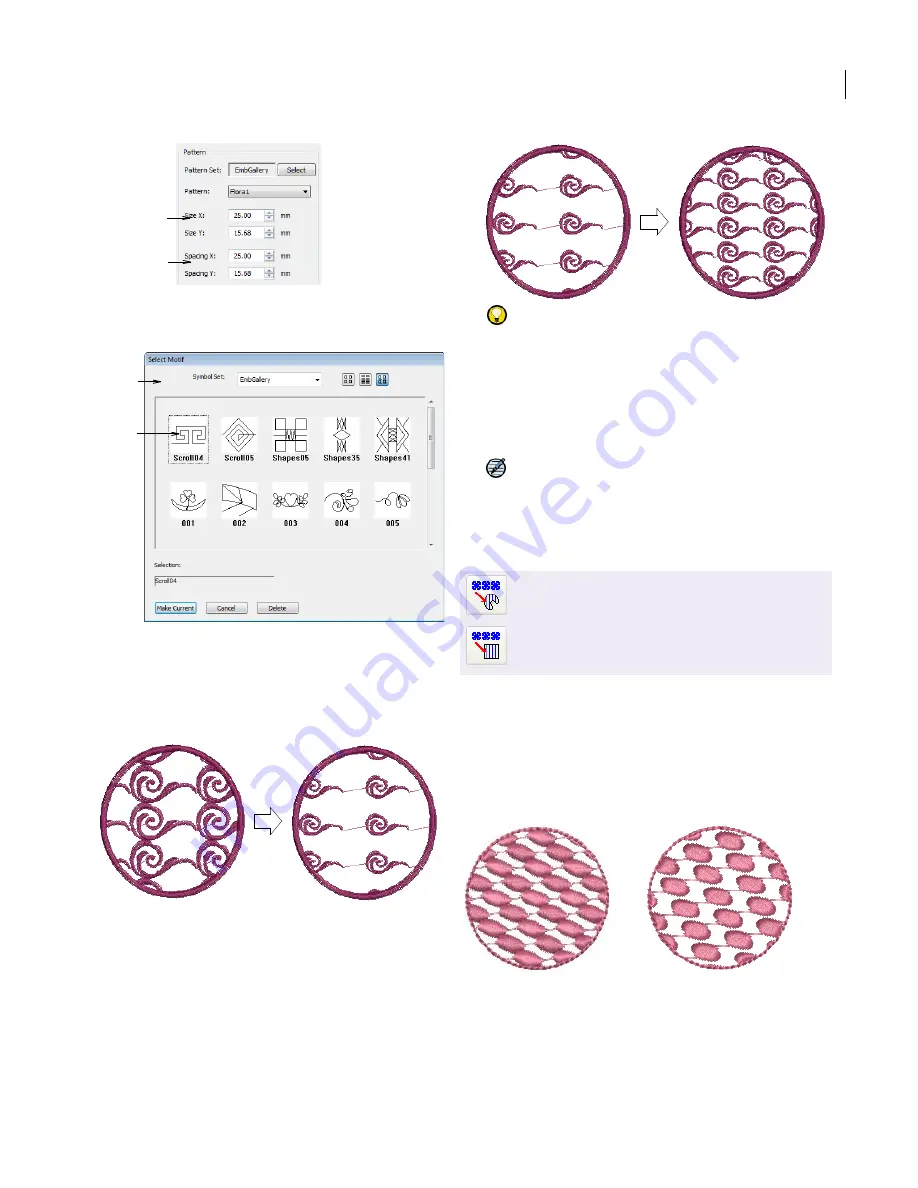
Click
Select
to change pattern sets as required.
The
Select Motif
dialog opens.
3
Select a motif set from the
Symbol Set
dropdown as
required – e.g. Black Work.
4
Select a pattern from the library and click
Make Current
.
5
Adjust
Size X
and/or
Size Y
settings as required to set
motif width and height.
6
Adjust
Spacing X
and/or
Spacing Y
as required to set
spacings between motifs.
Try this!
The Preview panel responds to any
adjustments to Size X, Size Y, Spacing X and
Spacing Y fields, providing you with a preview of the
new shape.
7
Click
OK
.
The digitized object is filled with the selected motif fill,
current settings applying.
Note
If more than half a motif is outside the boundary,
it will be clipped along the boundary.
Laying out motif fills on-screen
Lay out motif fills on-screen by using ‘guide motifs’
to scale, space, transform and offset the entire
motif fill. There are three blue guide motifs. Other
sample motifs appear in yellow. Each guide motif
lets you change different elements of the layout.
When you change a guide motif, all motifs in the fill
change accordingly.
Adjust motif
size
Adjust motif
spacing
Change
motif sets
Select
pattern
Use Digitize > Parallel Motif Fill to create motif
fills using current settings.
Use Digitize > Parallel Motif Fill: Rectangle to
create rectangular shapes filled with motif fills
using current settings.
Summary of Contents for DigitizerPro
Page 236: ...234 Part IX Software Feature Table ...

