5
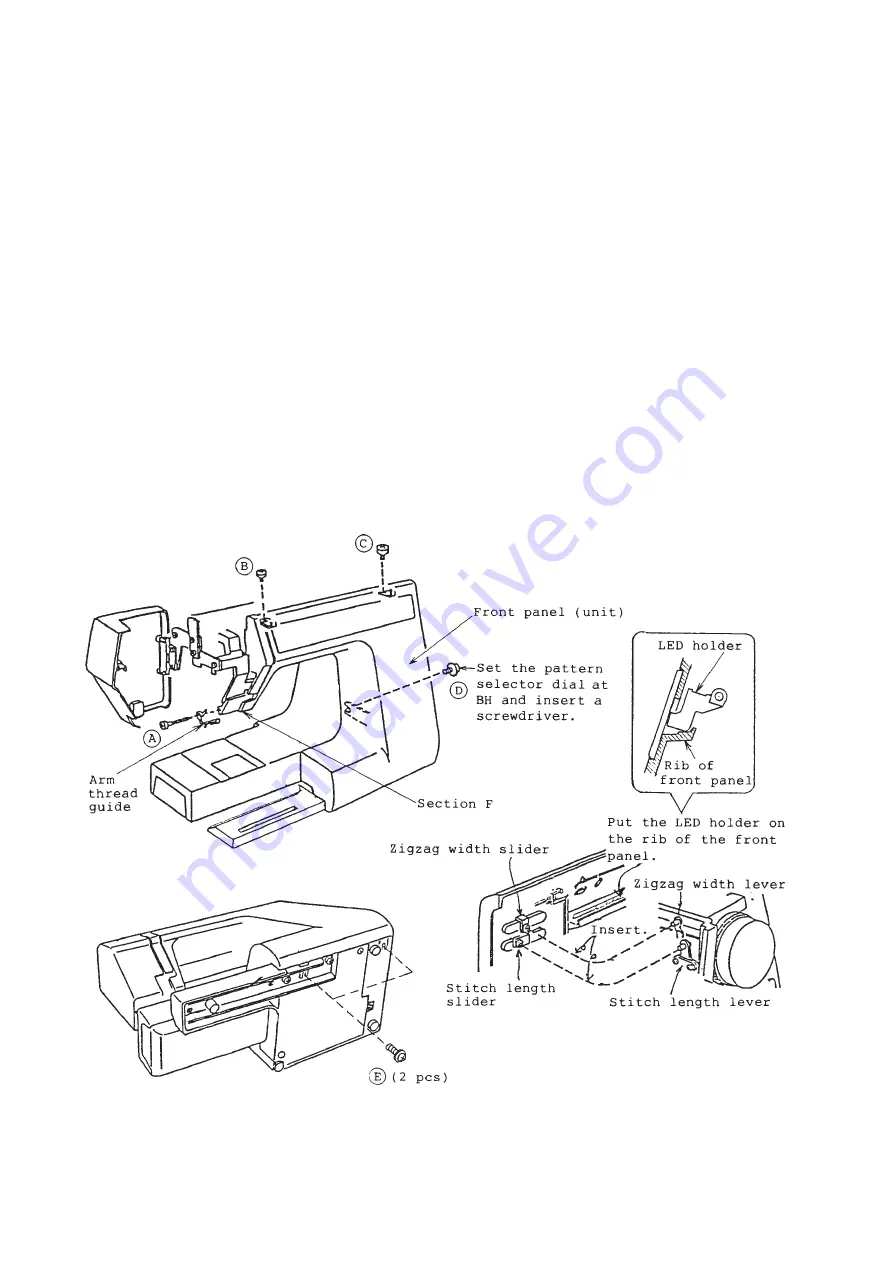
Front panel (unit)
To remove:
(1) Detach the top cover (unit) and belt cover.
(2) Turn the pattern selector dial toward you to select BH.
(3) Remove the set screws (A) and (B) ,and loosen the set screws (C), (D) and (E).
(4) While holding the right side of the front panel and lightly pushing down section F, draw the
front panel (unit) toward you for removal.
To attach:
(5) While holding the right side of the front panel and lightly pushing down section F, fit the front
panel to the lower side of the thread tension dial (unit).
(6) While inserting the pin of the zigzag width lever into the hole in the zigzag width slider and
the pin of the stitch length lever into the hole in the stitch length lever, put the LED holder on
the rib of the front panel to set it to the arm.
(7) Tighten the set screws (A) to (E) to fasten the front panel. (Fasten the arm thread guide
together with the front panel with the setscrew (A).
(8) Attach the top cover (unit) and belt cover.
Summary of Contents for HD3000
Page 1: ...SERVICING MANUAL HD 3000...


