25
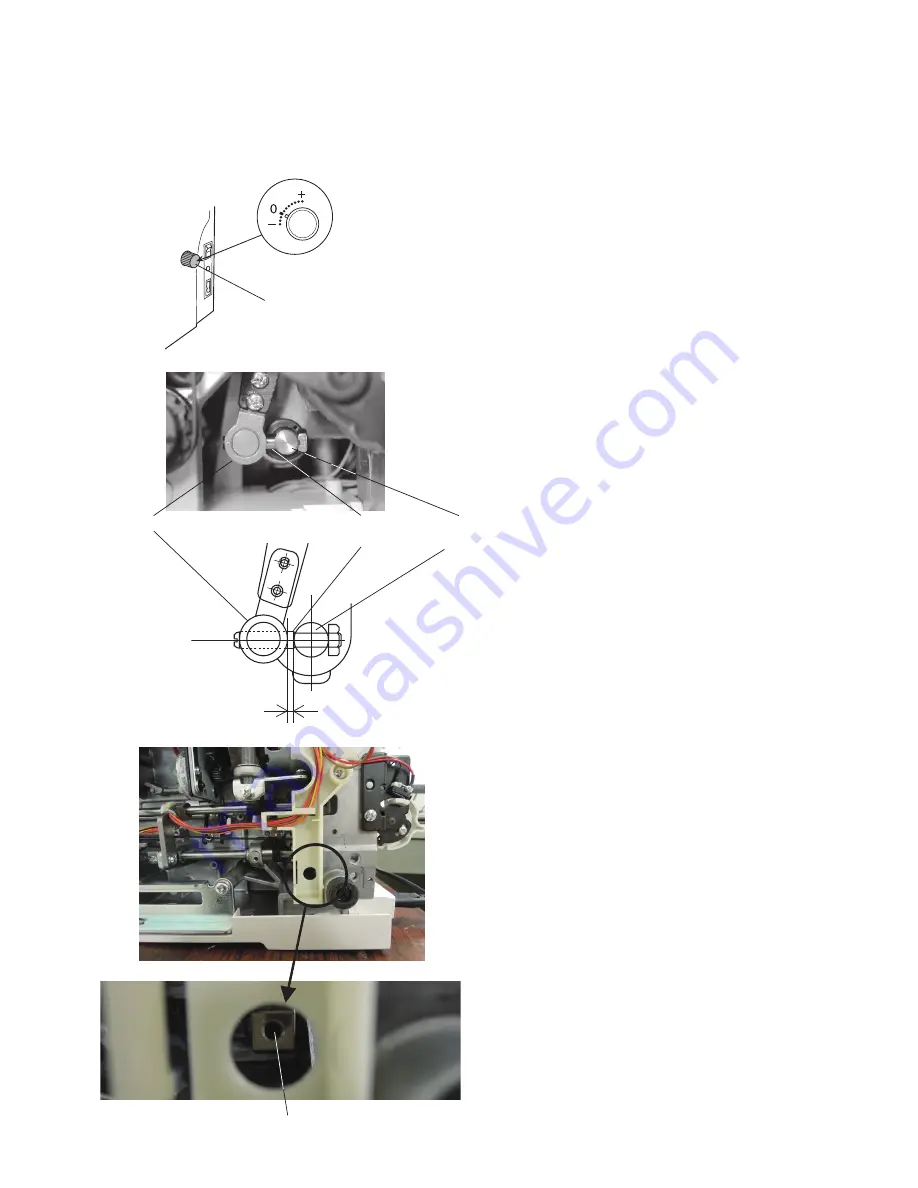
Setscrew A
To check:
1 Remove the belt cover and base cover (see page 1
and 2).
2. Turn the power switch on and select straigh stitch (D1).
Turn the drop feed lever to drop the feed dog.
Press the adjusting key and set the stitch length at "0".
3. Turn the upper feed adjusting dial to set the dial at "0".
4. Press the needle up/down button twice to raise the
needle.
Turn the power switch off.
* In order to initialize the feed dog position, press the
needle up/down button twice and reset the needle
position even though needle position is set at raised
position.
5. Check if the clearance between the upper feed link
shaft
and upper feed lower shaft is 2.5 mm.
If not, follow the procedure on page 27.
View from the base cover side
2.5 mm
Upper feed link shaft
Upper feed
lower shaft
Mechanical adjustment
Upper feed dog (1)
The clearance between the upper feed link shaft and upper feed lower shaft should be 2.5 mm when the upper feed
adjusting dial is set to "0".
Upper feed adjusting dial
View from the belt cover side
Upper feed lower
shaft rear arm
Even with the bed
To adjust:
1 Loosen the setscrew A on the upper feed adjusting arm.
Adjust the clearance between the upper feed link shaft
and upper feed lower shaft to 2.5 mm.
Tighten the setscrew A.


