
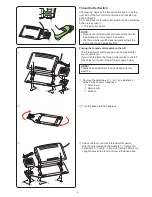

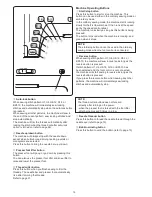

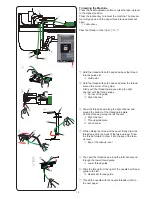

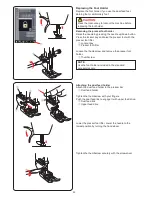
If you wish to use the foot control, pull out the cord from
the foot control and insert the pin connector into the jack
on the machine (see page 6).
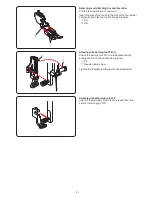
z
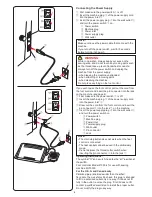
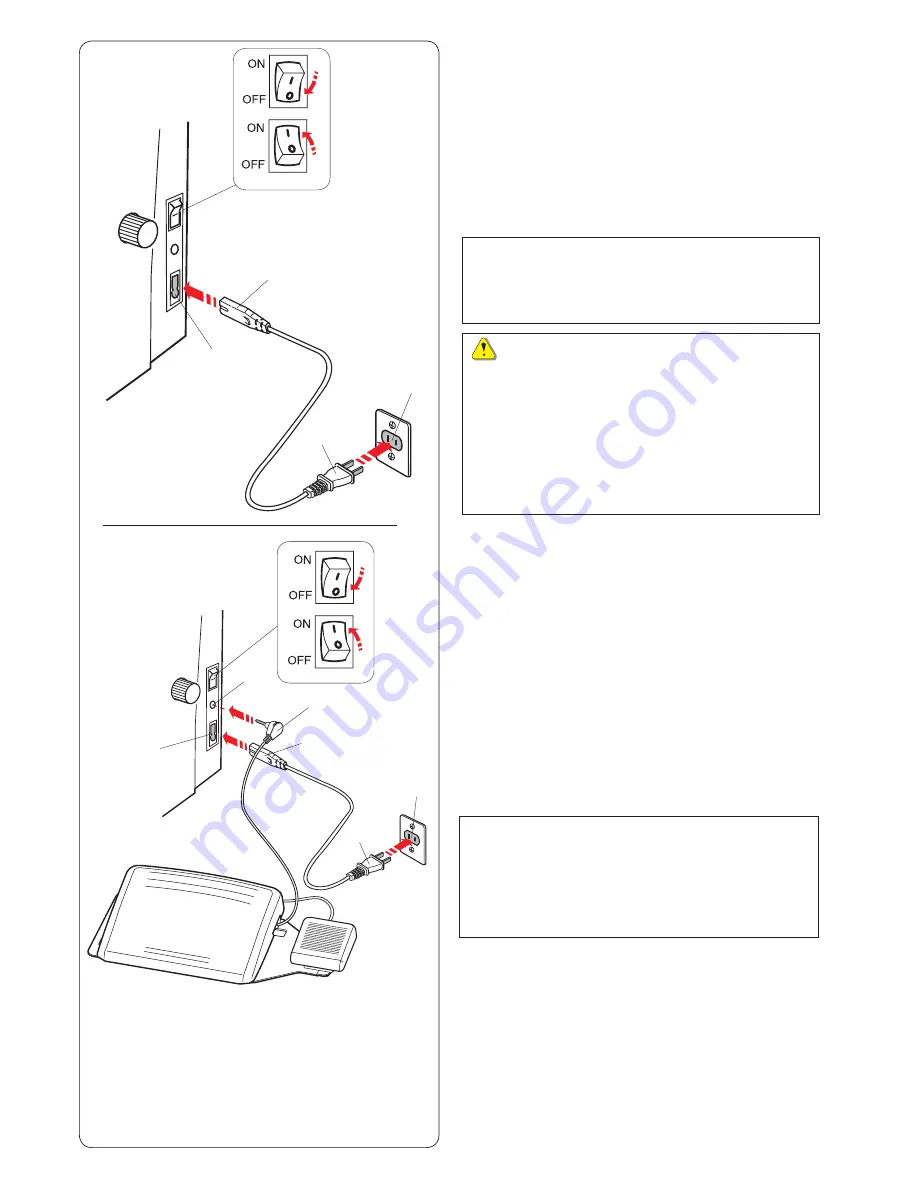
First make sure the power switch
q
is off.
x
Insert the machine plug
w
of the power supply cord
into the
power inlet
e
.
c
Draw out the cord from the foot control and insert the
pin connector
y
into the jack
u
on the machine.
v
Insert the power supply plug
r
into the wall outlet
t
,
and turn the power switch on.
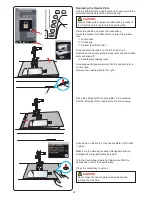
q
Power switch
w
Machine plug
e
Power inlet
r
Power supply plug
t
Wall outlet
y
Pin connector
u
Jack
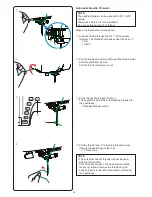
NOTE:
• The start/stop button does not work when the foot
control is connected.
• The foot control cannot be used in the embroidery
mode.
• Do not depress the thread cutter switch when
inserting the pin connector
y
into the jack
u
.
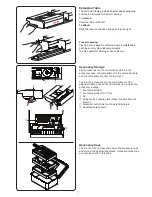
Connecting the Power Supply
z
First make sure the power switch
q
is off.
x
Insert the machine plug
w
of the power supply cord
into the power inlet
e
.
c
Insert the power supply plug
r
into the wall outlet
t
,
and turn the power switch
q
on.
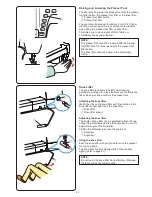
q
Power switch
w
Machine plug
e
Power inlet
r
Power supply plug
t
Wall outlet
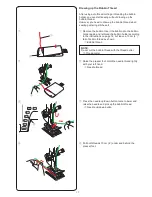
NOTE:
Make sure to use the power cable that came with the
machine.
If you turn off the power switch, wait for 5 seconds
before turning it on again.
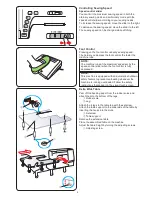
WARNING:
While in operation, always keep your eyes on the
sewing
area, and do not touch any moving parts such
as the thread take-up lever, handwheel or needle.
Always turn off the power switch and unplug the
machine from the power supply:
- when leaving the machine unattended.
- when attaching or removing parts.
- when cleaning the machine.
Do not place anything on the foot control.
q
w
e
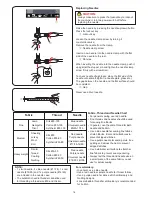
Operating Instructions:
The symbol “O” on a switch indicates the “off” position of
the switch.
Foot controller Model 21390 is for use with sewing
machine MC15000.
For the U.S.A. and Canada only
Polarized plug (one blade wider than the other):
To reduce the risk of electric shock, this plug is intended
to fit in a polarized outlet only one way. If it does not fit
fully in the outlet, reverse the plug. If it still does not fit,
contact a qualified electrician to install the proper outlet.
Do not modify the plug in any way.
y
u
r
t
e
t
r
w
q
8
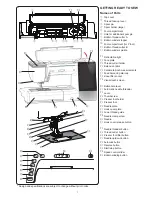
Summary of Contents for Horizon Memory Craft 15000
Page 1: ...Memory Craft 15000 Instruction Manual ...
Page 170: ...165 STITCH CHART Ordinary Sewing Block Script Symbol Broadway Block 9 mm ...
Page 178: ...173 DESIGN CHART Embroidery Gothic Script Cheltenham Bauhaus Galant Typist ...
Page 180: ...175 DESIGN CHART Embroidery Micro Gothic ...
Page 184: ...862 801 005 EN ...


