105
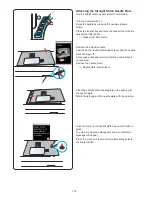
Attaching the Embroidery Hoop to the
Machine
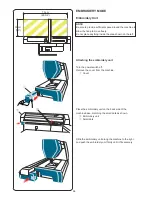
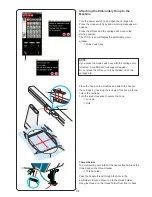
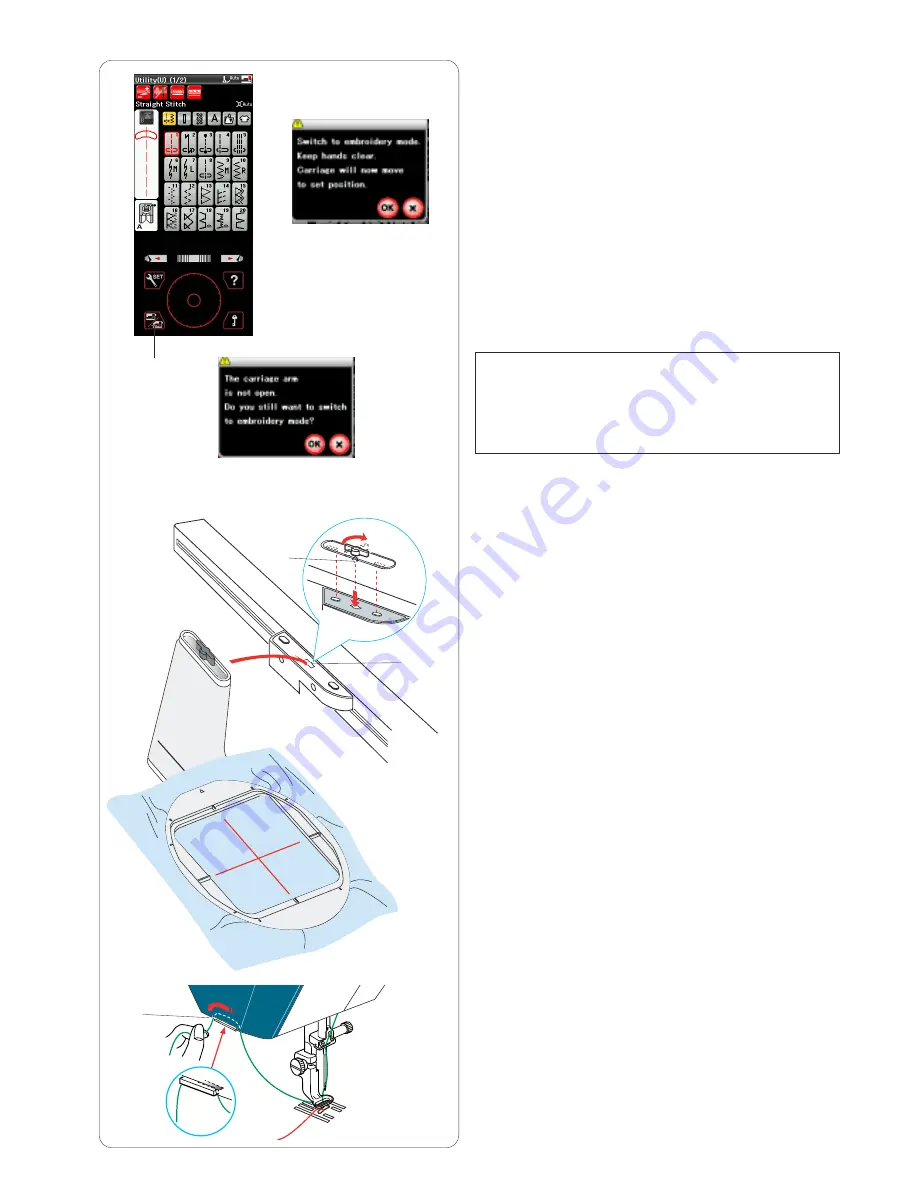
Turn the power switch on and open the carriage arm.
Press the mode switch key and a warning message will
appear.
Press the OK key and the carriage will move to the
starting position.
The LCD screen will display the embroidery mode
window.
q
Mode switch key
NOTE:
If you press the mode switch key with the carriage arm
retracted, a confirmation message will appear.
Do not press the OK key or X key. Instead, open the
carriage arm.
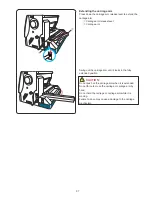
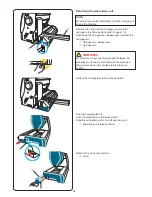
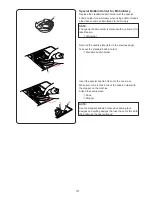
Place the hoop on the machine and attach the hoop to
the carriage by inserting the lock pin of the hoop into the
hole in the carriage.
Turn the knob clockwise to secure the hoop.
w
Lock pin
e
Hole
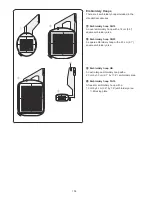
Thread holder
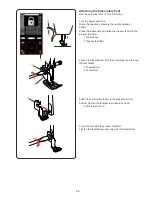
To avoid sewing over a tail of the needle thread, place the
thread end on the thread holder.
r
Thread holder
Pass the needle thread through the hole in the
embroidery foot and draw it up to the thread holder.
Hang the thread on the thread holder from front to back.
q
w
e
r
Summary of Contents for Horizon
Page 1: ......
Page 41: ...38 This page is intentionally left blank...
Page 50: ...47 This page is intentionally left blank...
Page 56: ...53 This page is intentionally left blank...
Page 98: ...95 This page is intentionally left blank...
Page 141: ...138 STITCH CHART Ordinary Sewing Utility U Buttonhole B Applique A Heirloom H Quilt Q...
Page 142: ...139 STITCH CHART Ordinary Sewing Satin S Bridge BR Decorative D Long L Pictograph P Play PL...
Page 143: ...140 STITCH CHART Ordinary Sewing...
Page 144: ...141 DESIGN CHART Embroidery Favorite Designs SQ14 SQ23 GR FA10 Pattern images are not to scale...
Page 149: ...146 Script Cheltenham Bauhaus Galant Gothic Typist DESIGN CHART Embroidery...
Page 151: ...859 800 107 EN...

