Setup
Desktop Robot JR3000
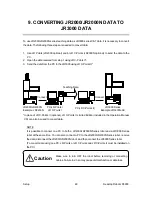
Please carry out the following:
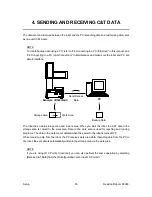
(This is done using a PC with JR-Points or JR C-Points and JR C-Points II installed and connected to
both the JR2000/JR2000N and JR3000 Series robots.)
1. Turn ON the robot and the PC. If the robot is in Run Mode, make sure it is in run standby. For other
modes, have the robot at the base screen.
2. On the PC, boot up JR-Points for the JR2000 Series or JR C-Points for the JR2000N Series. Set
the port to match the COM port connected to the JR2000/JR2000N Series robot.
[Robot]
Æ
[COM Status]
3. Transfer the teaching data from the JR2000/JR2000N Series robot.
[Robot]
Æ
[Receive C&T Data]
4. Name the data and save it. For JR-Points, the file is saved as an “.rps” extension. For JR C-Points,
the file is saved as an “.cps” extension
[File]
Æ
[Save As]
5. Exit JR-Points or JR C-Points and start up JR C-Points II.
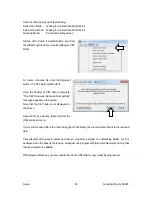
6. In Ethernet Settings, register the JR3000 Series robot to where you want to send data.
[Robot]
Æ
[Ethernet Settings]
7. From the [Open] dialog box, change [File Type] to [JR Points File (*.rps)] for the JR2000 Series, or
change to [JR C-Points File (*.cps)] for the JR2000N Series. Open the data file sent from the
JR2000/JR2000N Series robot.
[File]
Æ
[Open]
8. Transfer the data to the JR3000 Series robot.
Caution: when data is transferred from the PC to the robot, any data stored in the robot is deleted
and overwritten with the newly transferred data.
[Robot]
Æ
[Send C&T Data]
NOTE
•
For the JR-Points operating environment etc., refer to the JR-Points operation manual.
•
For the JR C-Points operating environment etc., refer to the JR C-Points operation manual.
PC
PC
PC
PC
PC
PC
49

