AAASewing.com
12
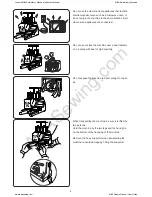
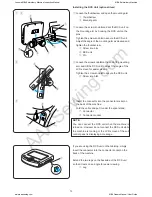
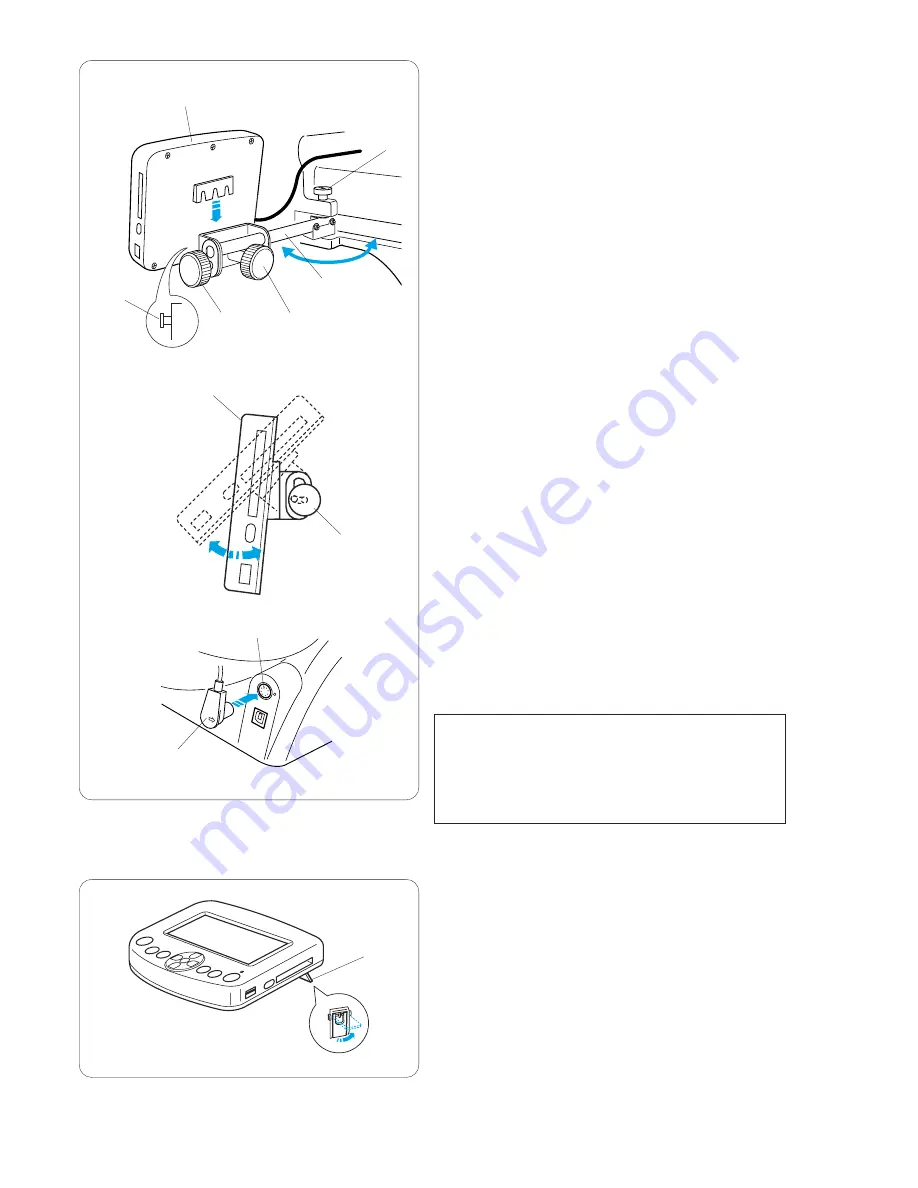
Installing the RCS Unit (optional item)
z
Loosen the thumbscrew and open the mounting arm.
q
Thumbscrew
w
Mounting arm
x
Loosen the screw knob A and set the RCS unit on
the mounting arm by hooking the RCS unit on the
pins.
Tighten the screw knob A to secure the RCS unit.
Adjust the angle of the mounting arm as desired and
tighten the thumbscrew.
e
Screw knob A
r
RCS unit
t
Pin
c
Loosen the screw knob B on the end of the mounting
arm and tilt the RCS unit to adjust the angle of the
LCD screen for easier viewing.
Tighten the screw knob B to secure the RCS unit.
y
Screw knob B
v
Insert the connector into the connector socket on
the back of the machine.
Fold the cable and put it under the spool stand.
u
Connector
i
Connector socket
NOTE:
You can connect the RCS unit when the machine is
turned on. However do not connect the RCS unit while
the machine is running or the LCD screen of the sub
control panel is displaying a message.
If you are using the RCS unit on the tabletop, simply
insert the connector into the connector socket on the
back of the machine.
Extend the two legs on the backside of the RCS unit
so that it rests on an angle for easier viewing.
q
Leg
q
w
e
r
t
y
u
i
r
q
z x
c
v
y
Janome MB4 Embroidery Machine Instruction Manual
MB-4 Embroidery Machine
www.aaasewing.com
MB4 Owners Manual/ User Guide


