AAASewing.com
71
6
Reminder to Start
Reserve Color to Needle
Ignore Short Stitches
OFF
Color Control
ON
OFF
6
Reminder to Start
Reserve Color to Needle
Ignore Short Stitches
OFF
Color Control
1
2
3
4
1
2
3
4
1
2
3
4
1
2
3
4
Ivory White
6
Reminder to Start
Reserve Color to Needle
Ignore Short Stitches
OFF
Color Control
⁄7
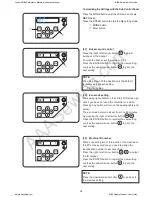
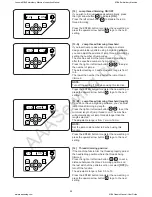
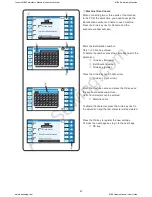
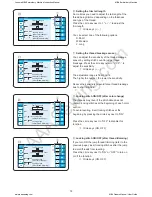
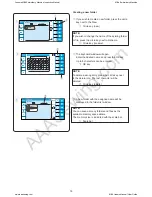
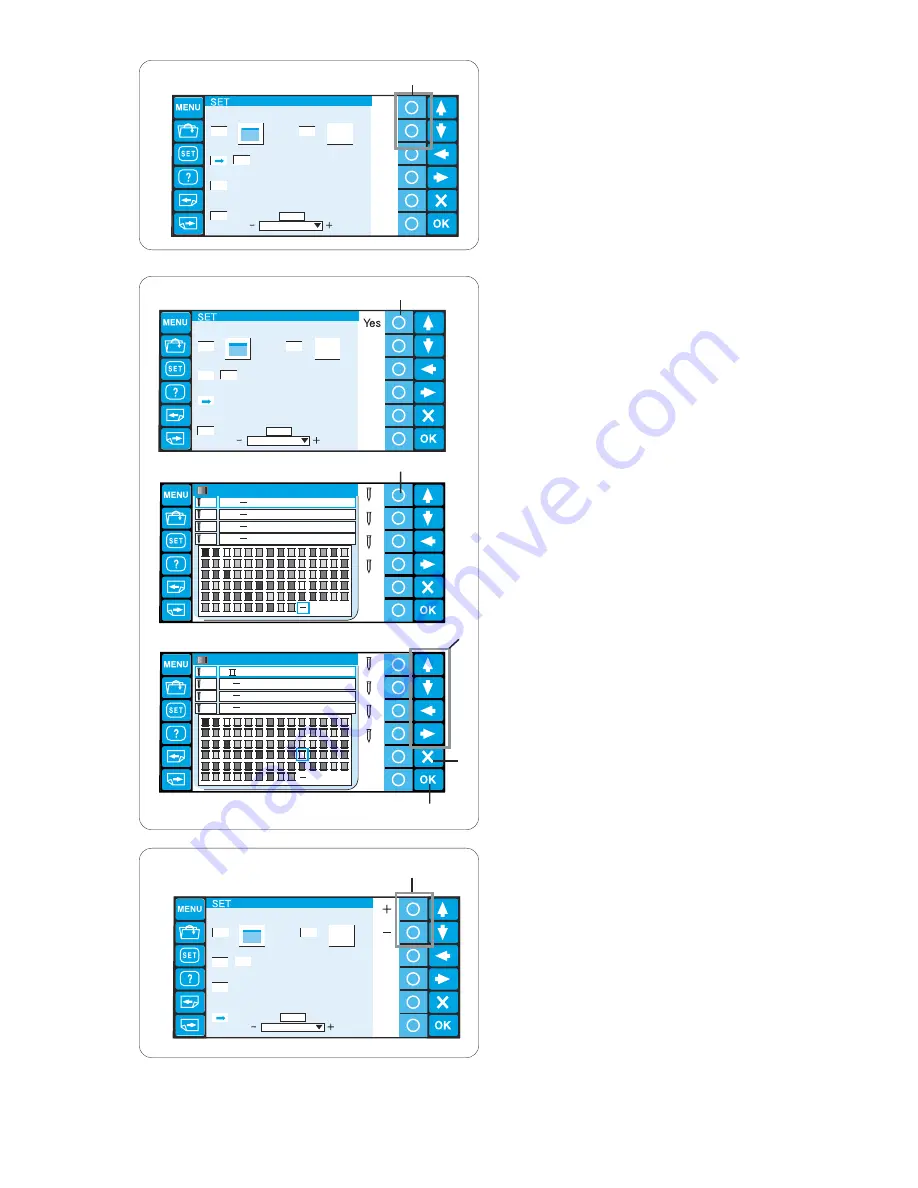
Reminder message ON/OFF
When you press the START/STOP button, a reminder
message will appear on the LCD touch panel.
However, you can turn off the reminder.
Press the circle key next to OFF to turn off the
reminder.
To turn the reminder message on, press the circle key
next to ON.
q
Circle keys (ON, OFF)
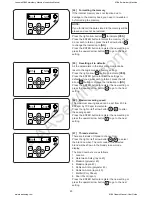
⁄8
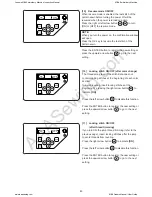
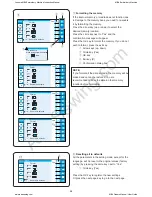
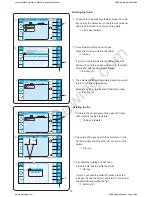
Reserving the color for the needle bar
When you select a multi-color design, the machine
will automatically assign the thread color to each
needle bar. However, when you are sewing the
second pattern that uses the color same as one of
the first pattern used, you can reserve this color for
the needle bar already threaded with this color.
If the first pattern uses Ivory white thread on needle
bar No.1 and the second pattern uses Ivory white on
needle bar No. 3, reserve Ivory white for needle bar
No.1.
So you do not need to unthread needle bar No. 1.
Press the circle key next to “Yes”, the color setting
window will open.
w
Circle key (Yes)
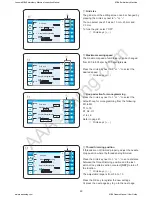
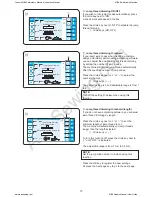
Select needle bar No. 1 by pressing the circle key
next to the needle bar icon No. 1.
e
Circle key (needle bar No.1)
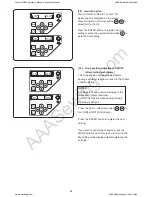
Press the arrow keys to select Ivory white from the
color pallet and press the OK key to confirm your
setting.
r
Arrow keys
t
OK key
To cancel the changes to setting, press the exit key.
y
Exit key (X)
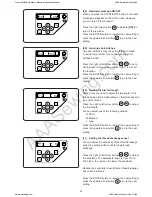
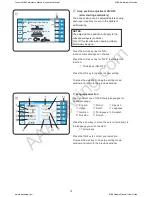
⁄9
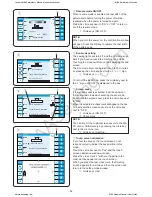
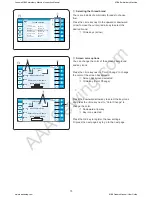
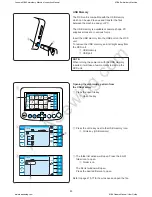
Ignoring short stitches
To avoid thread breakage due to short stitches,
activate the ignoring short stitches function to
eliminate short stitches from stitch data.
Press the circle key next to “+” or “–” to select the
stitch length so the stitches shorter than the selected
length will be eliminated.
The adjustable range is from 0 to 1.0 mm.
u
Circle keys (+, –)
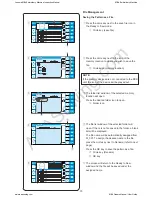
To turn off this function, press the circle key next to
“+” until OFF is indicated.
Press the OK key to register the new settings.
Or press the next page key to go to the next page.
q
⁄7
y
w
e
r
t
⁄8
u
⁄9
Janome MB4 Embroidery Machine Instruction Manual
MB-4 Embroidery Machine
www.aaasewing.com
MB4 Owners Manual/ User Guide

