48
MC 11000
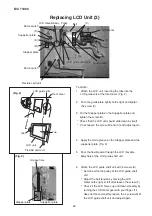
Replacing LCD Unit (2)
To attach:
1 Attach the LCD unit, inserting the tabs into the
LCD guide slits of the front cover. (Fig. 2)
2 Push the guide plate lightly to the right and tighten
the screw (C).
3 Put the Stopper plate on the Supporter plate and
tighten the screw (B).
* Check that the LCD unit should slide down by itself.
* If not, loosen the screw (B) and (C) and adjust again.
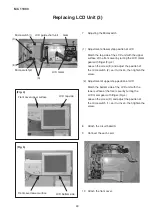
4 Apply the white grease on the Stopper plate and the
supporter plate. (Fig. 3)
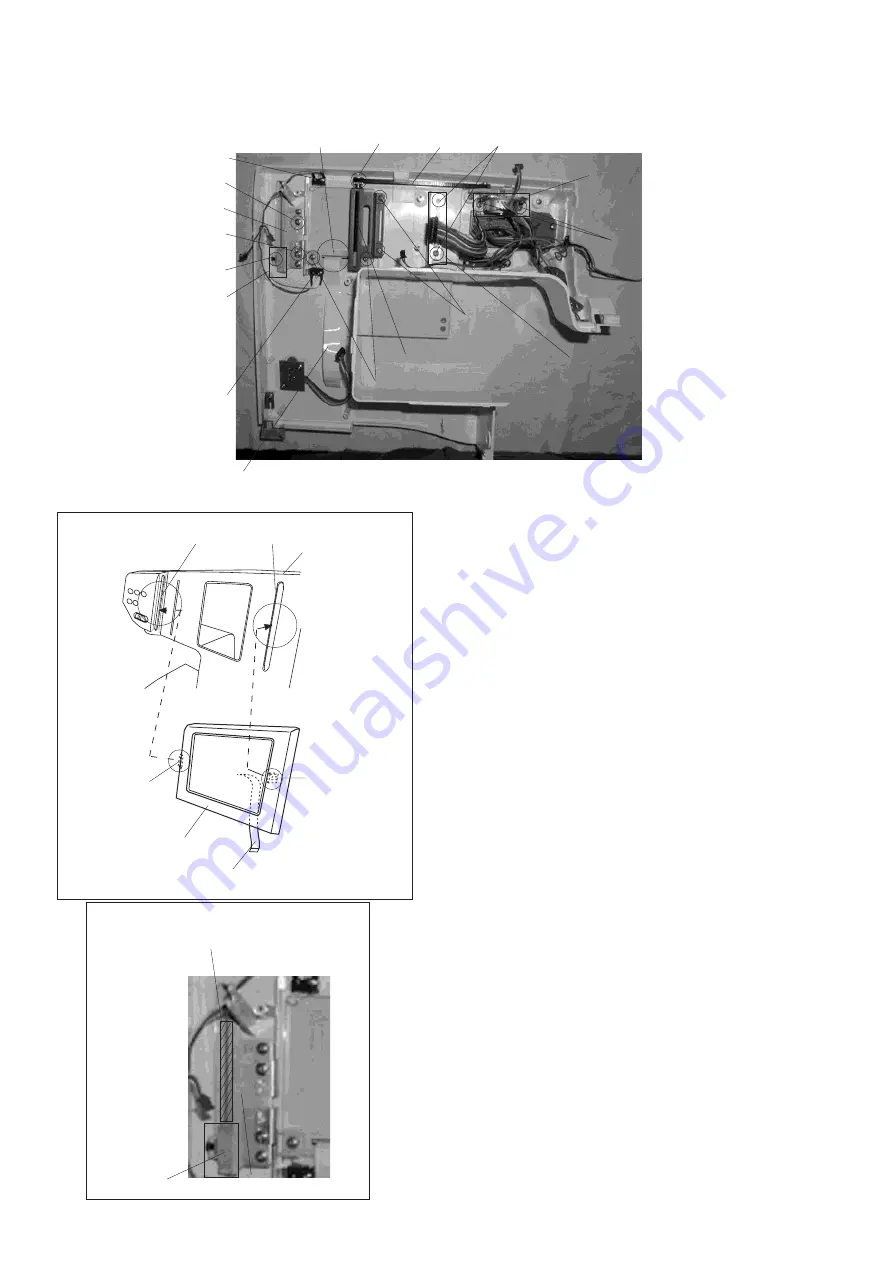
5 Pass the flexible cord through the LCD movable
body hole of the LCD guide shaft unit.
6 Attach the LCD guide shaft unit with 4 screws (A).
* Set the belt to the pulley of the LCD guide shaft
unit.
* Adjust the belt tension by moving the LCD
motor to the right or left after loosen the screw (F).
* Check if the LCD moves up and down smoothly by
turning the LCD motor gear with your finger. If it
does not move smoothly, loosen the 4 screws(A) of
the LCD guide shaft unit and adjust again.
Belt
Pulley
LCD guide shaft unit
Flexible cord unit
Micro switch
(E)
Micro switch
LCD movabl body
(Fig. 2)
Stopper plate
Supporter plate
(B)
LCD unit
Flexible cord unit
LCD guide slits
Front cover
(C)
(D)
(A)
(A)
(F)
LCD motor
Stopper plate
Supporter plate
dêÉ~ëÉ=ÜÉêÉ
(Fig. 3)
Guide plate
Tab
Tab